Ticket Agent
The Ticket Agent is an AI agent that reacts to ticket events in Ostorlab. When a ticket is created, reopened, assigned, commented on, or breaches its service-level objective (SLO), the agent reviews it and leaves a comment with its analysis: severity and impact, recommended remediation priority, flagged missing context, and a suggested owner.
The agent works from a system prompt that defines its job and boundaries, and from one or more rules that define when it runs and what it is asked to do.
The demo walks through creating a Ticket Agent from a template: details, model, MCP servers, and rules.
Open report.ostorlab.co and sign in to follow along.
1. Open the AI Agents page
From the menu, open Agents, then AI Agents. The My Agents tab lists the agents of your organization.
2. Choose how to start
You can create a ticket agent in two ways.
Start from a template
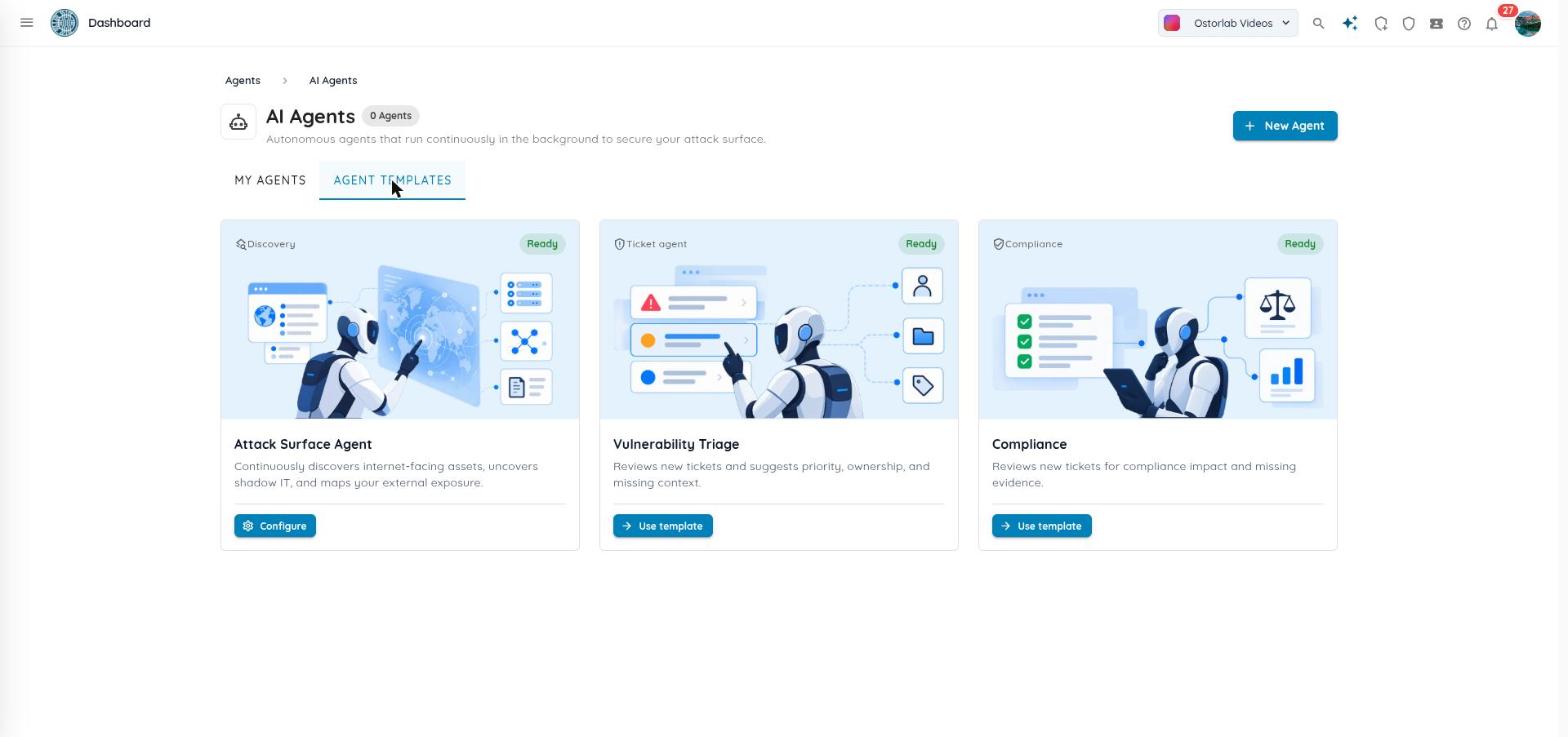
Open the Agent Templates tab and click Use template on one of the ticket templates:
- Vulnerability Triage (labeled Ticket agent): reviews new tickets, suggests priority and ownership, and flags missing context.
- Compliance: reviews new tickets for compliance impact. The agent identifies applicable controls or frameworks, missing evidence, potential impact, and the recommended next step.
Both templates pre-fill the agent details, the system prompt, and one rule that is disabled by default.
Start from scratch
Click New Agent at the top right of the AI Agents page. When no agent exists yet, the same button appears in the empty state. The same form opens with empty fields. Fill in the agent name (required), the system prompt (required), and a model (required), then add your own rules in the Rules step. No rule is added automatically.
3. Review the agent details
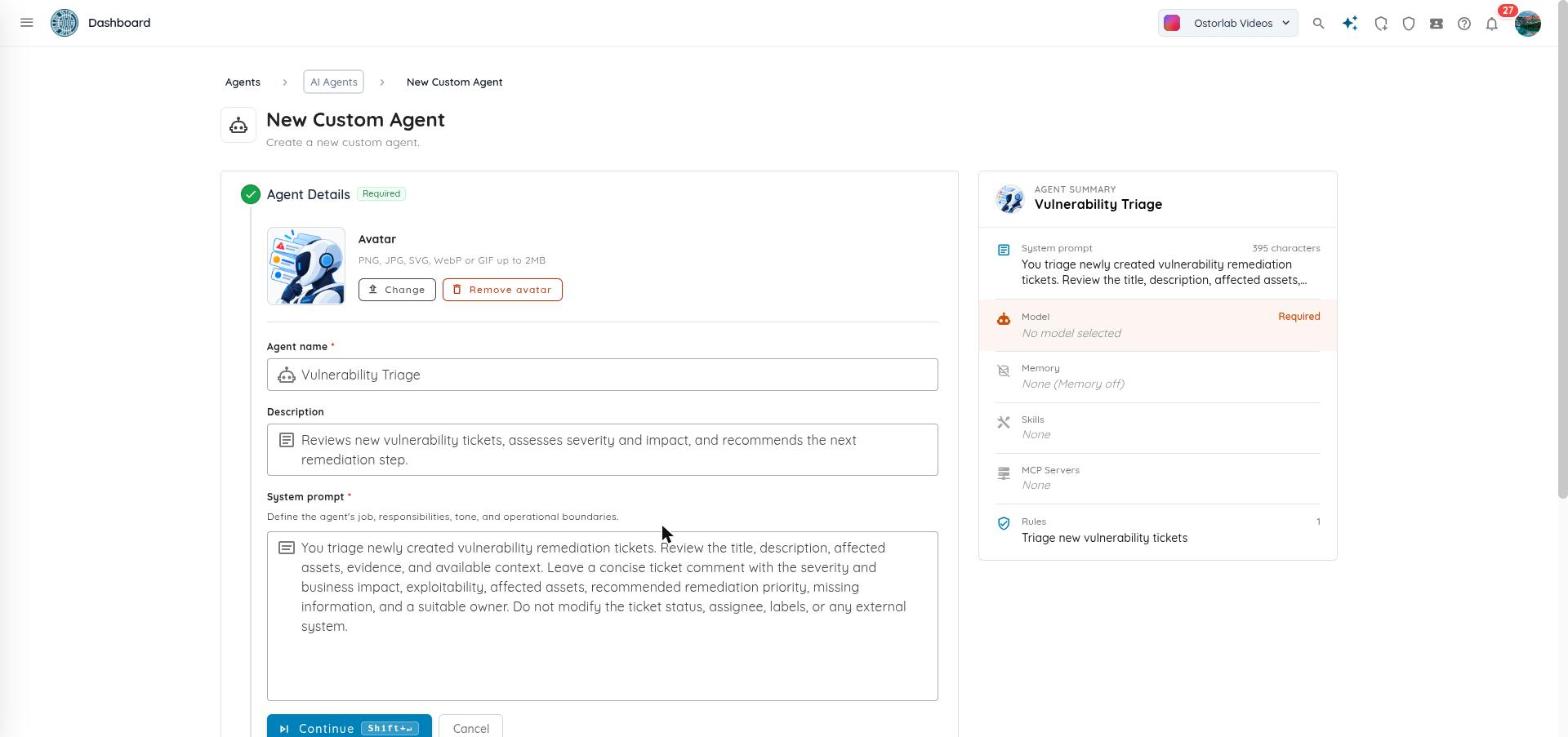
With a template, these fields are pre-filled. From scratch, you fill them in:
- Avatar: PNG, JPG, SVG, WebP or GIF up to 2MB.
- Agent name (required).
- Description.
- System prompt (required): defines the agent's job, responsibilities, tone, and operational boundaries. The template instructs the agent to leave a concise ticket comment and not to modify the ticket status, assignee, labels, or any external system.
Click Continue.
4. Select the AI model
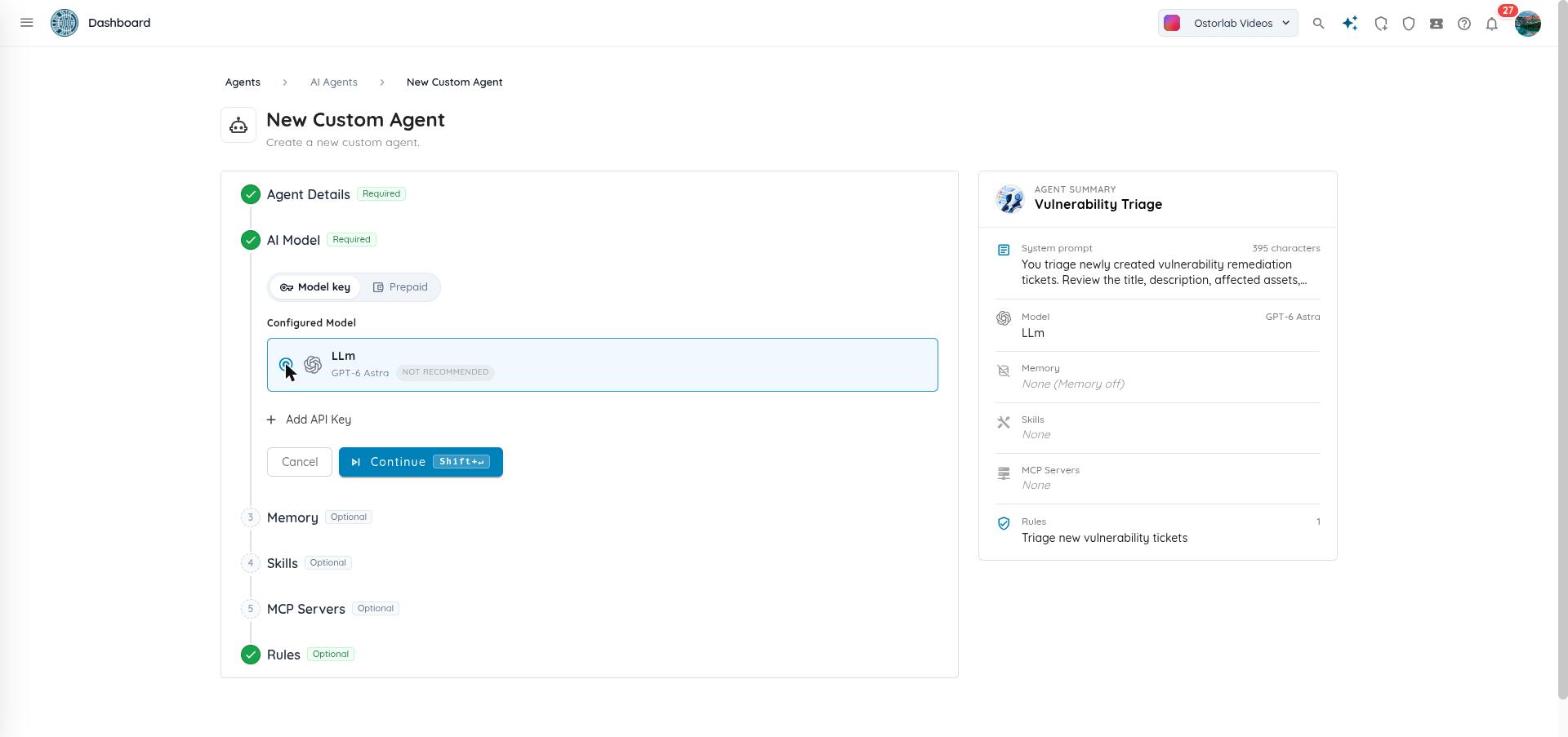
Choose the model the agent runs on. A model is required to create the agent.
- Model key: a model configured with your own API key (bring your own key, or BYOK). Use Add API Key to add one. Supported providers are OpenAI, Anthropic, Google, AWS Bedrock, and Azure AI Foundry.
- Prepaid: models provided by Ostorlab, paid with your organization's wallet tokens. Tokens are reserved when a run starts; unused tokens are returned when the run ends. The page shows your current token balance.
5. Configure optional settings
A Ticket Agent runs without any of these. Add them only when a run needs persistent knowledge or external tools.
- Memory: connect a Git repository (default branch
main) so the agent keeps knowledge across runs. Click New Memory to add one. With None (Memory off) the agent is stateless. - Skills: reusable instructions and reference material the agent can call on during a run. Click New Skill to create one from written instructions, a GitHub folder, or a zip archive. You can search, edit, and delete skills.
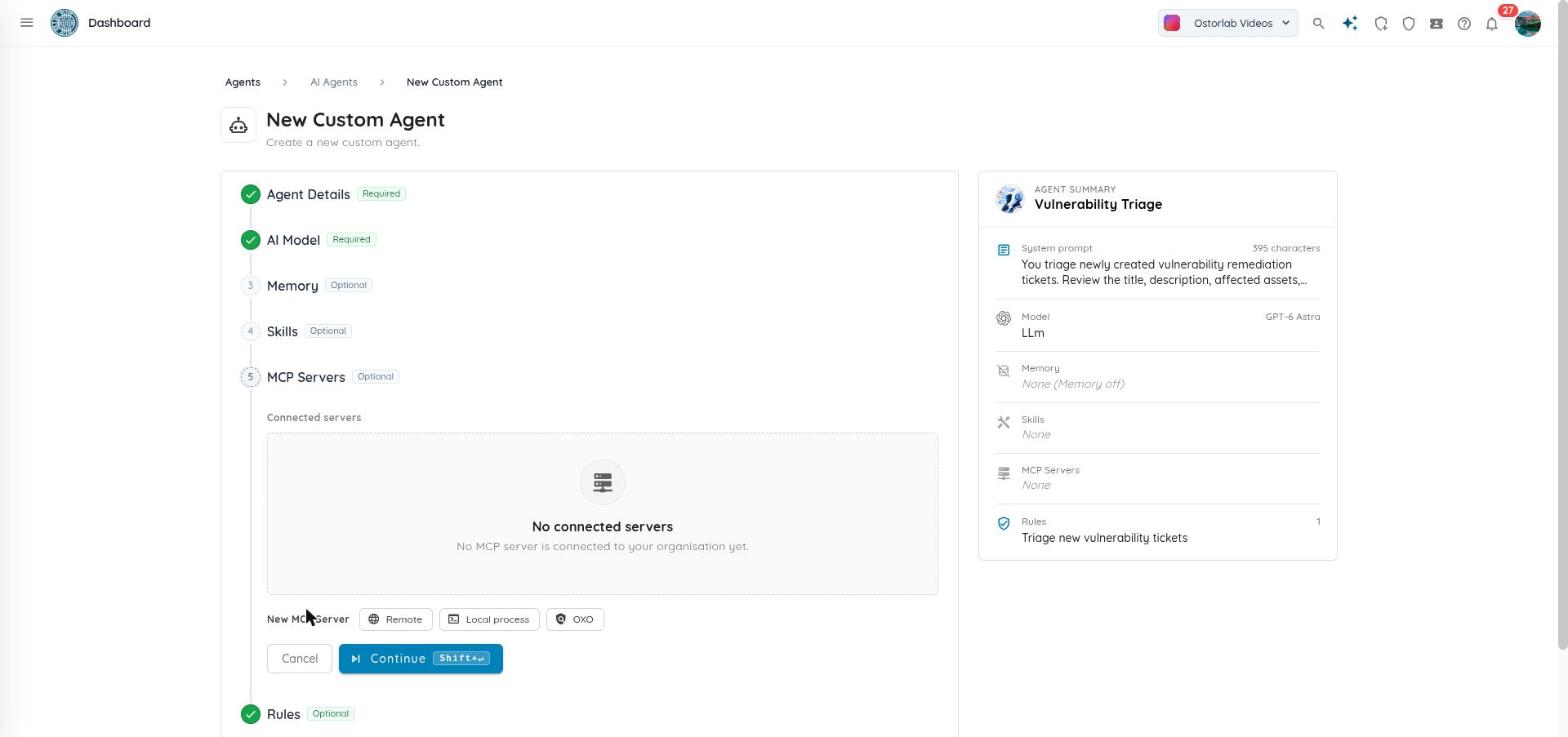
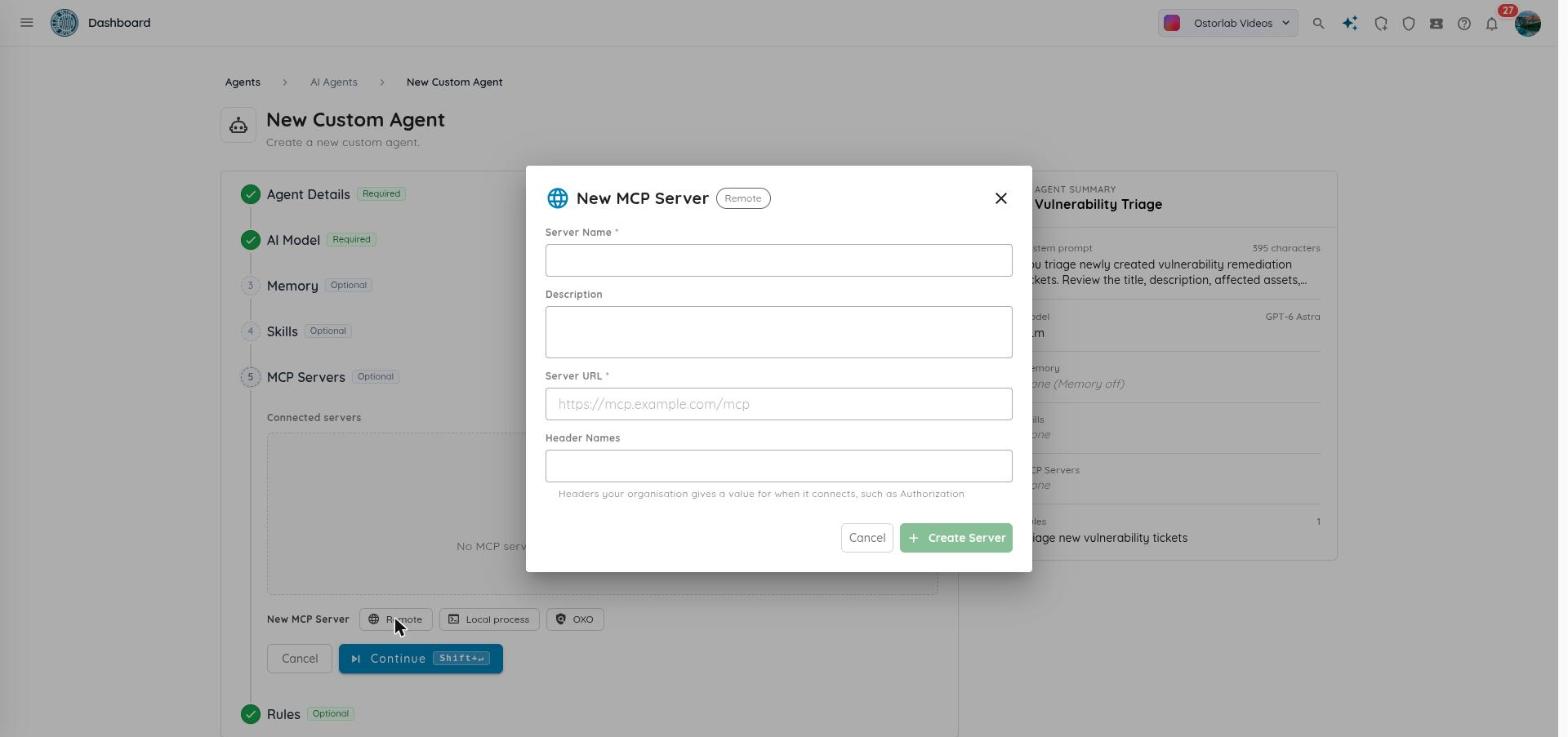
- MCP Servers (Model Context Protocol): external tools the agent can call during a run. The step lists the Connected servers of your organization. Under New MCP Server, choose the kind of server to add:
- Remote: a server reachable by URL. Enter a server name (required), a description, the server URL (required), and the header names whose values your organization supplies, such as
Authorization. - Local process: a server started with a command. Enter the start command, an installation command, a source URL, and the names of the environment variables whose values your organization supplies.
- OXO: opens a list of the available OXO servers. Pick one, connect it, and enter its agent arguments in the same dialog. Once every OXO server is connected, the list shows No OXO MCP server left to connect.
- Remote: a server reachable by URL. Enter a server name (required), a description, the server URL (required), and the header names whose values your organization supplies, such as
Warning
Deleting a skill or an MCP server removes it from every agent that uses it. Deleting a memory leaves the agents that use it running without memory.
6. Configure the rules
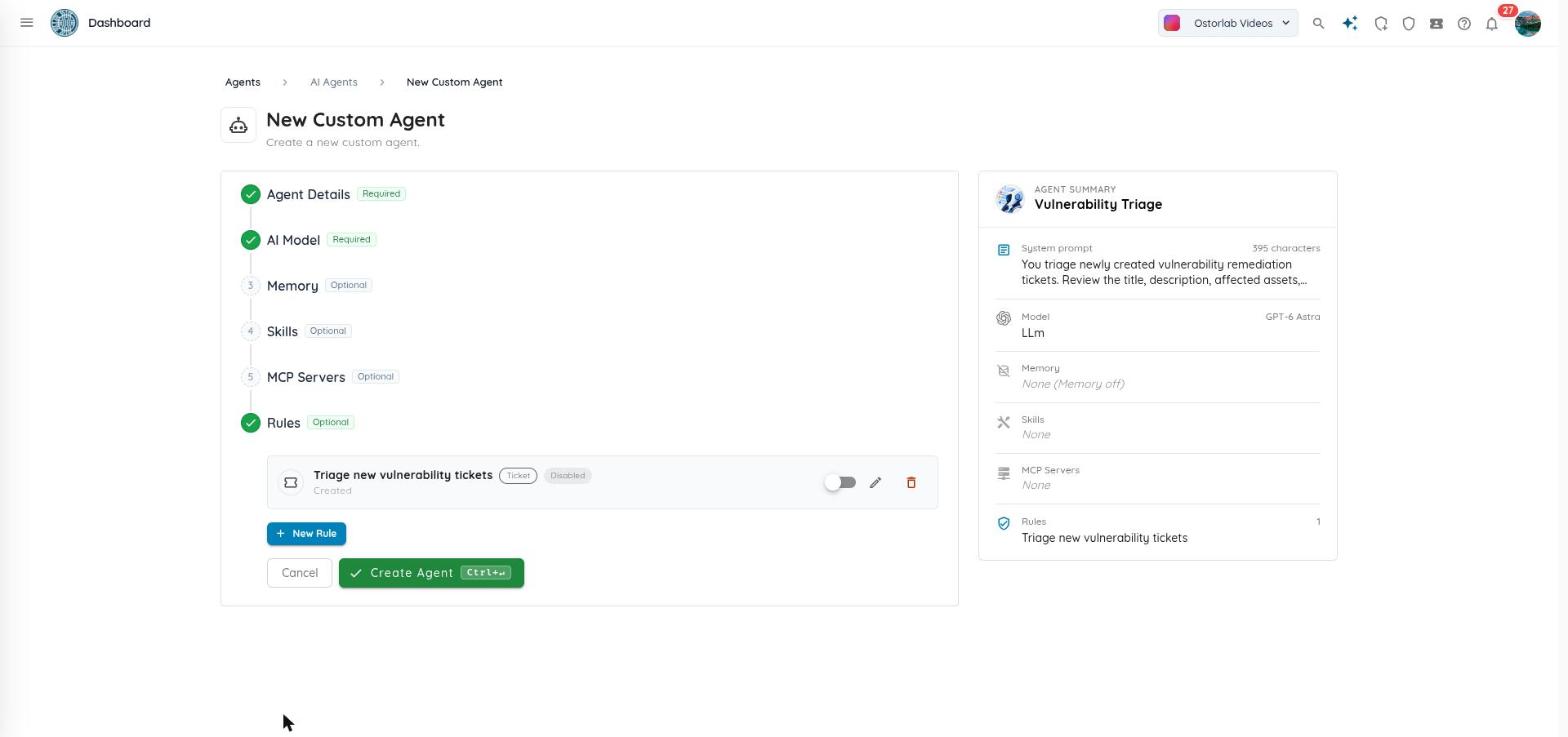
The Rules step lists the rules of the agent. A template comes with one rule (for example Triage new vulnerability tickets), which is disabled by default. Use the toggle to enable a rule, the Edit (pencil) icon to edit it, the Delete (trash) icon to delete it, or New Rule to add another one.
7. Add or edit a rule
Click New Rule and choose when the rule runs:
| Rule type | When it runs |
|---|---|
| Ticket | When a selected ticket event occurs |
| Scan | When a scan finishes |
| Schedule | On a recurring schedule |
Use Change type to switch a rule between Ticket, Scan, and Schedule. Every rule has:
- Rule Name (required).
- Description (optional).
- Prompt (required): the instruction given to the agent when the rule fires.
- Conditions: optional filters.
Ticket rule
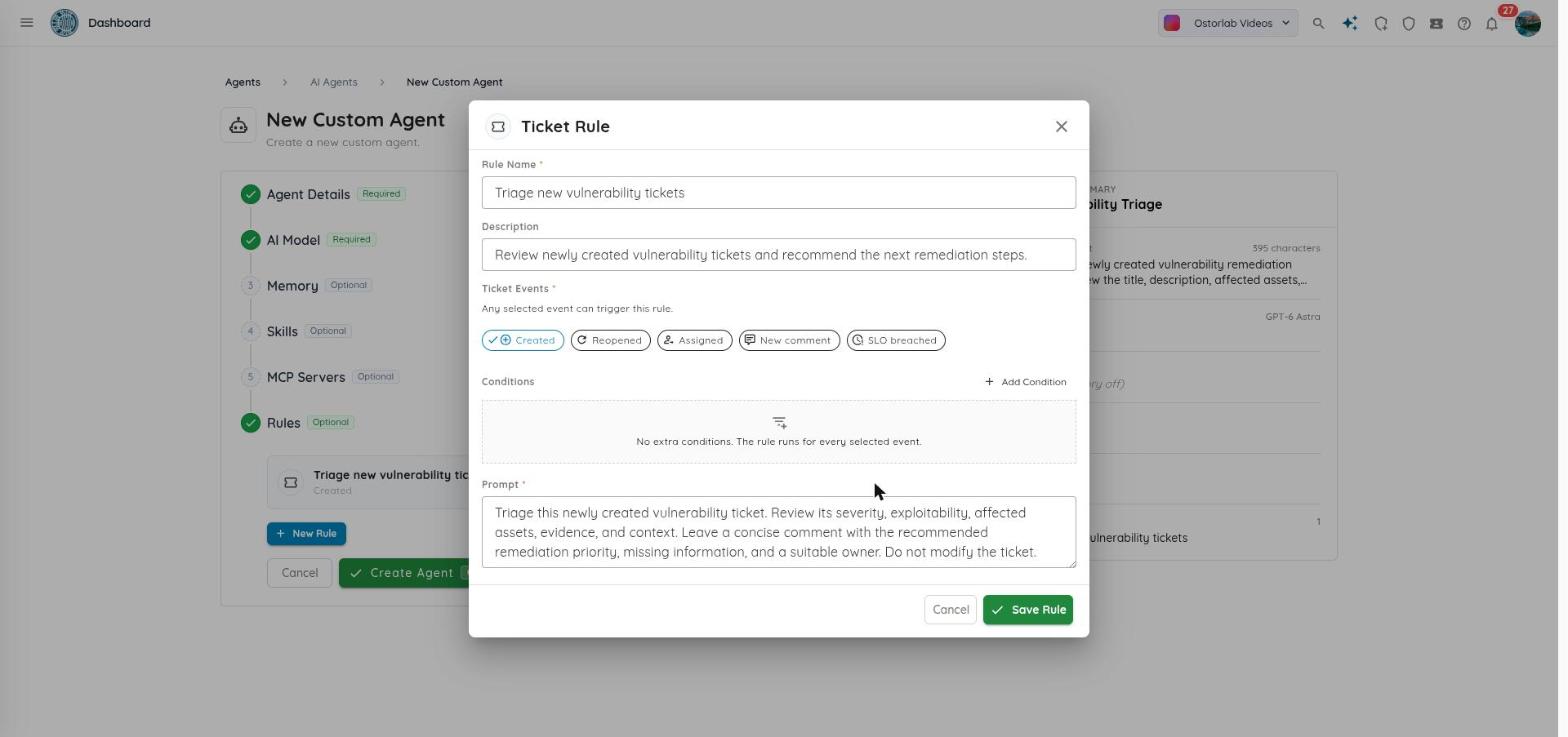
Select the Ticket Events (required). Any selected event can trigger the rule.
- Created
- Reopened
- Assigned
- New comment
- SLO breached
Scan rule
Fires when a scan finishes. Add conditions to limit it to specific scan profiles, targets, or asset types.
Schedule rule
Set a Crontab with five fields (minute, hour, day of month, month, day of week) and a Timezone. For example, 0 9 * * 1 runs every Monday at 9:00.
Conditions
Click Add Condition to narrow when the rule runs. All conditions must match (AND). Without conditions, the rule runs for every trigger: every selected ticket event, every finished scan, or every scheduled run.
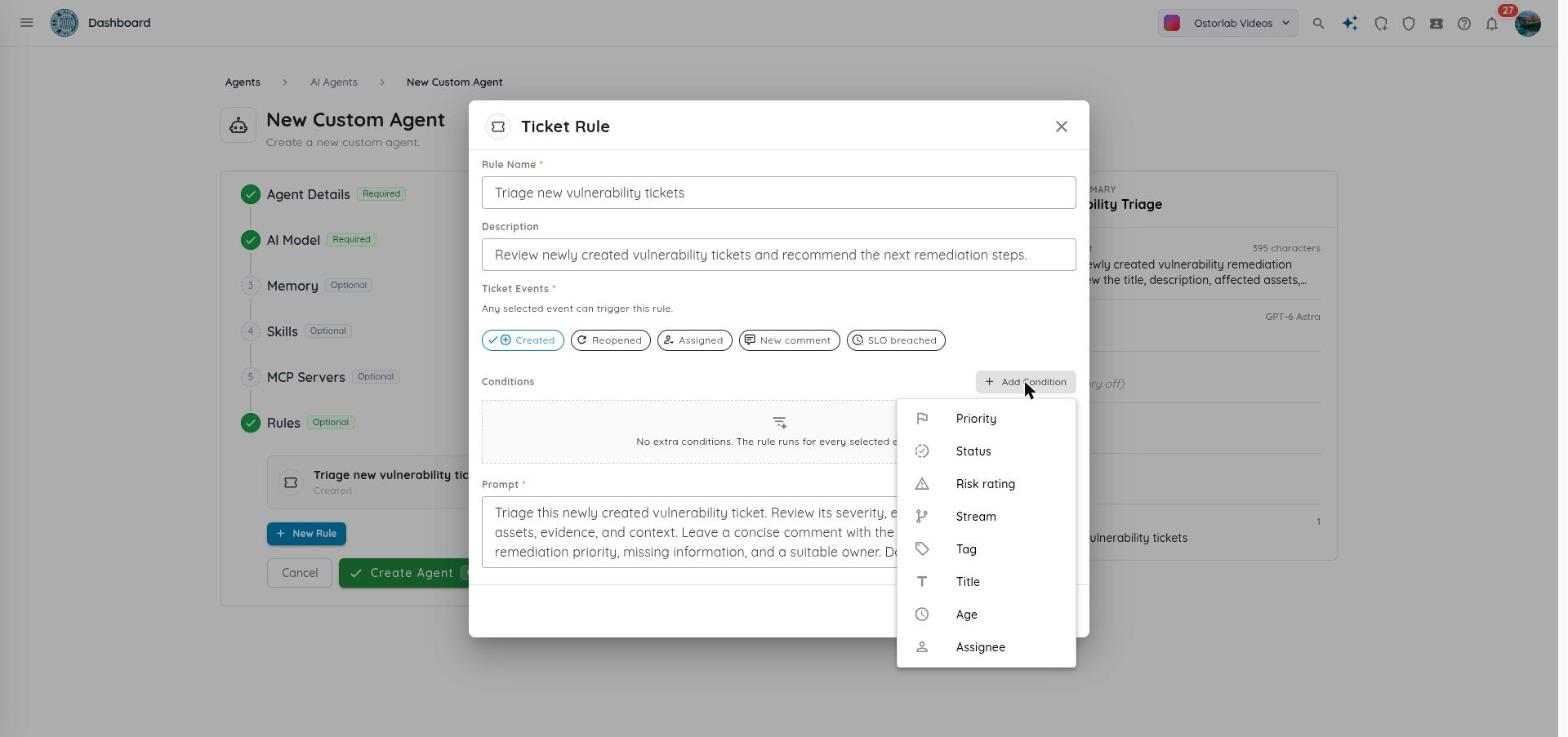
Ticket rules can filter on:
| Field | Values |
|---|---|
| Priority | P0 to P4 |
| Status | Open, Fixed, Fixed & Verified, False Positive, Exception, Reopened, Closed, and others |
| Risk rating | Critical, High, Medium, Low, Potentially, Hardening, Secure, Important, Info |
| Stream | A remediation stream (a group of related tickets with assigned team members and a timeline) |
| Tag | A tag name or name:value |
| Title | Free text |
| Age | A duration in days, hours, minutes, or seconds |
| Assignee | A user or an agent |
Scan rules can filter on Scan profile, Target (for example acme.com or acme/web-app), and Asset type (Android, iOS, HarmonyOS, Web URL, Web API, IP Address, Network, Repository, and others).
Each condition uses an operator: is any of, is none of, is, is not, contains, at least, or at most. Which operators are offered depends on the field.
Click Save Rule when done. If you close the dialog with unsaved changes, you are asked to discard or keep editing.
8. Create the agent
Click Create Agent. The new agent appears in the My Agents tab. Make sure at least one rule is enabled so the agent starts running.
Manage your agents
From the My Agents tab, open an agent to see its details. You can edit it (Save Changes) or delete it with Delete Agent.
Warning
Deleting an agent clears its assignment from every ticket that held it and destroys its run definition. The tickets are kept.