Ostorlab Integration with Bitbucket
Overview
In this guide, we will explore how to easily integrate security and privacy testing into your mobile application pipeline builds using the Bitbucket Pipeline.
Video Demonstration
Watch this brief video for a visual walkthrough of the integration process.
Generate an API Key:
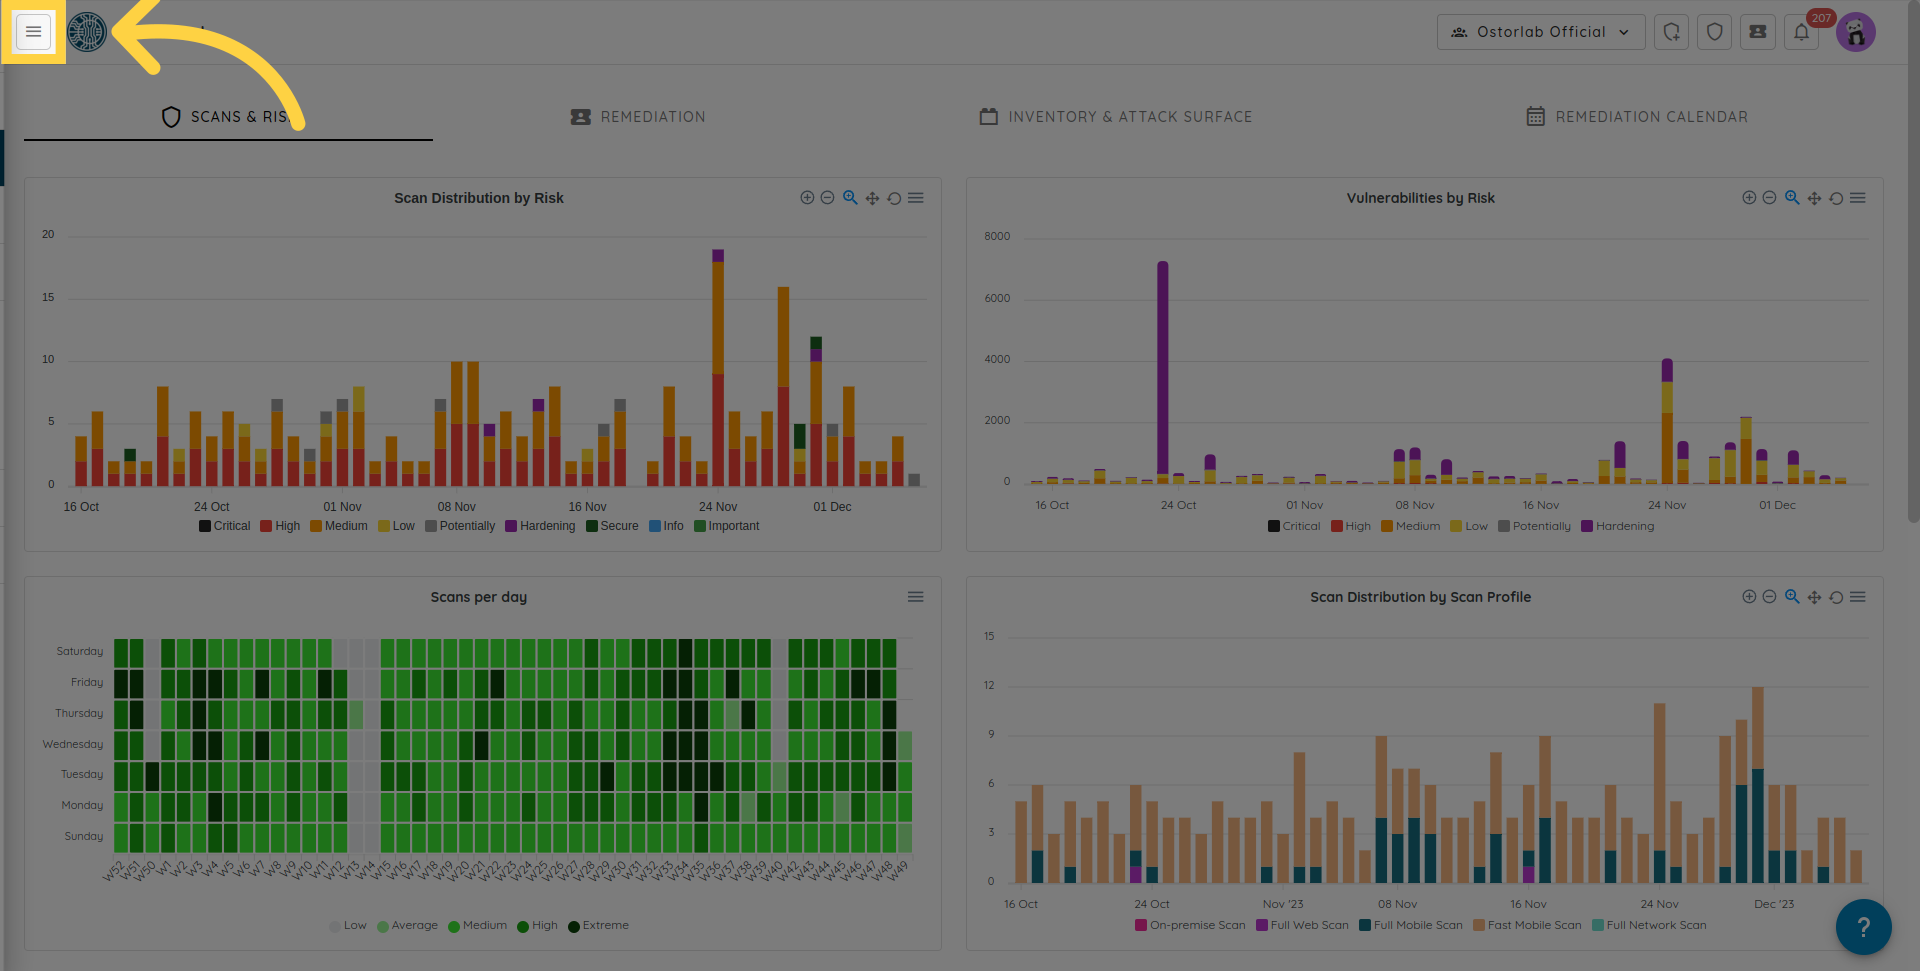
The first step is to generate a new API key. In your organisation dashboard, click the menu button.
Next click "Integrations/API" to expand.
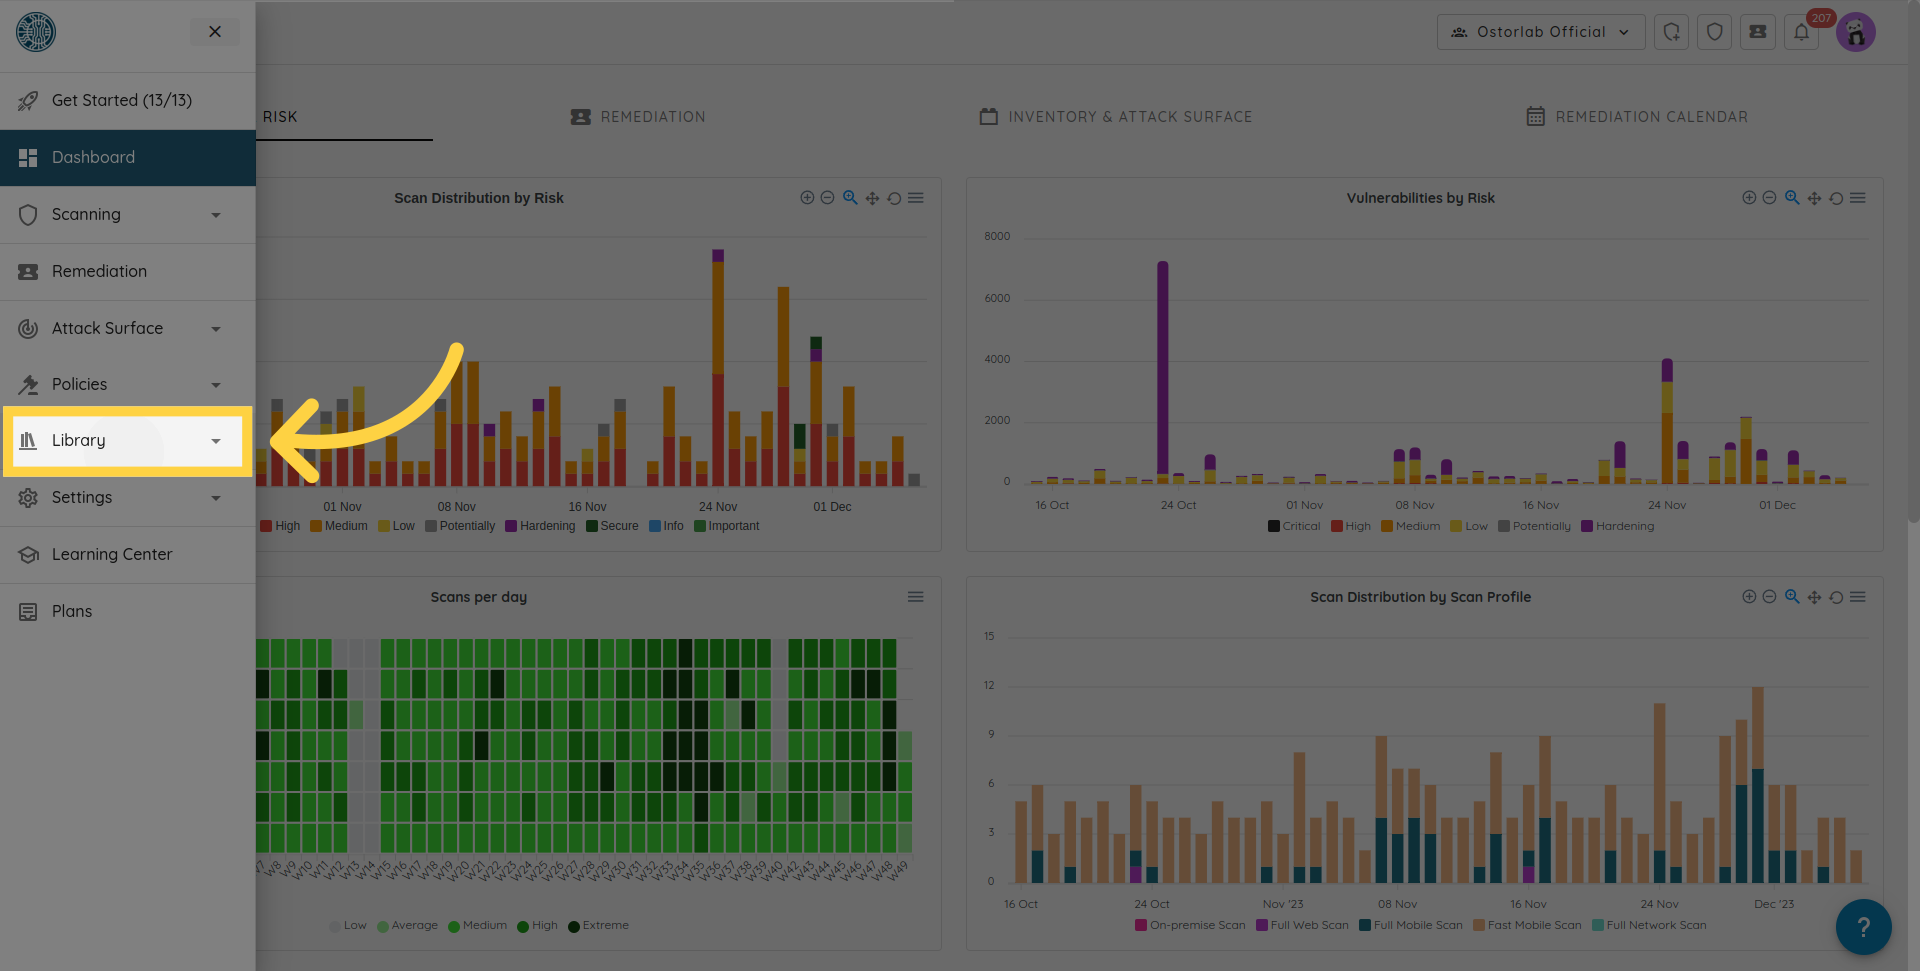
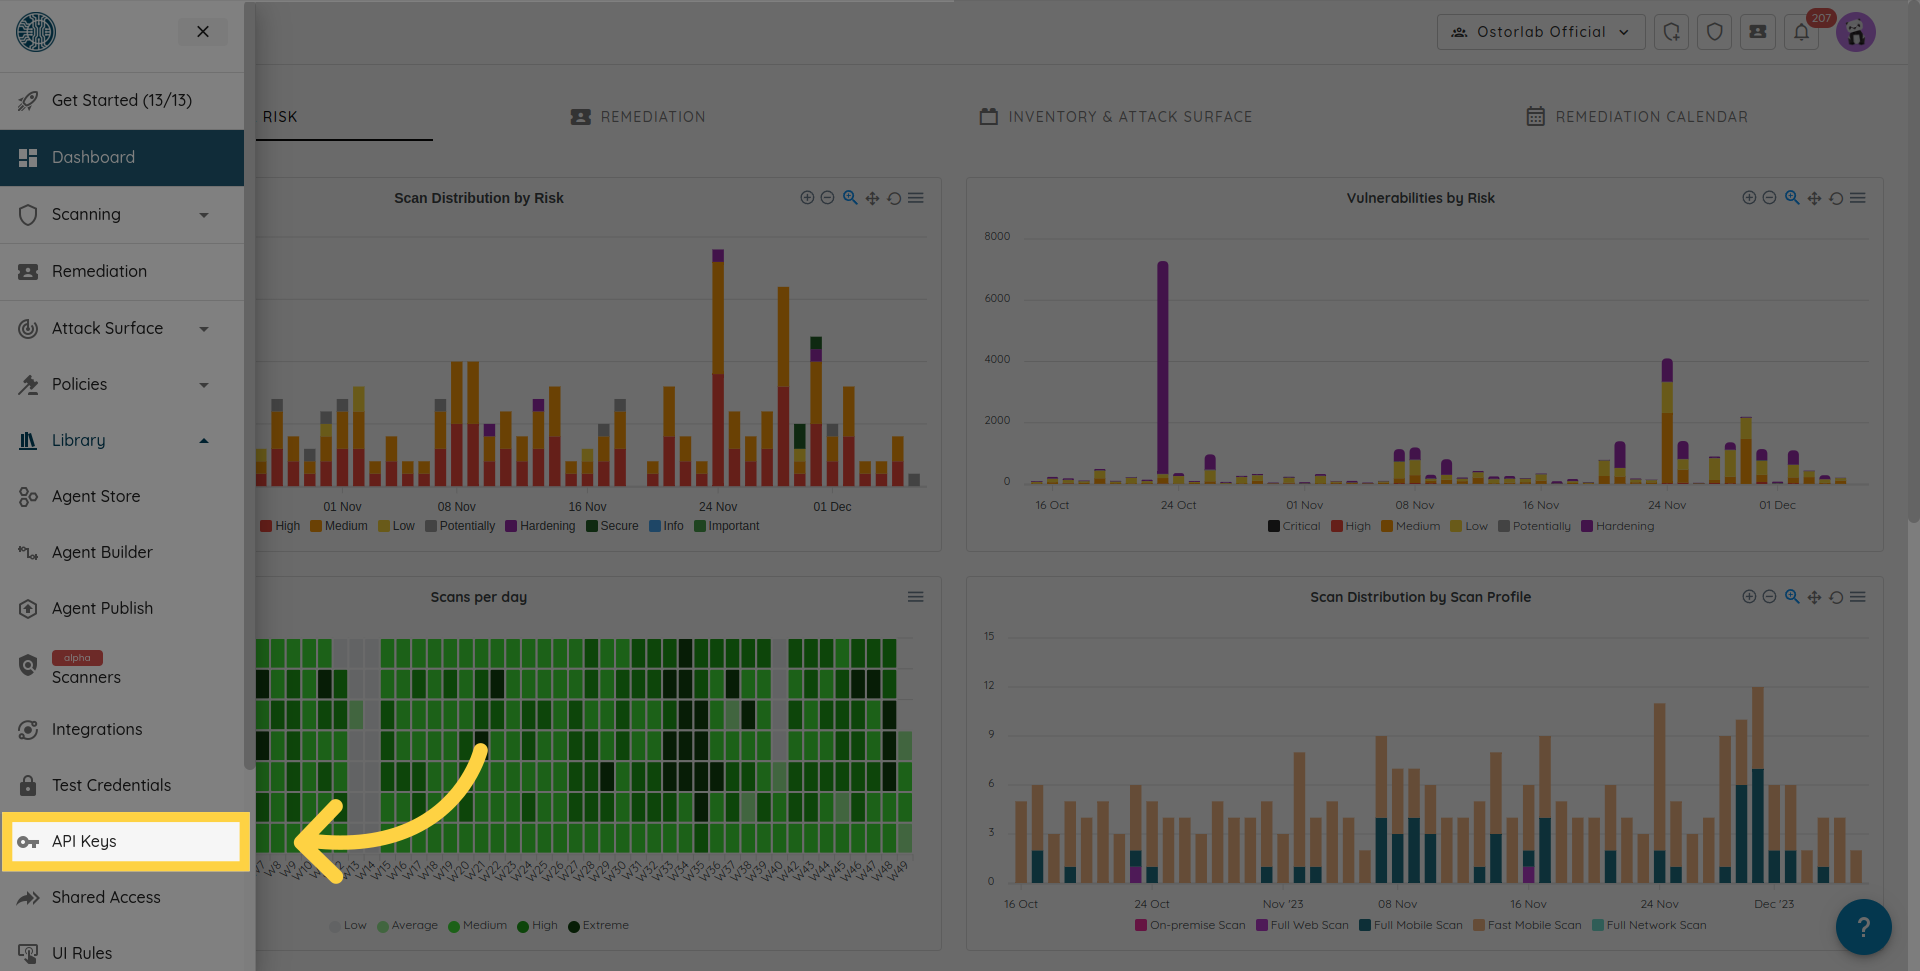
And choose API keys.
From here, click "New".
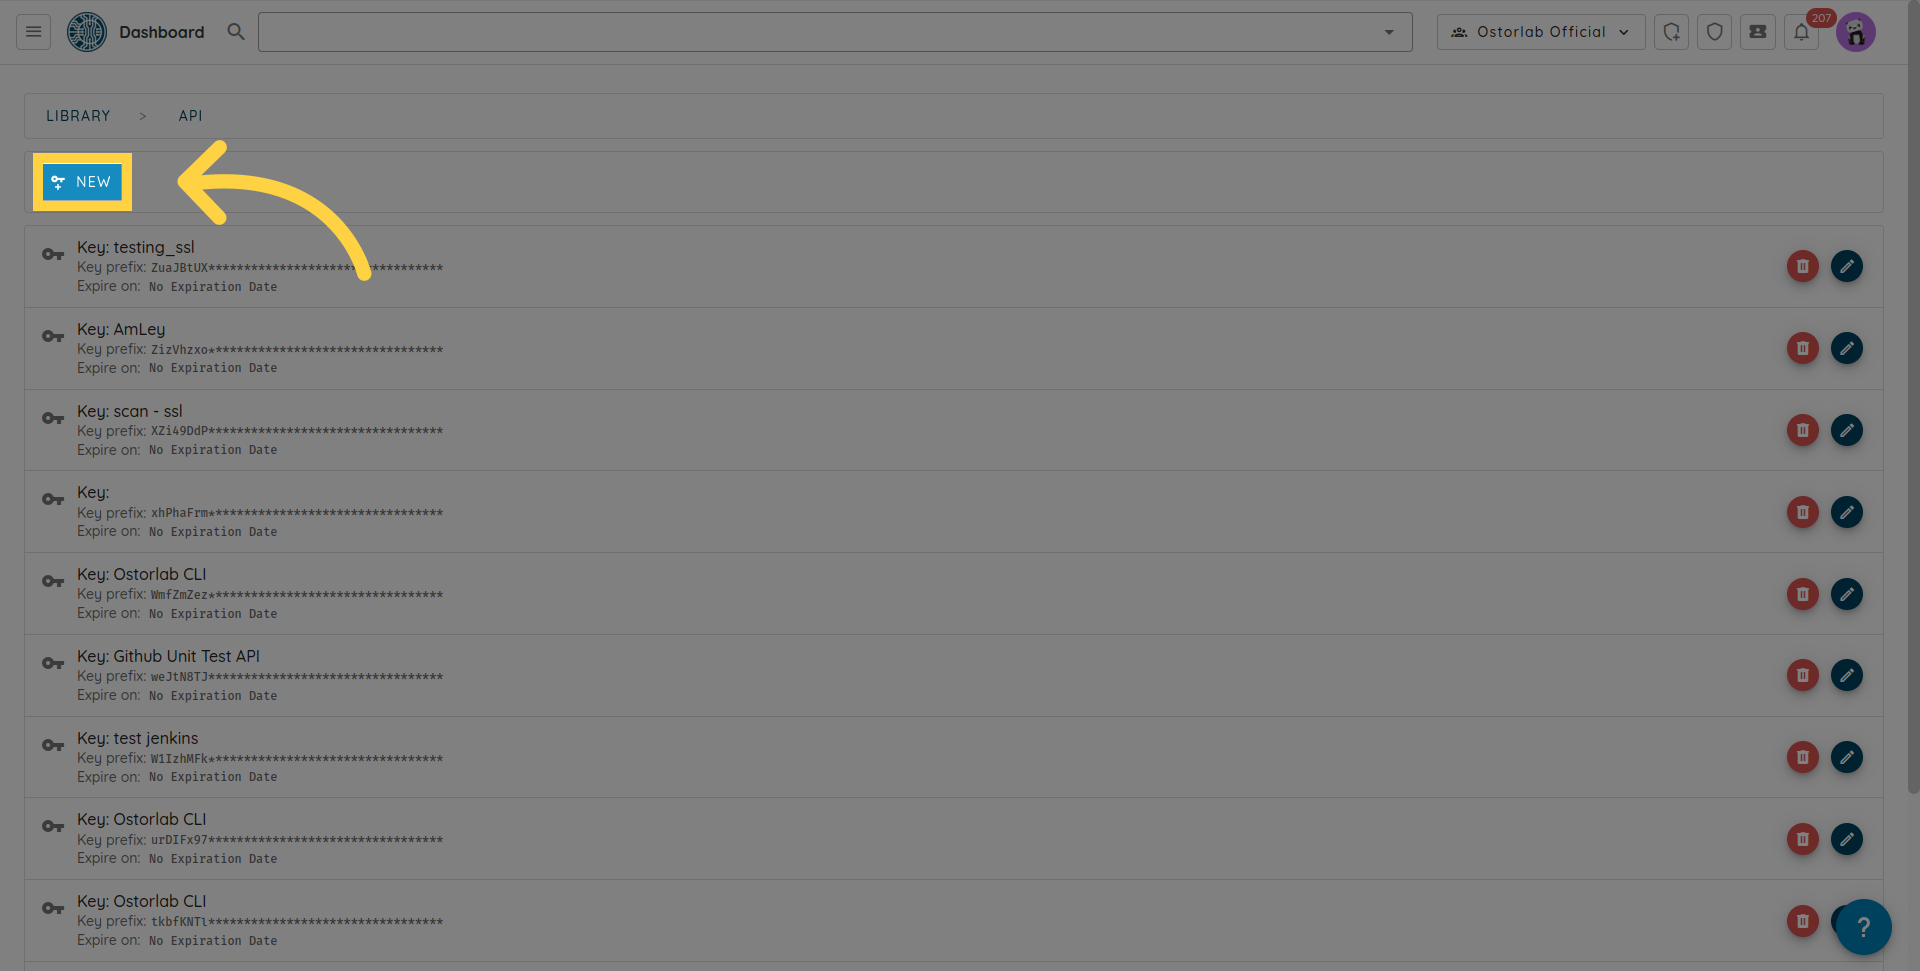
Copy the API key. You can also add a name and an expiry date to your key.
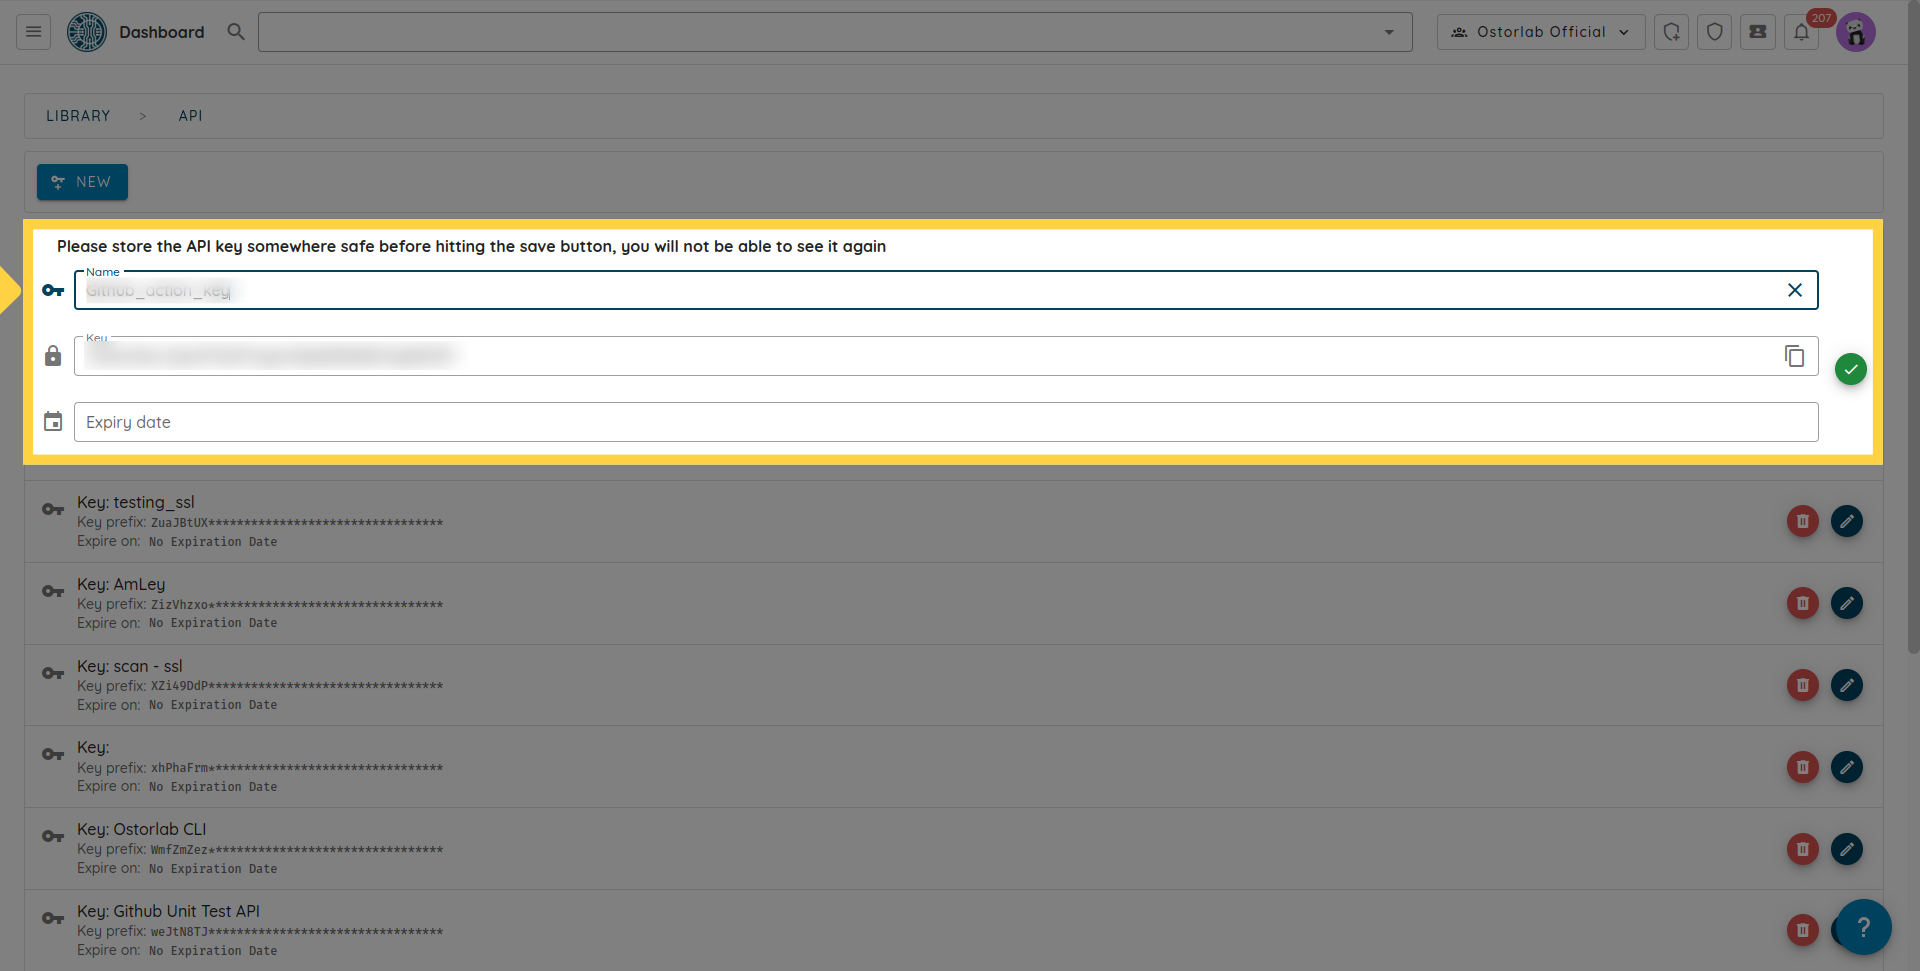
Don't forget to click the save button to save your key.

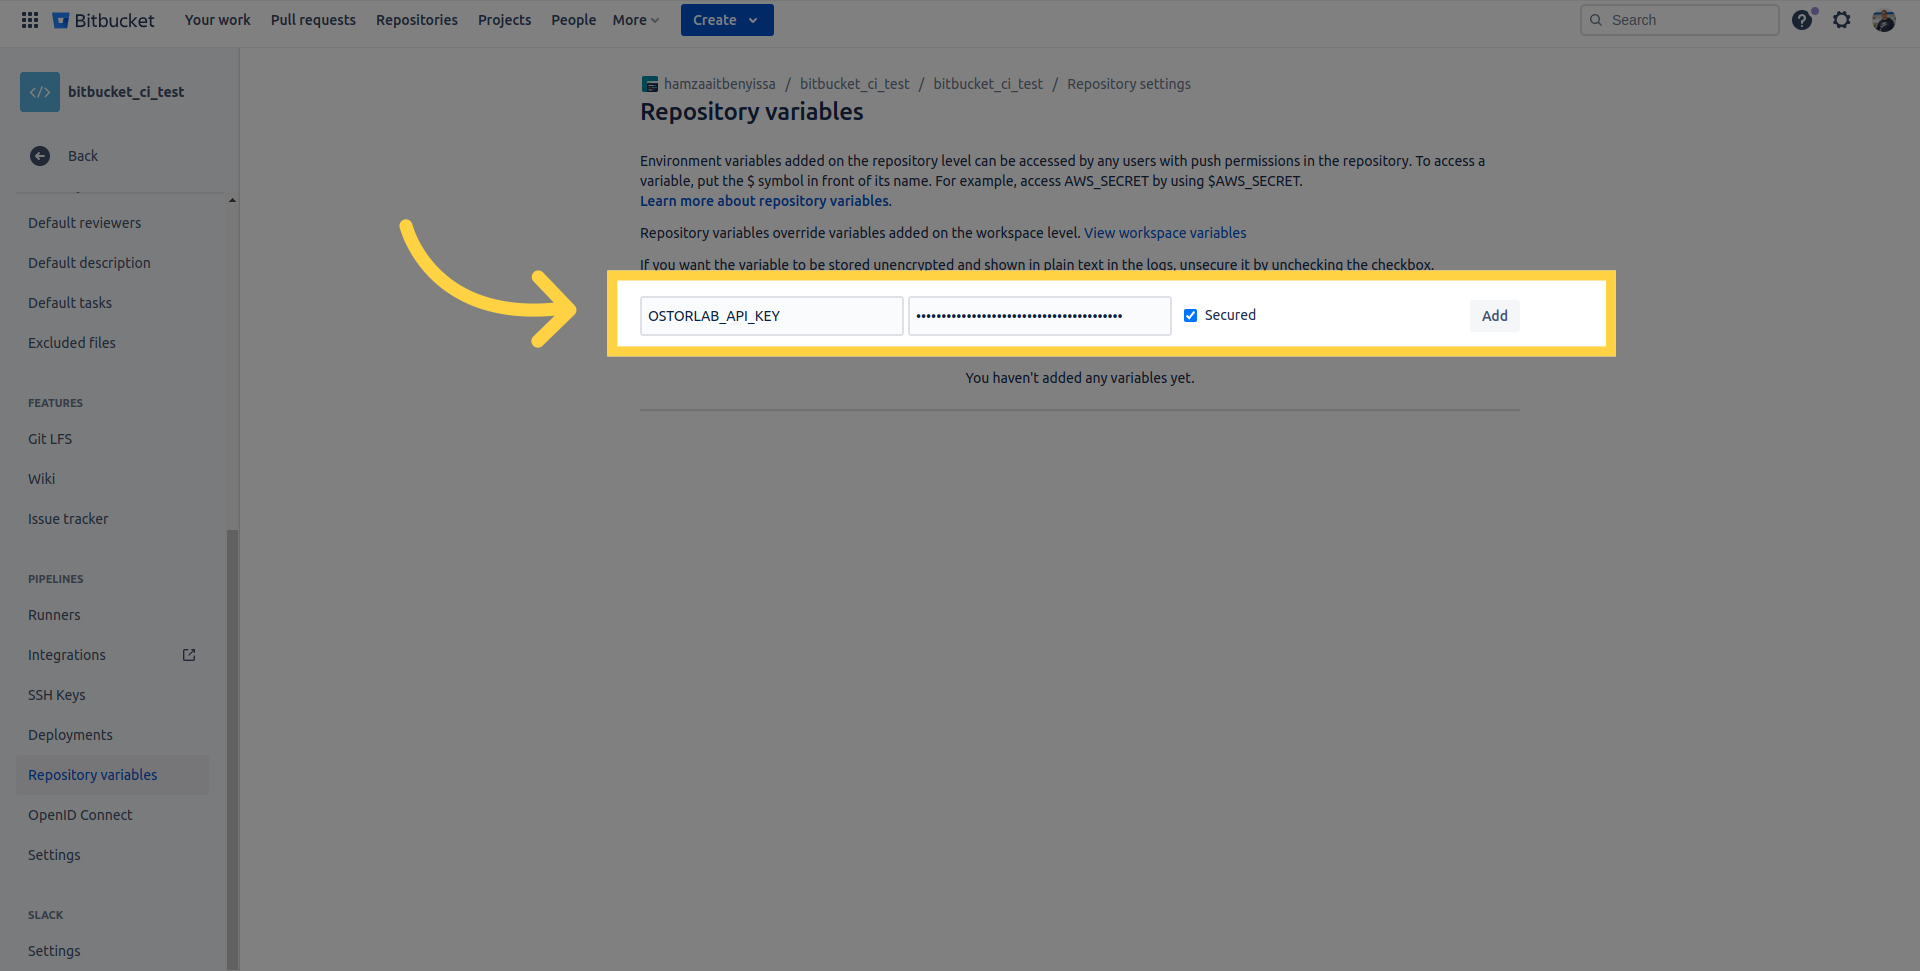
Add the API Key to Bitbucket Variables:
Once you have generated your API key, add it to your Bitbucket variables.
Update Your Pipeline:
Now, you need to update your Bitbucket pipeline to include an Ostorlab step for triggering the security scan. This is a sample configuration that performs a fast scan on an Android APK and fails the pipeline for vulnerabilities with a high severity rating.
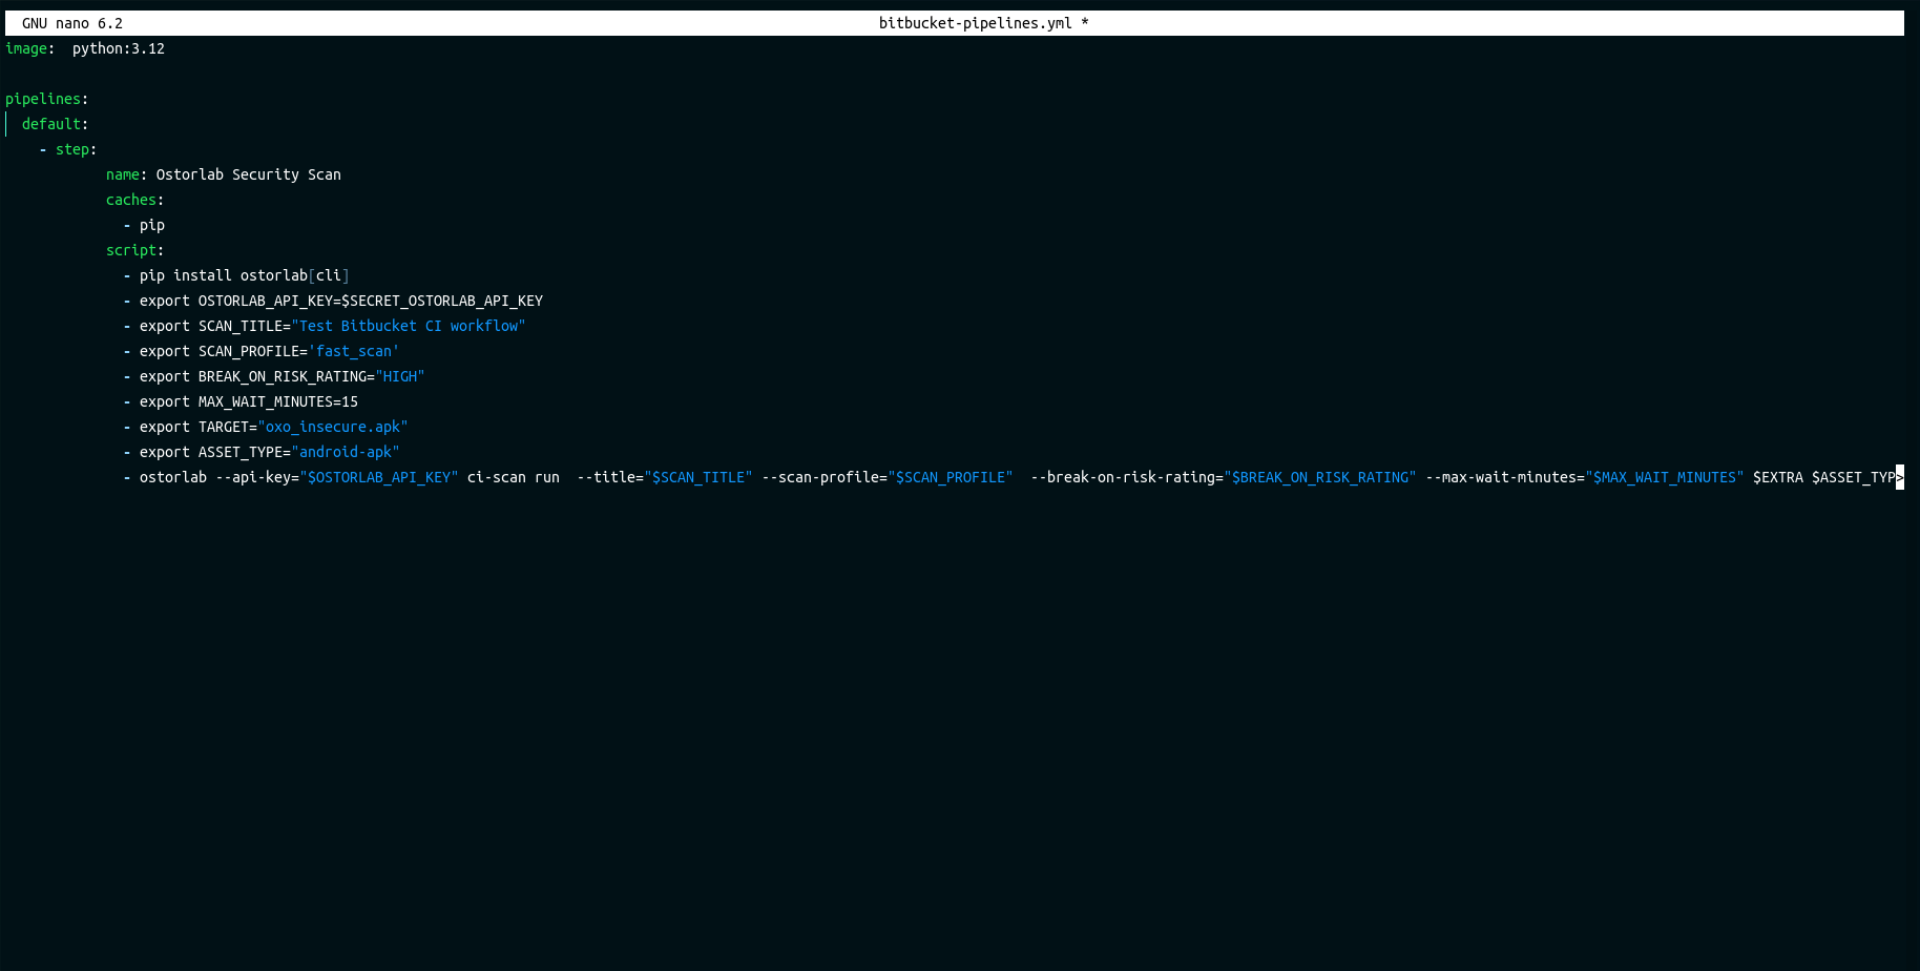
- step:
name: Ostorlab Security Scan
caches:
- pip
script:
- pip install ostorlab[cli]
- export OSTORLAB_API_KEY=$SECRET_OSTORLAB_API_KEY
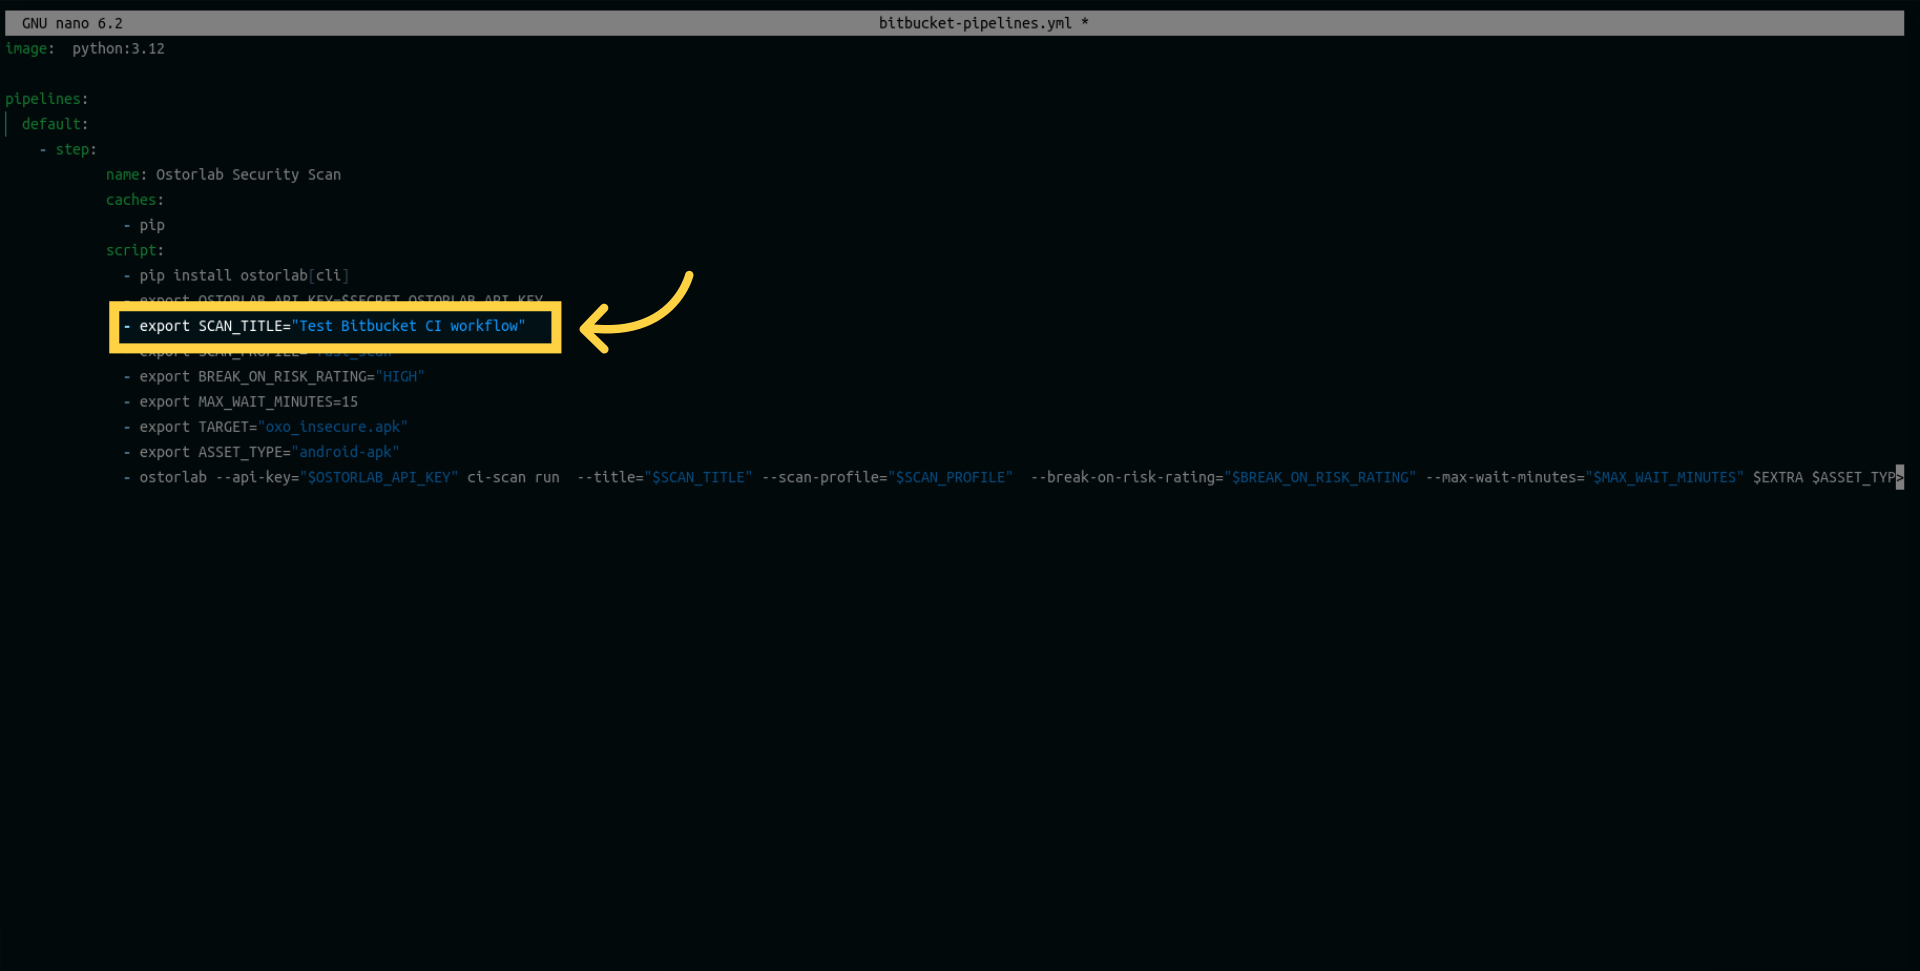
- export SCAN_TITLE="Test Bitbucket CI workflow"
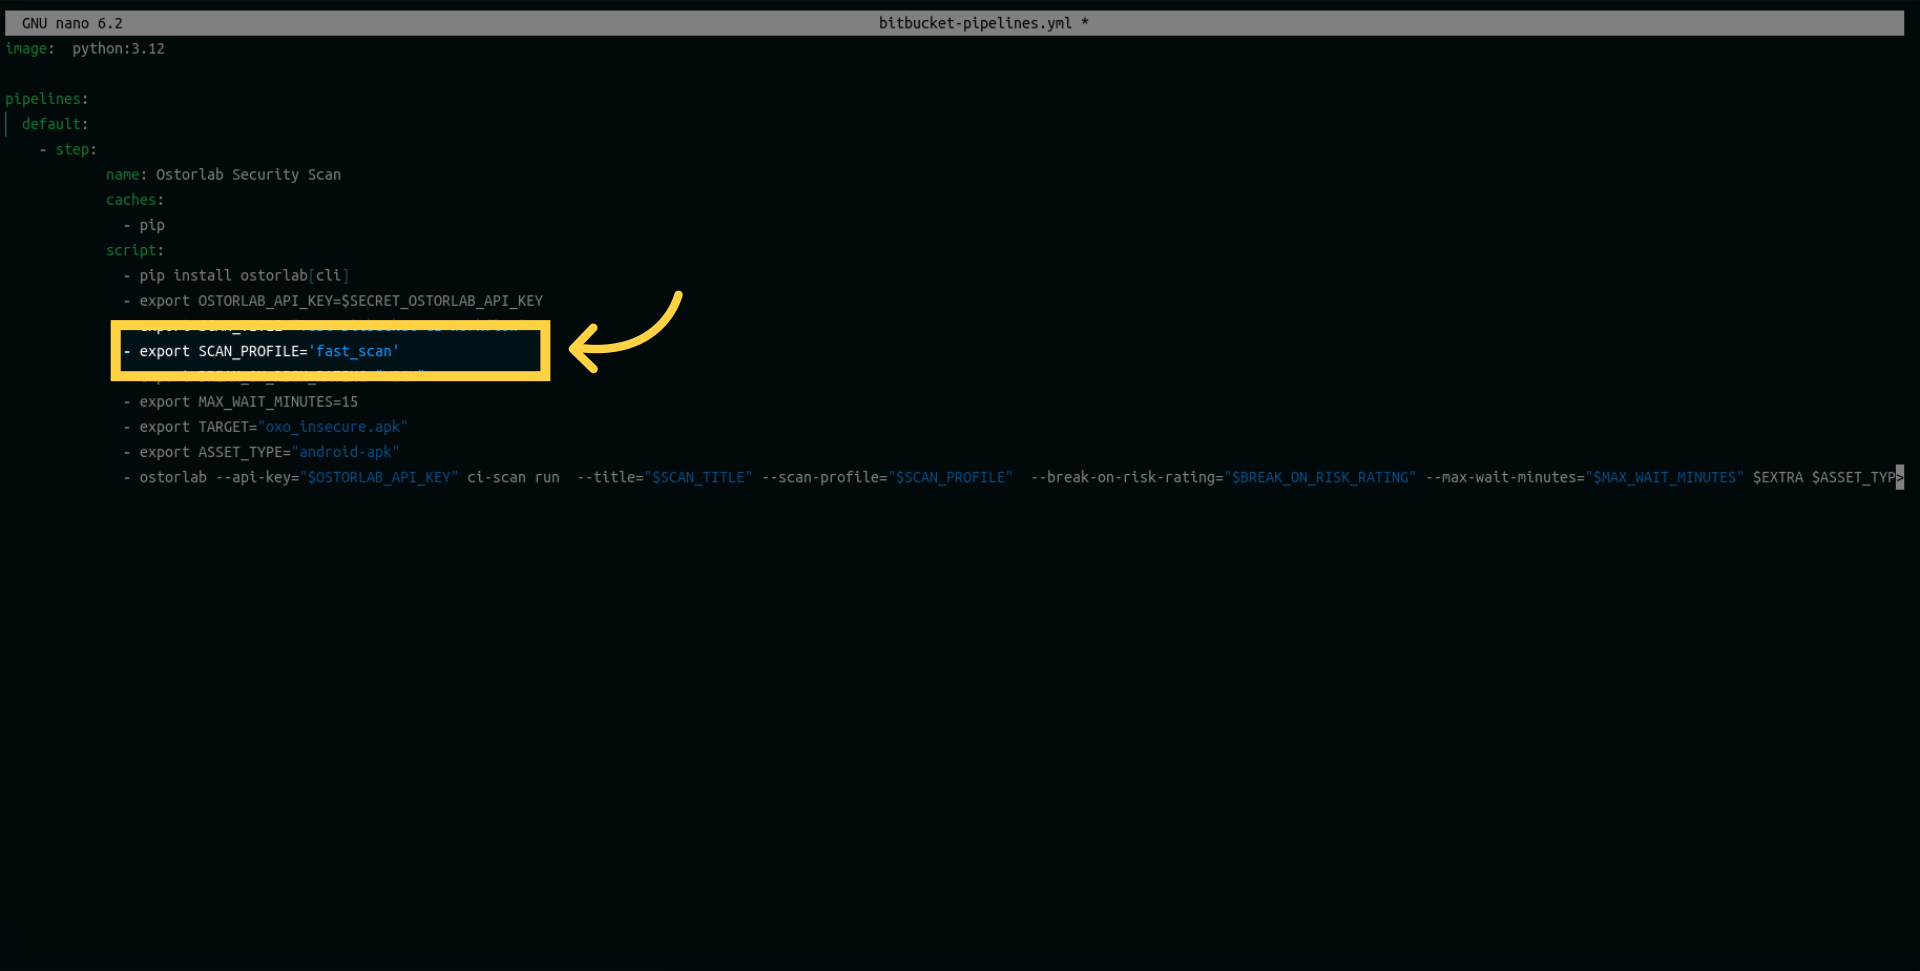
- export SCAN_PROFILE='fast_scan'
- export BREAK_ON_RISK_RATING="HIGH"
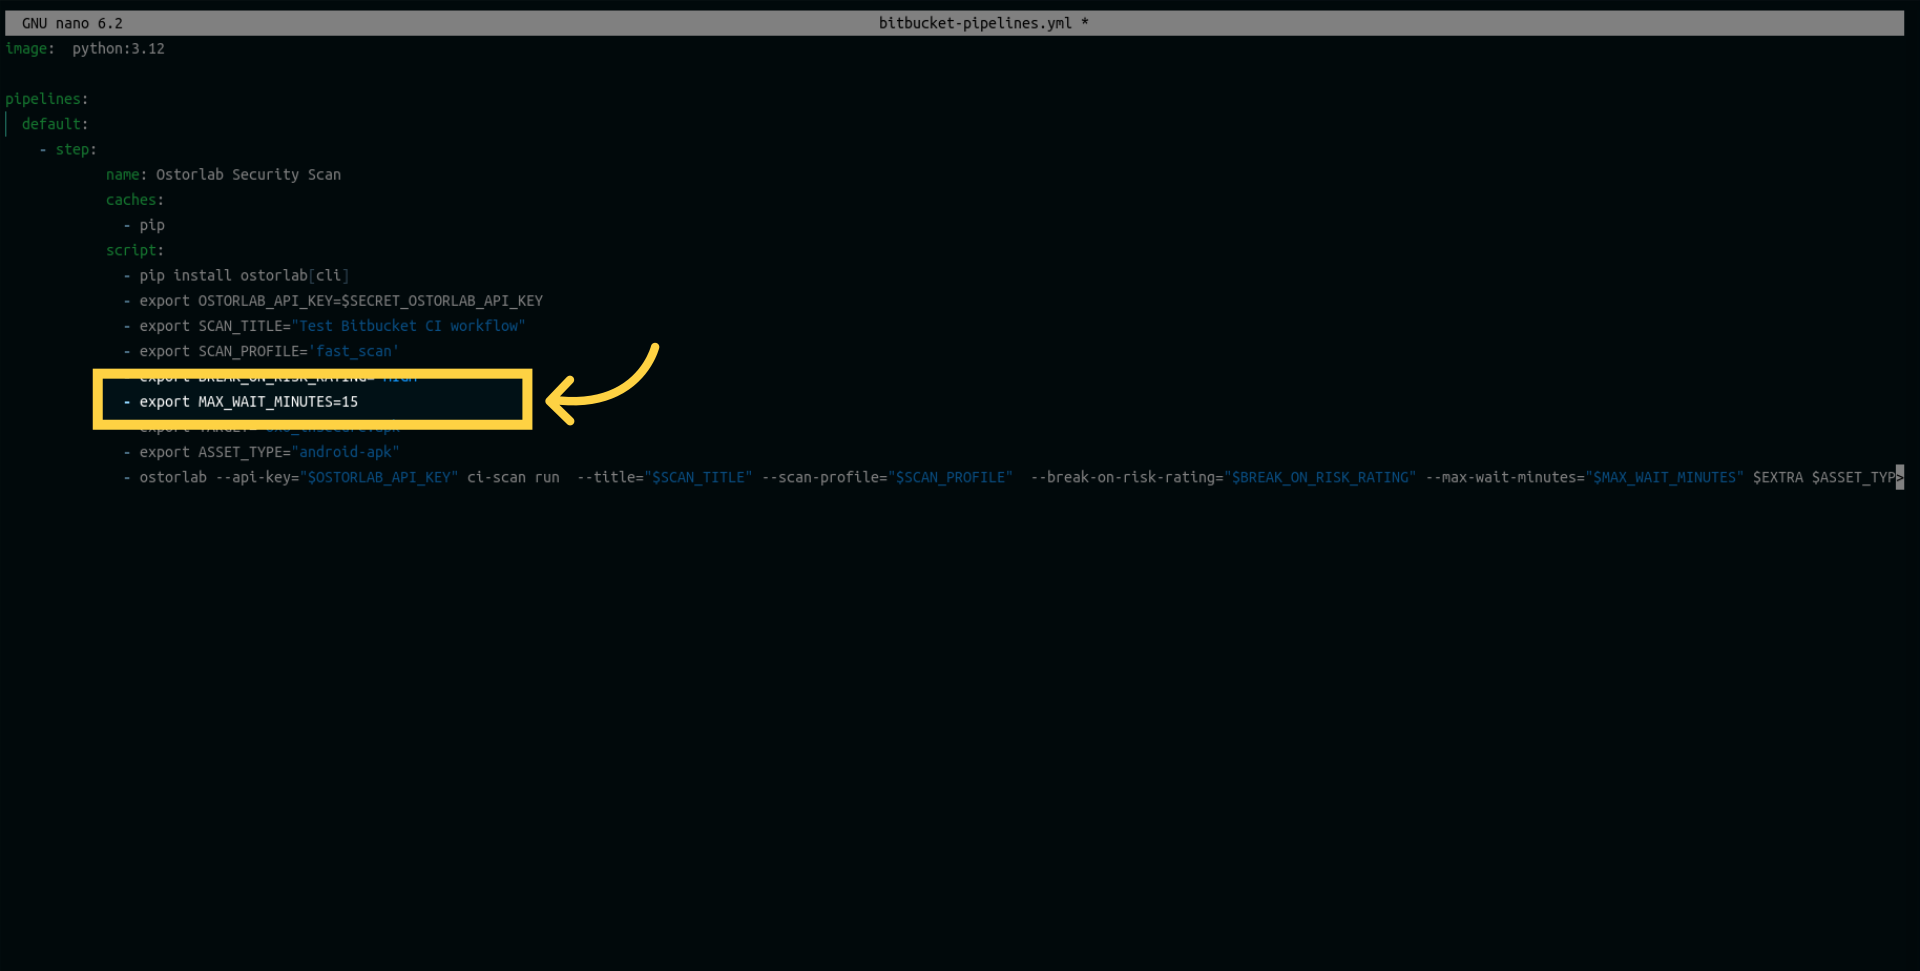
- export MAX_WAIT_MINUTES=15
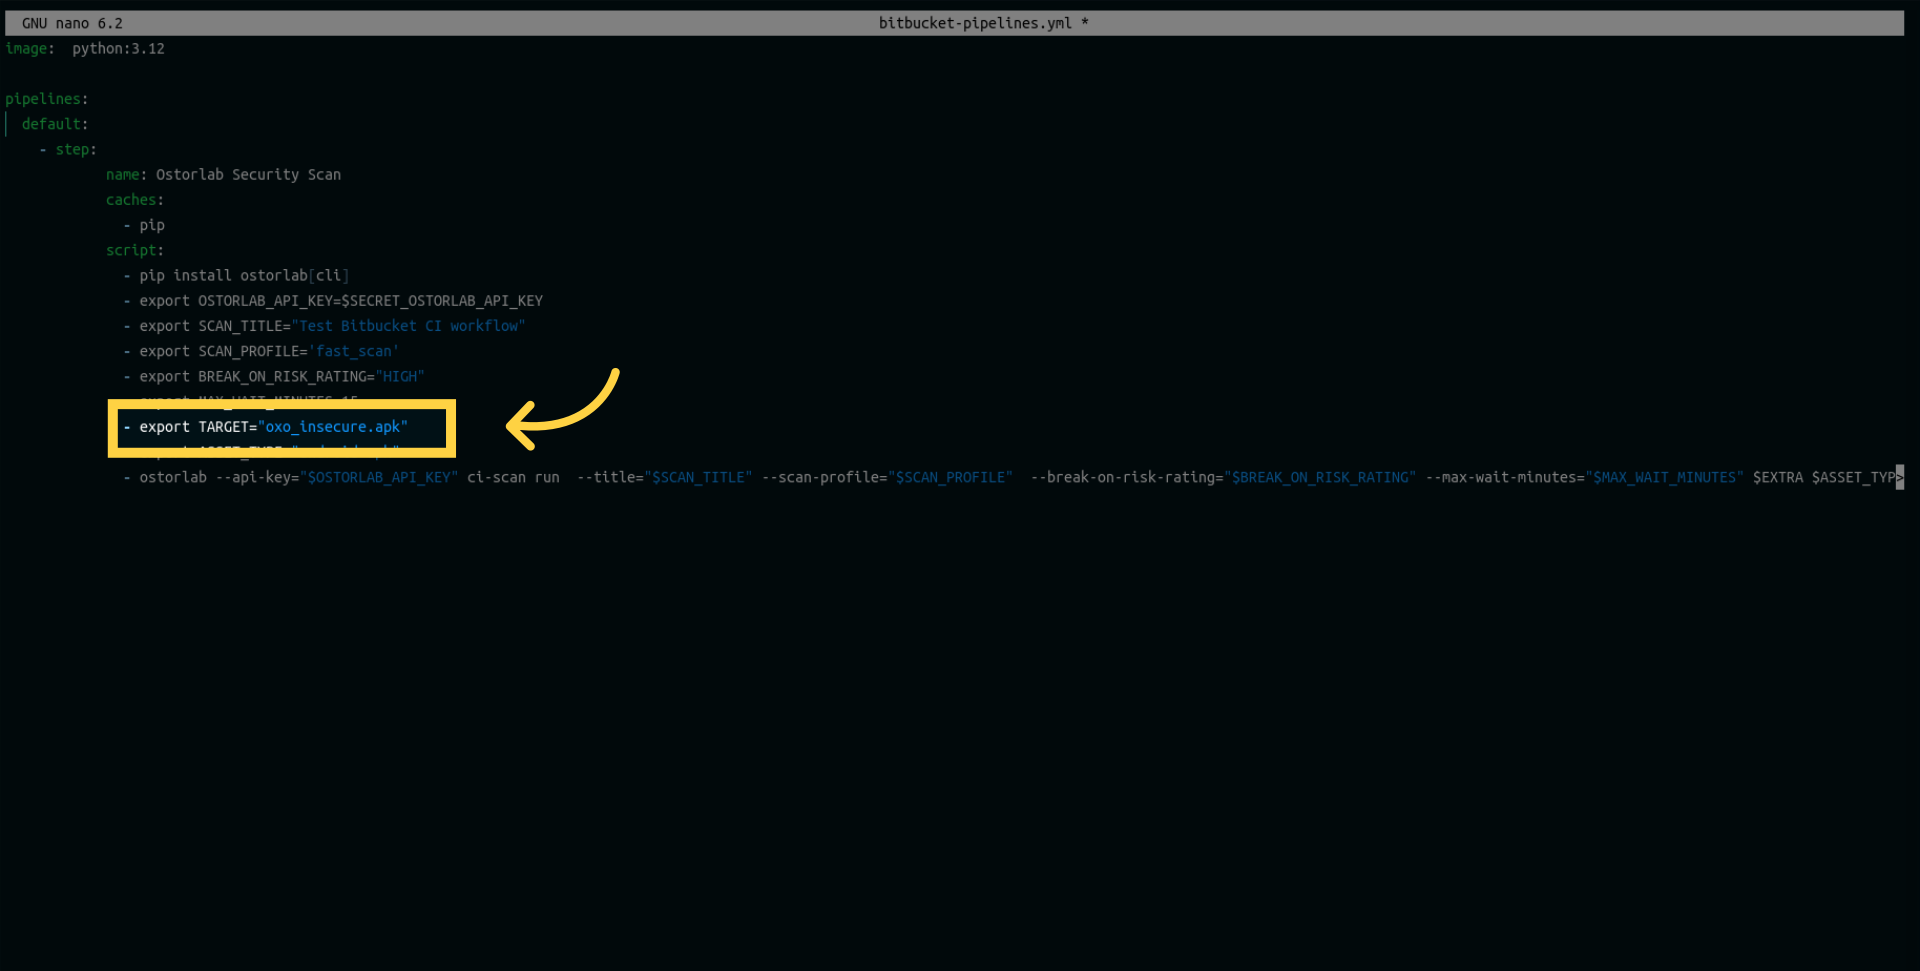
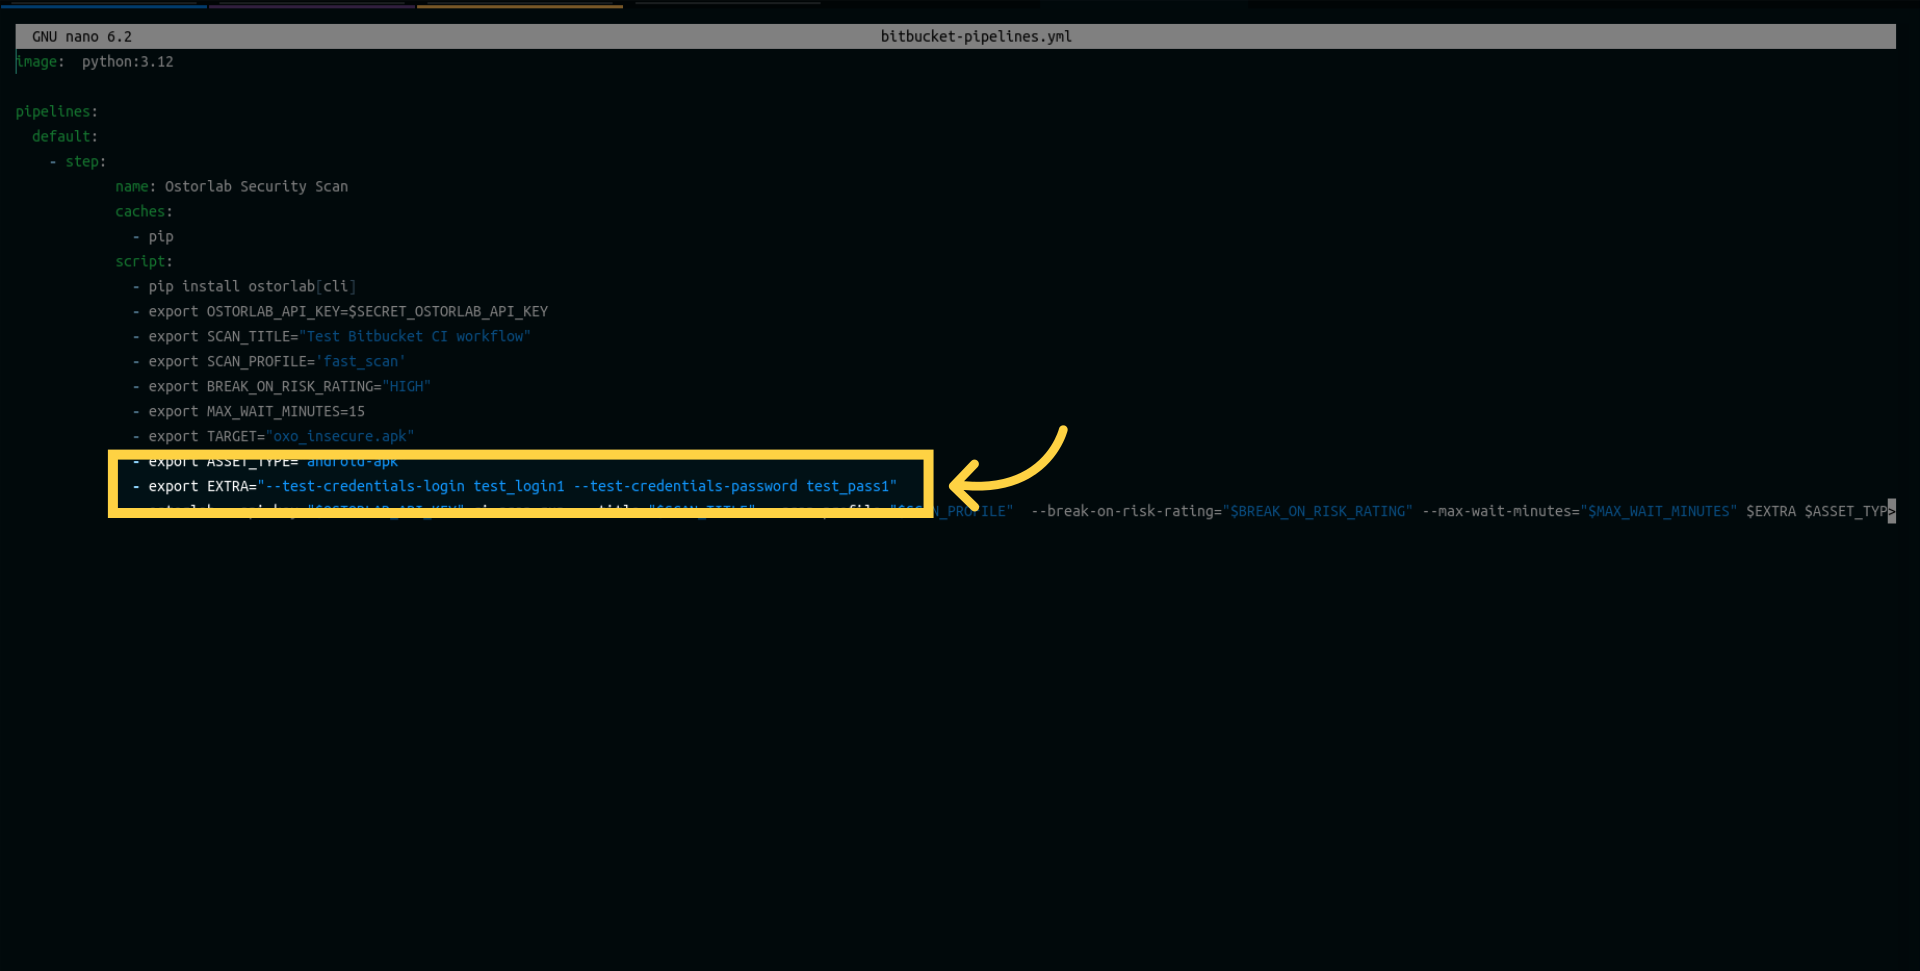
- export TARGET="oxo_insecure.apk"
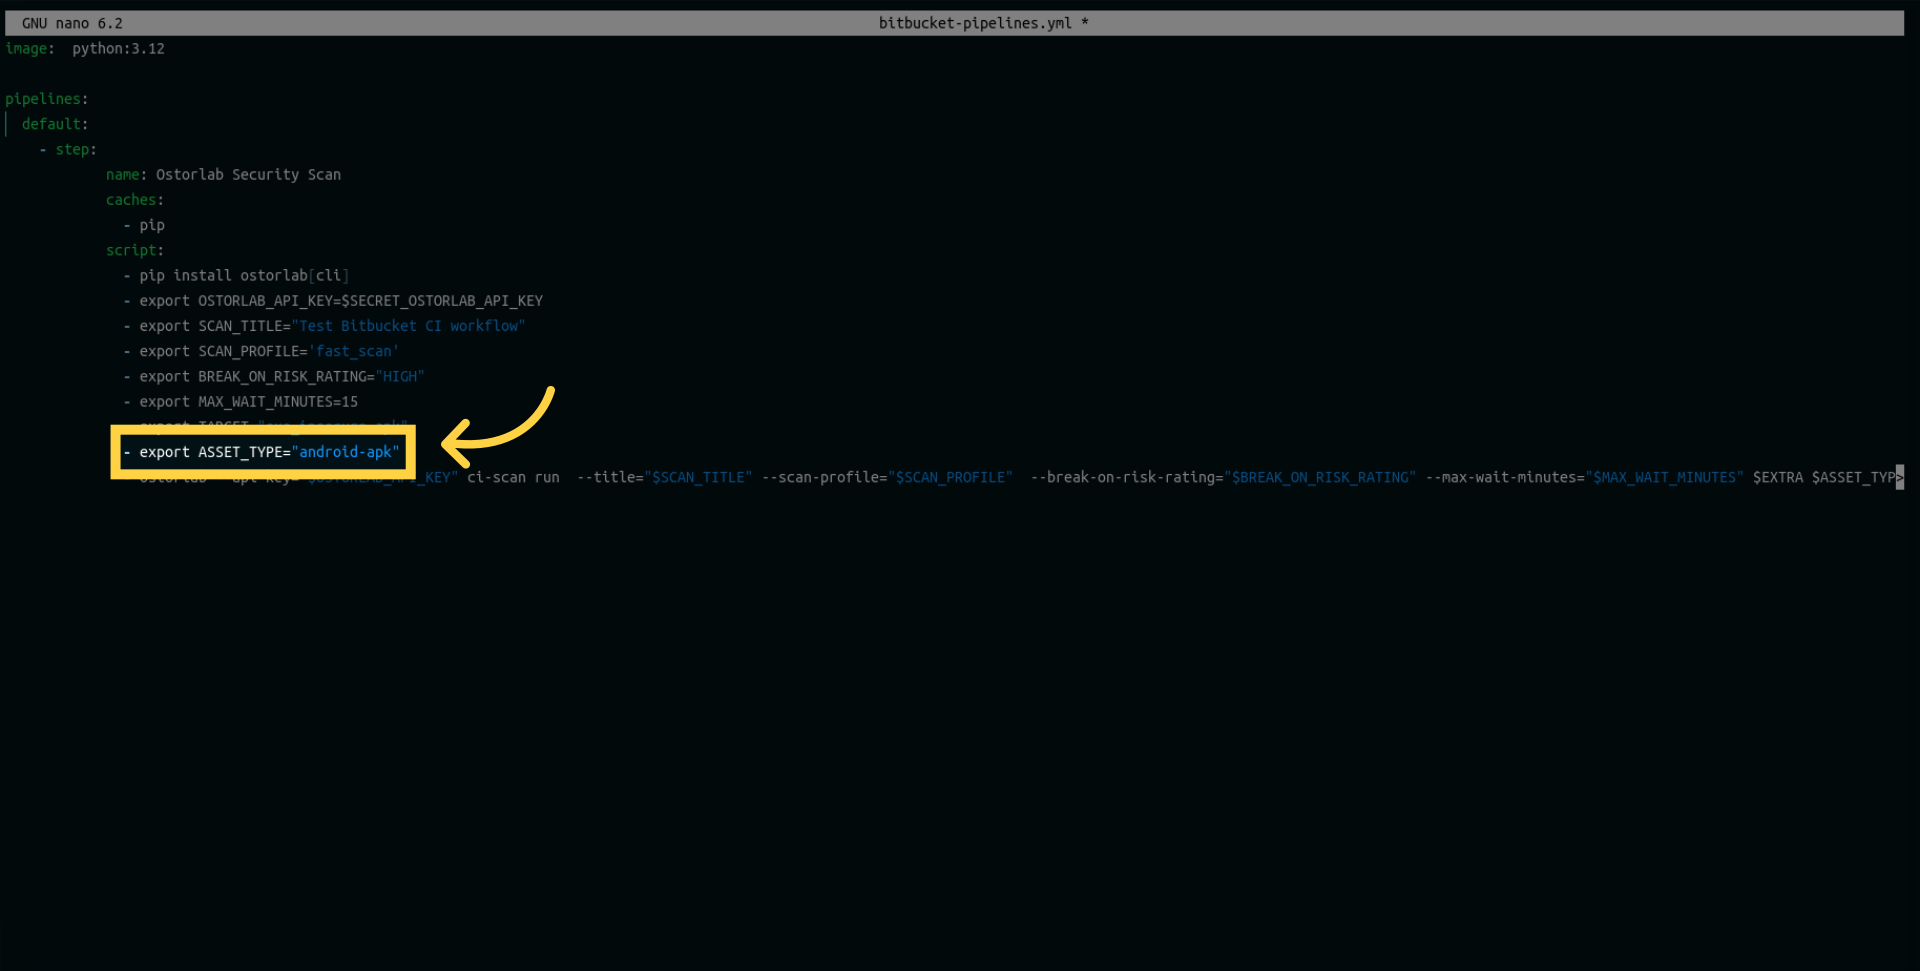
- export ASSET_TYPE="android-apk"
- export EXTRA="--test-credentials-login test_login --test-credentials-password test_pass"
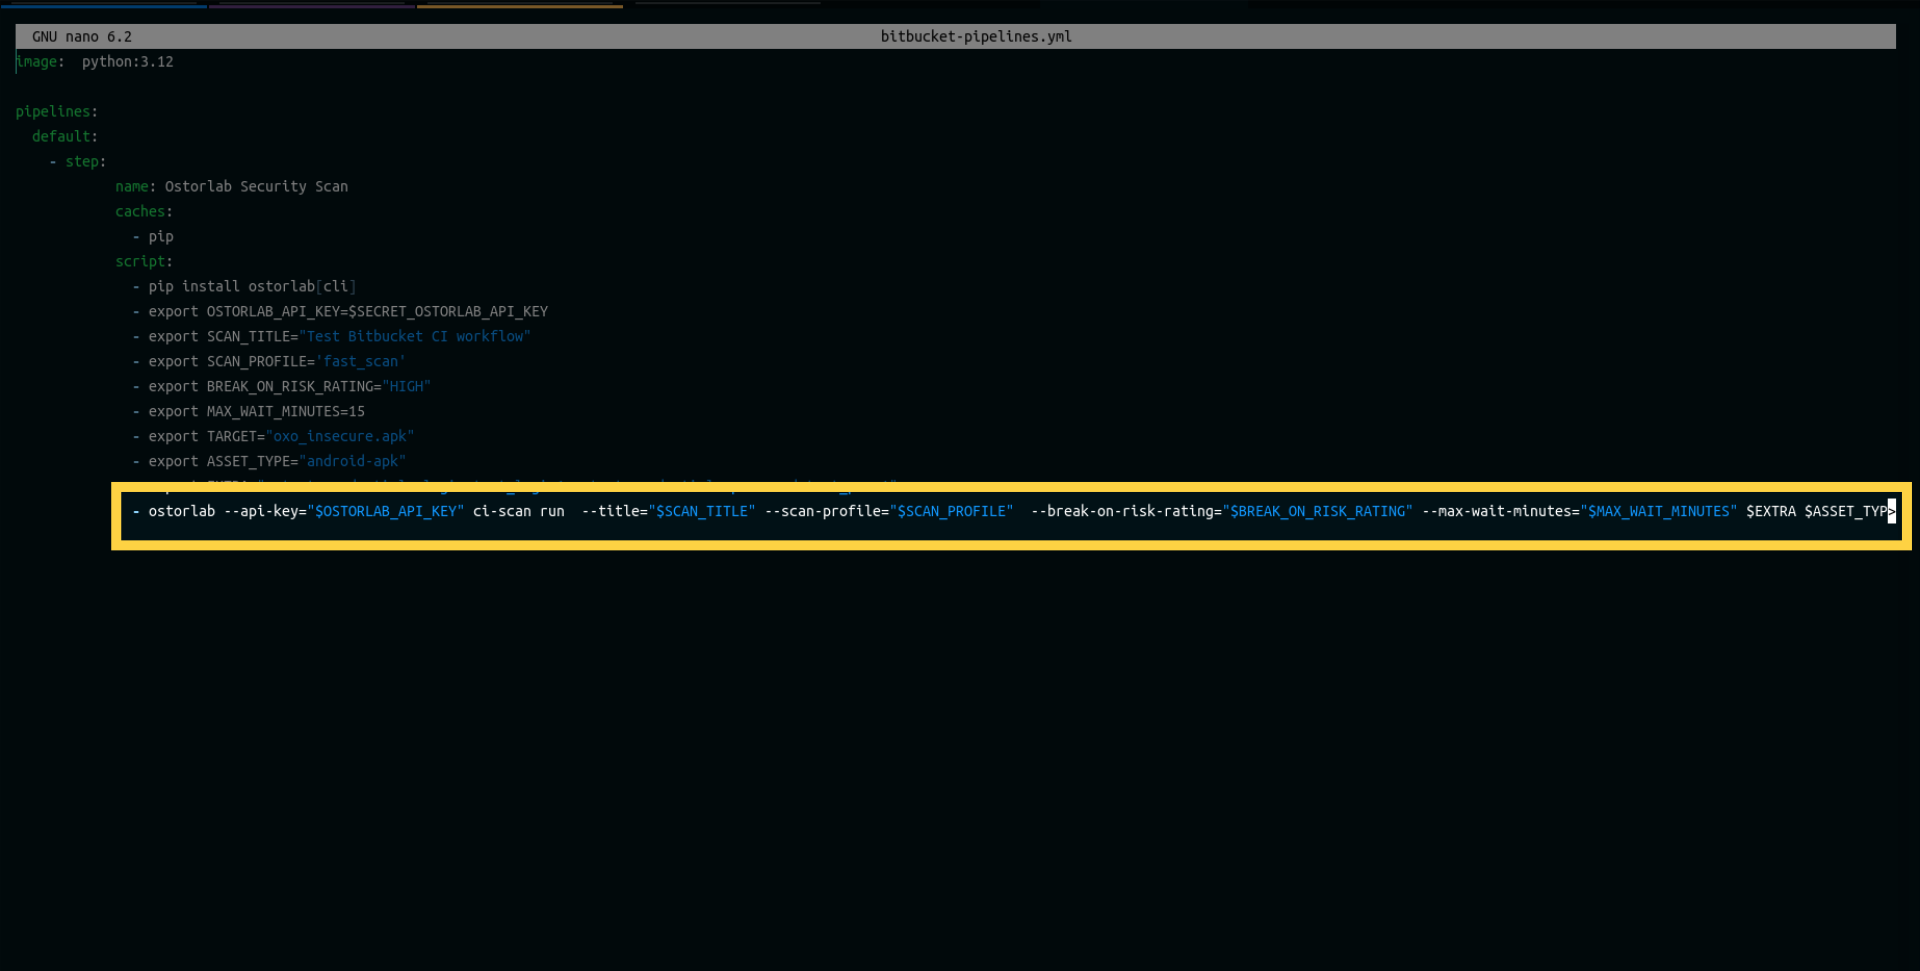
- ostorlab --api-key="$OSTORLAB_API_KEY" ci-scan run --title="$SCAN_TITLE" --scan-profile="$SCAN_PROFILE" --break-on-risk-rating="$BREAK_ON_RISK_RATING" --max-wait-minutes="$MAX_WAIT_MINUTES" $EXTRA $ASSET_TYPE
Let's explore each line in this configuration:
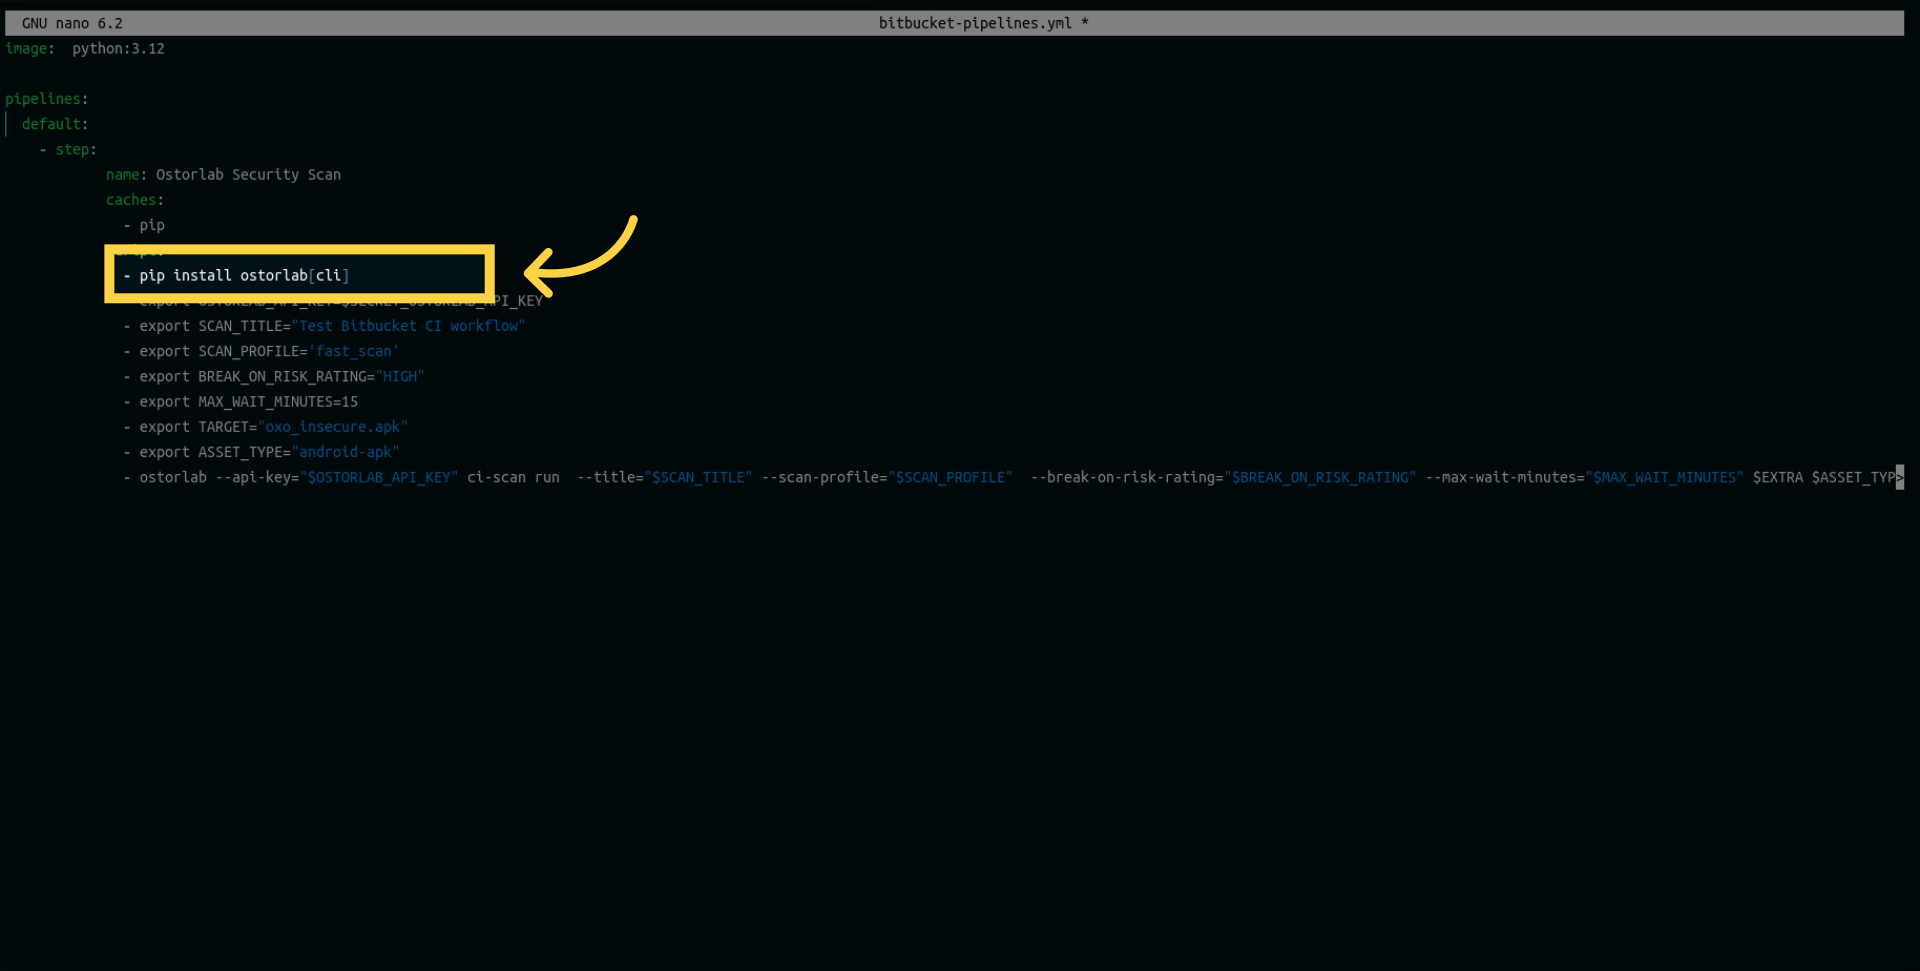
First, we will need to install the ostorlab package and its command-line interface components using pip.
Next, create a variable to store the API key. Ensure that the variable's name matches the one added to your repository as a secret or environment variable.

Add a title variable for your scan.
Add another variable for the scan profile. Choose between Fast Scan for rapid static analysis or Full Scan for a comprehensive analysis, including static, dynamic, and backend.
Then, a variable to Defines the maximum time the build should wait (in minutes) to finish security analysis.
Add a target variable to specify the path to your application.
Define the asset type as either Android or iOS. In my case, I am choosing Android as I intend to scan an Android app.
The extra parameter enables you to provide your Lock files for enhanced scan analysis.
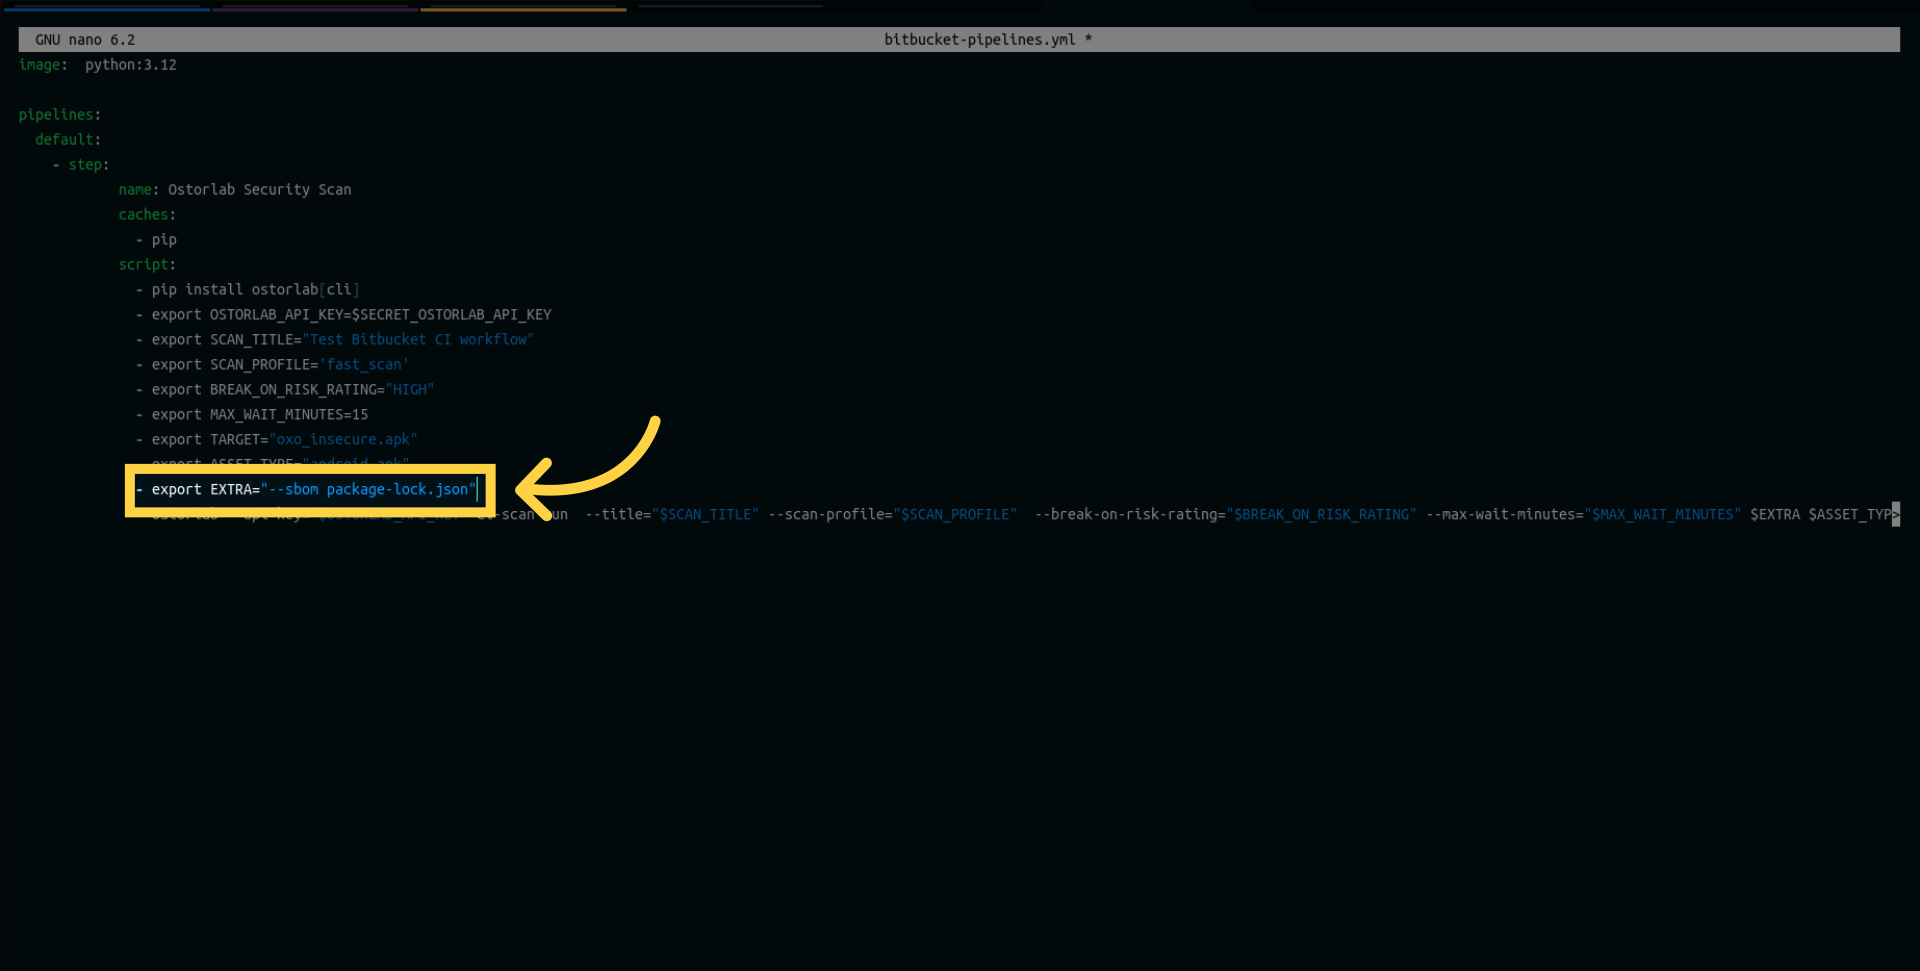
The following list outlines the supported SBOM/Lock files:
    SPDX
    CycloneDX
    gradle.lockfile
    pubspec.lock
    buildscript-gradle.lockfile
    pnpm-lock.yaml
    package-lock.json
    packages.lock.json
    pom.xml
    Gemfile.lock
    yarn.lock
    Cargo.lock
    composer.lock
    conan.lock
    mix.lock
    go.mod
    requirements.txt
    Pipfile.lock
    poetry.lock
Additionally, it allows you to supply either simple credentials or custom credentials to enable authenticated testing.
For 2FA support, you can add the following credentials:
- SMS 2FA: --sms-2fa-sender <sender_name> (Learn more about SMS 2FA)
- Email 2FA: --email-2fa-sender-email-address <sender_email> --email-2fa-email-address <email_address> --email-2fa-password <email_password> (Learn more about Email 2FA)
- TOTP 2FA: --totp-2fa-seed <seed> (Learn more about TOTP 2FA)
You can also provide UI prompts to guide the scanner through your app's UI. UI prompts are a powerful feature that allows you to use natural language to tell the scanner how to navigate the app. For example, you can specify prompts like "click the login button" or "enter the username and password".
--ui-prompt-name accept-terms --ui-prompt-action "Scroll down and tap the 'Accept Terms' checkbox."
--ui-prompt-name submit --ui-prompt-action "Tap the 'Submit' button to complete the login process."
You can add multiple --ui-prompt-name and --ui-prompt-action flags for different steps in your app's flow.
Additionally, you can use the --ui-prompt-id flag to reference existing UI prompt flows by their IDs. This allows you to reuse previously defined UI prompt flows. You can add multiple --ui-prompt-id flags as needed. For example:
--ui-prompt-id 123 --ui-prompt-id 456
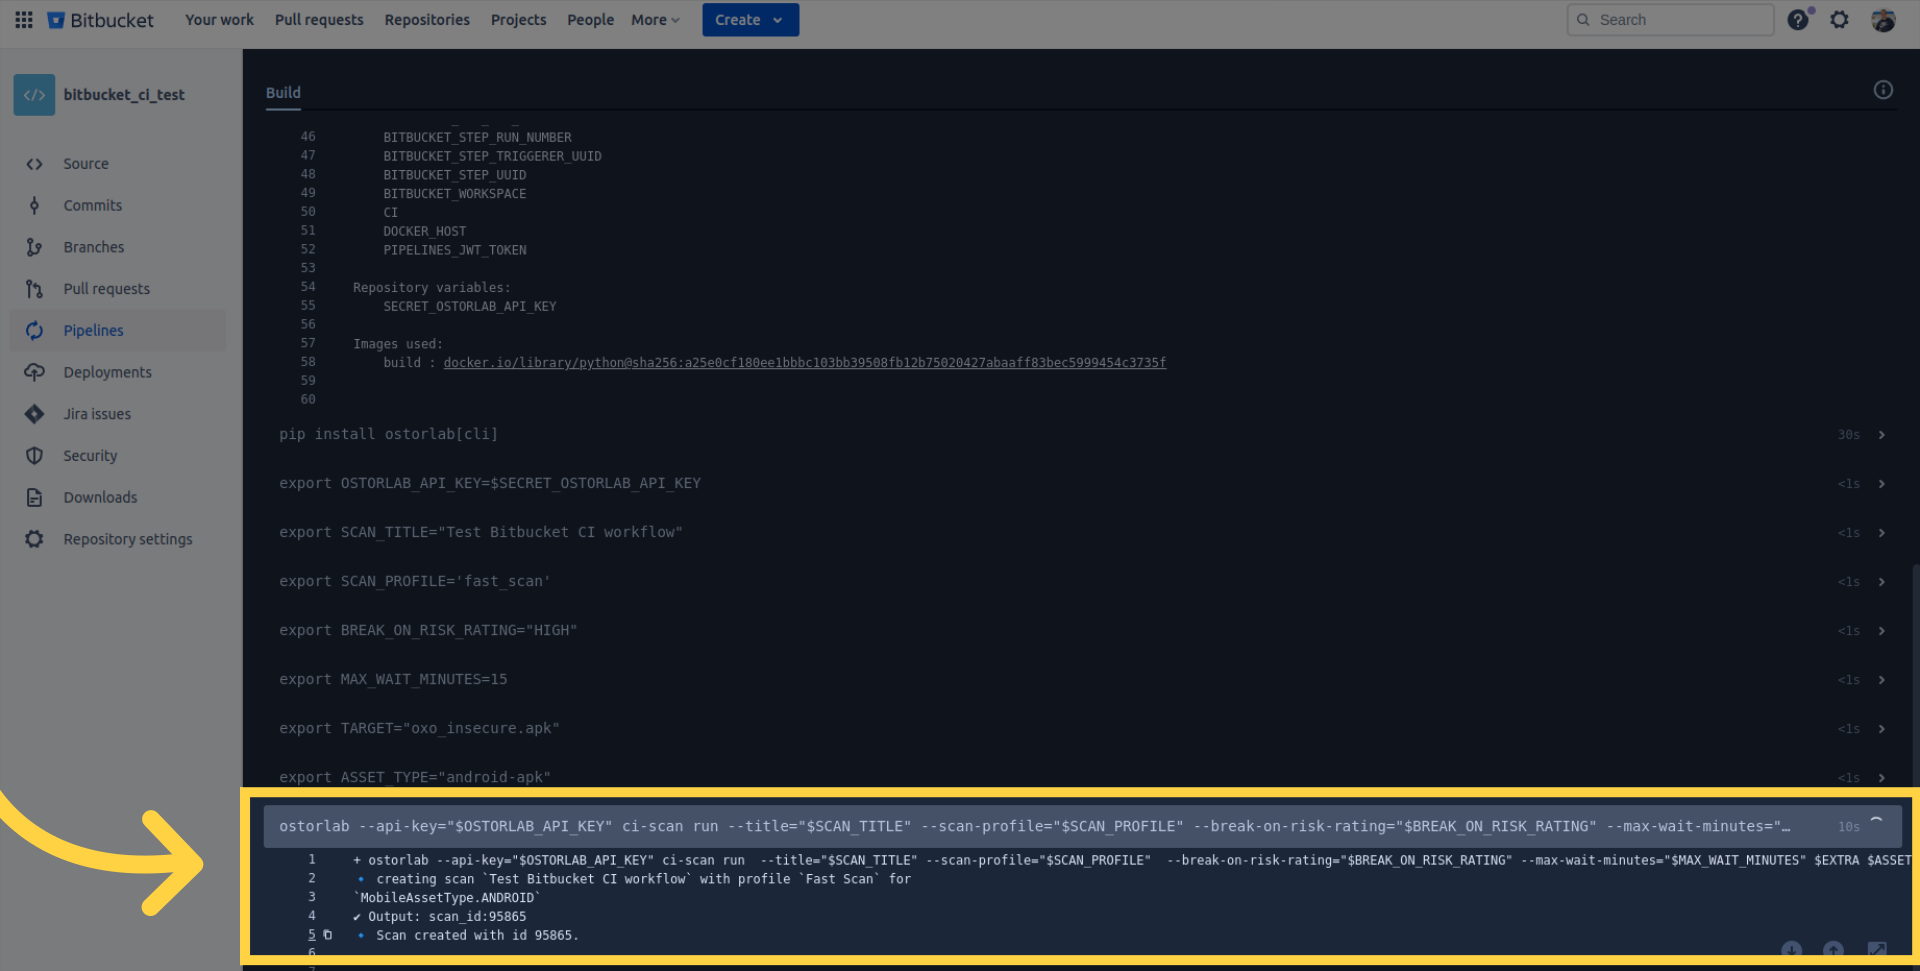
Finally, execute the Ostorlab command as follows:
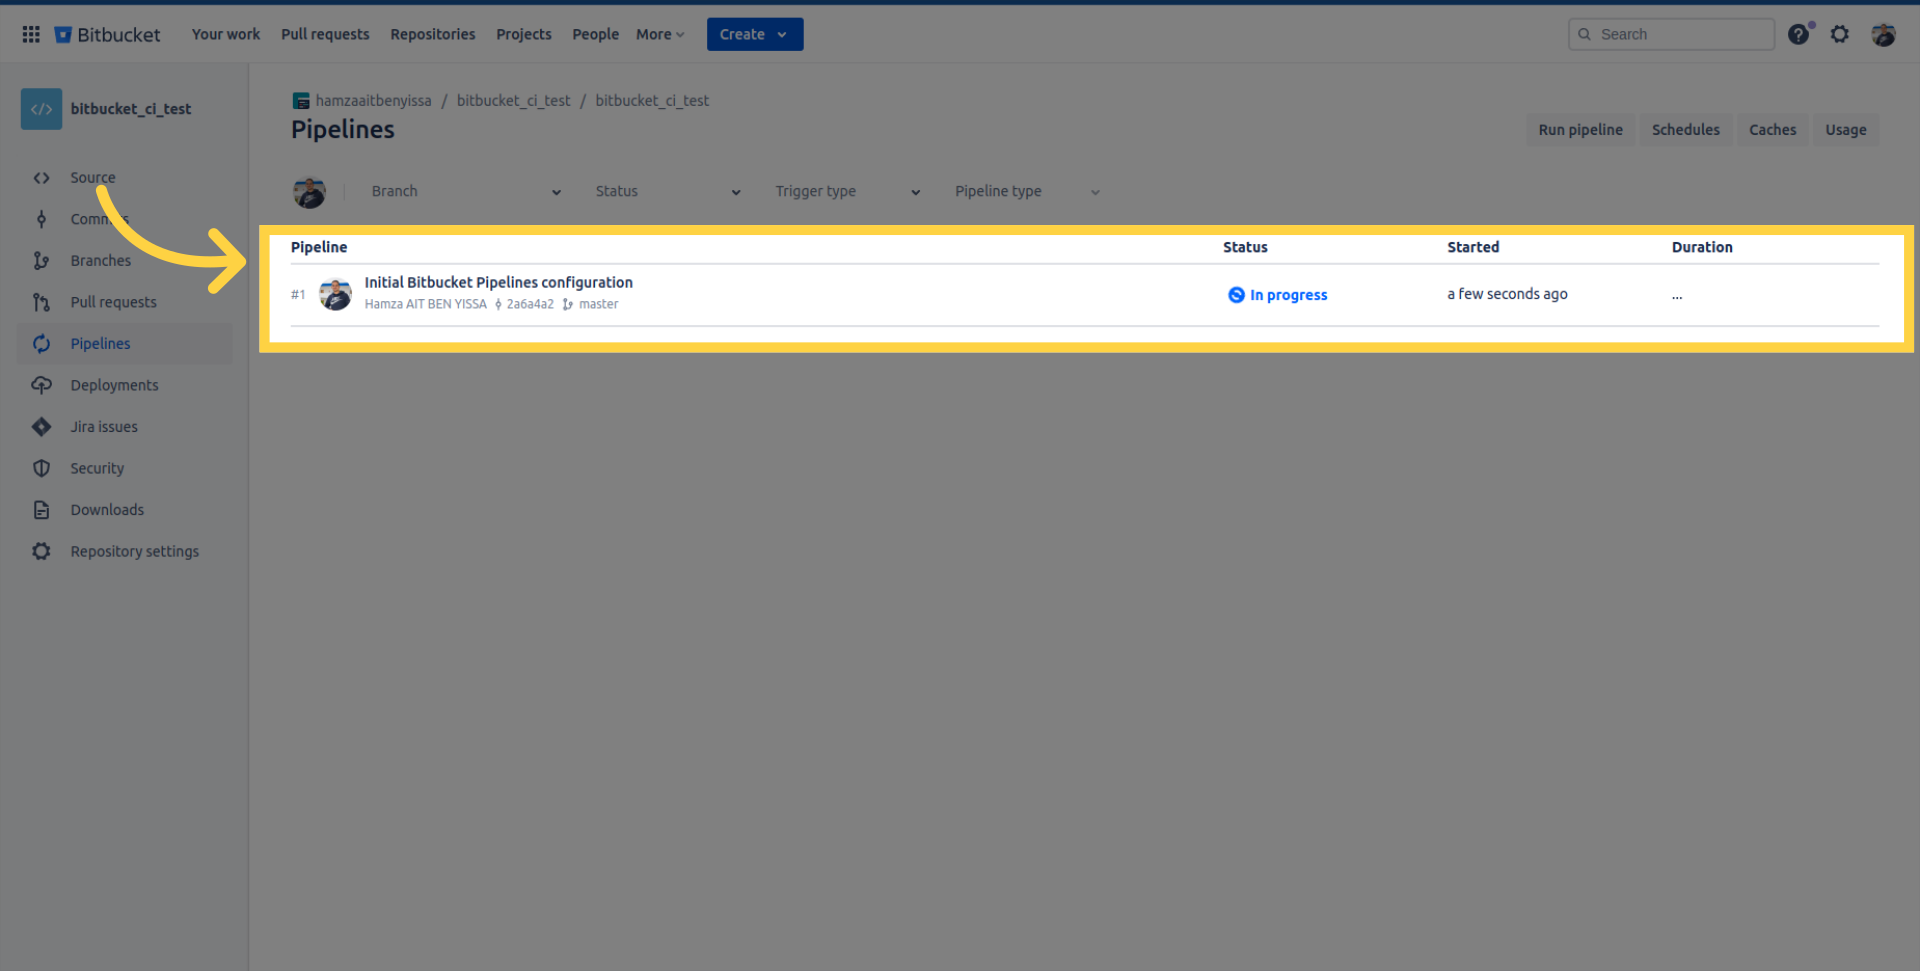
After updating the pipeline, check the progress here.
Check the pipeline logs for details, retrieve the scan ID, and monitor your scan within your organization account on Ostorlab.
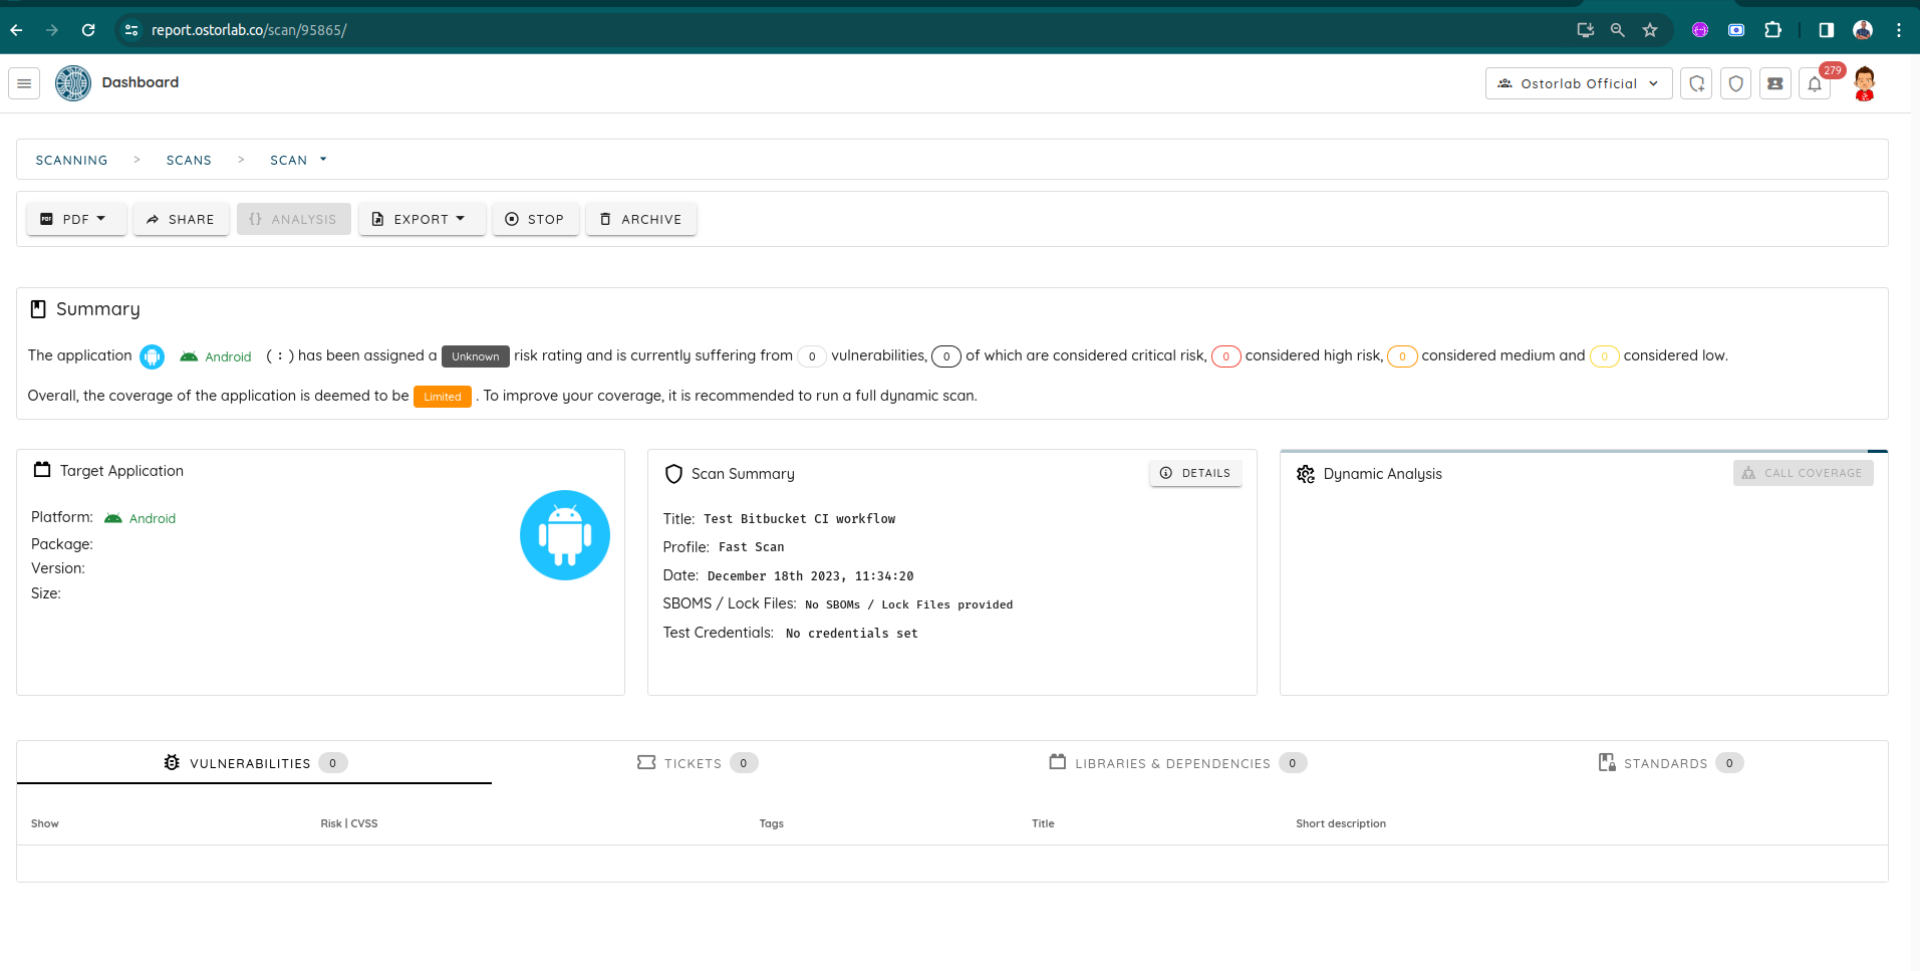
For example, this is the report for the current scan.
Conclusion
This guide covers the steps required to effectively and easily integrate Ostorlab autonomous security testing for Android and iOS mobile apps into your Bitbucket Pipeline.