Ostorlab Integration with Jenkins
1. Generate a new API key
The first step is to generate an API key. To do so, simply follow the following steps:
Go to report.ostorlab.co
Click the Menu button

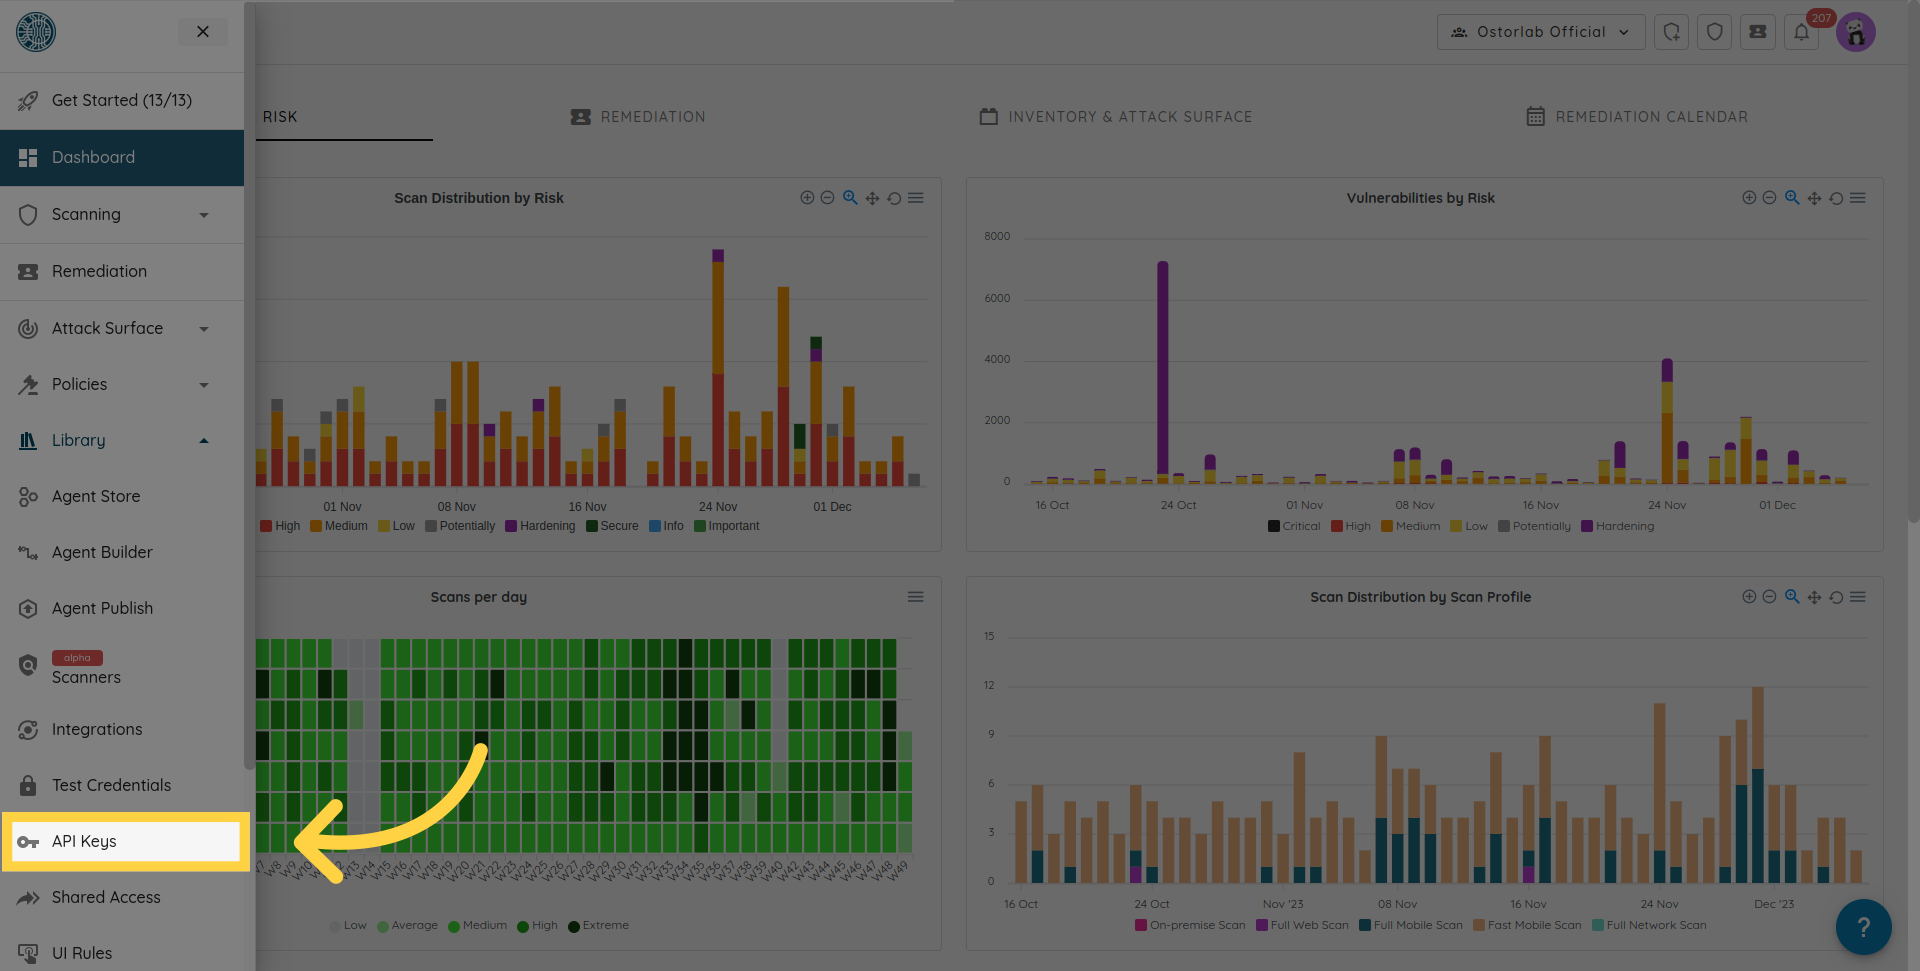
Click Integrations/API to expand
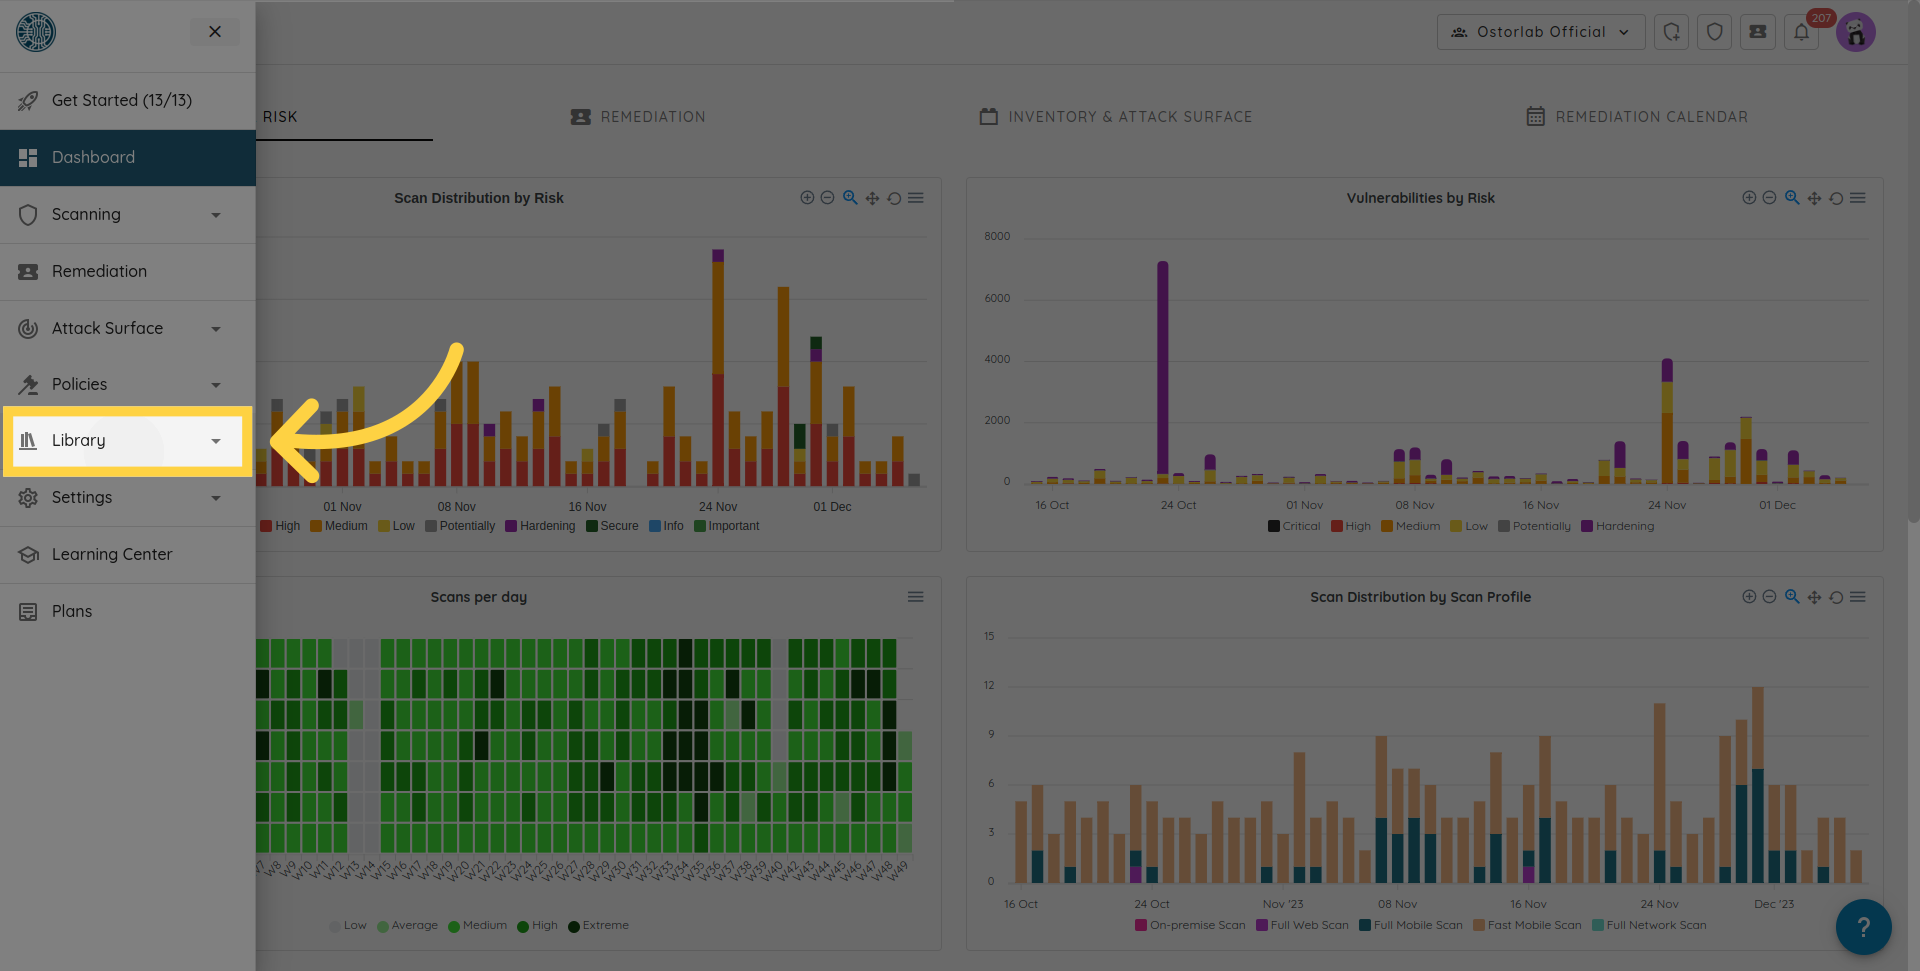
Click API Keys
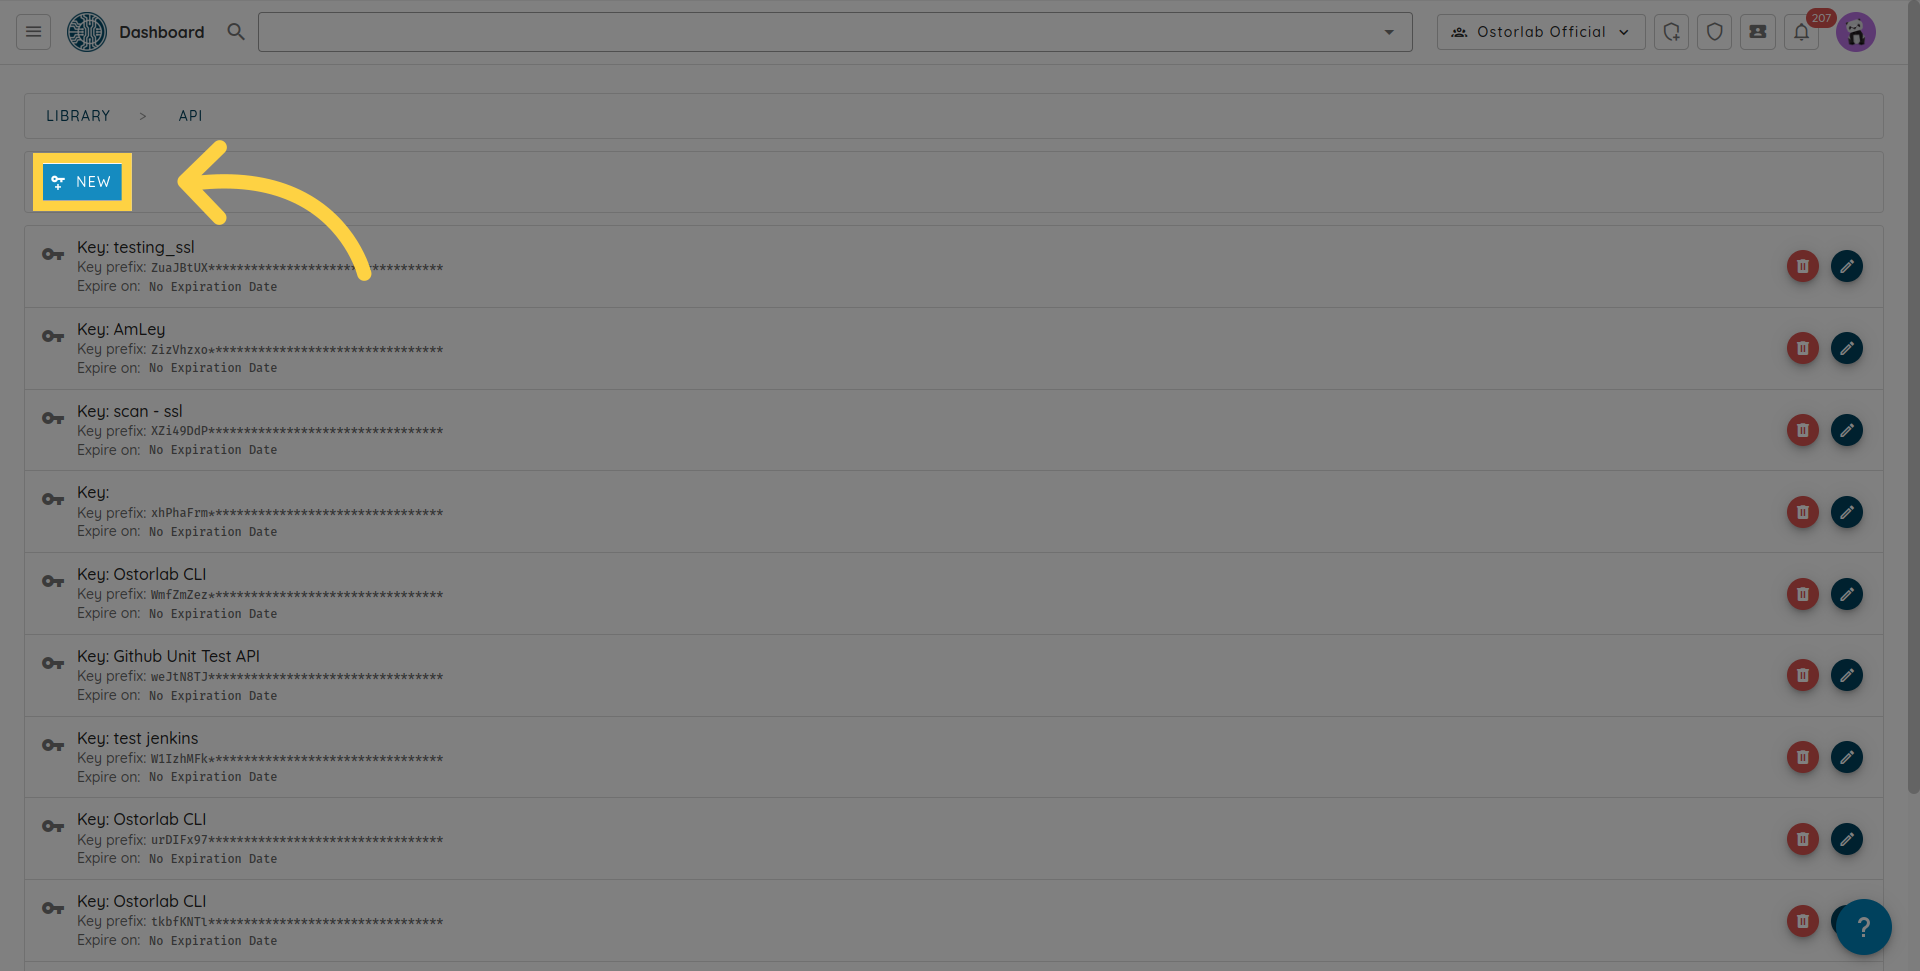
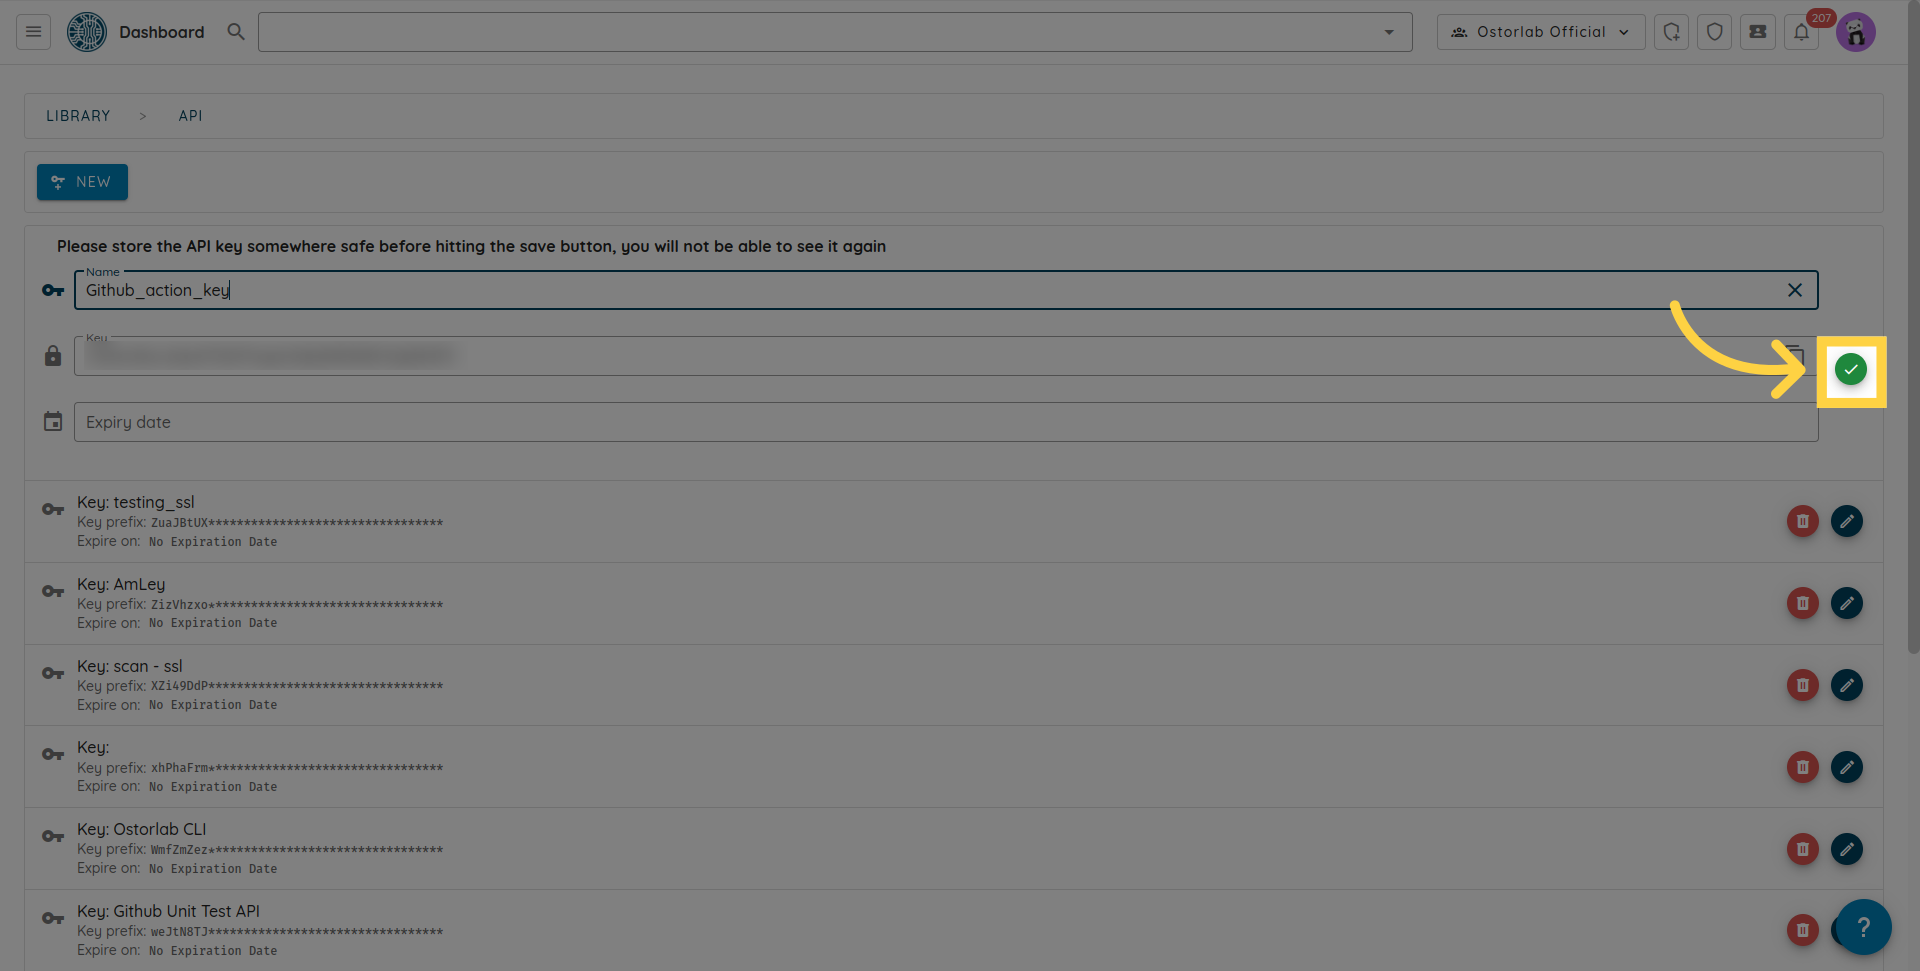
Click New to generate a new API key
Copy the API key. You can also add a name and an expiry date to your key.
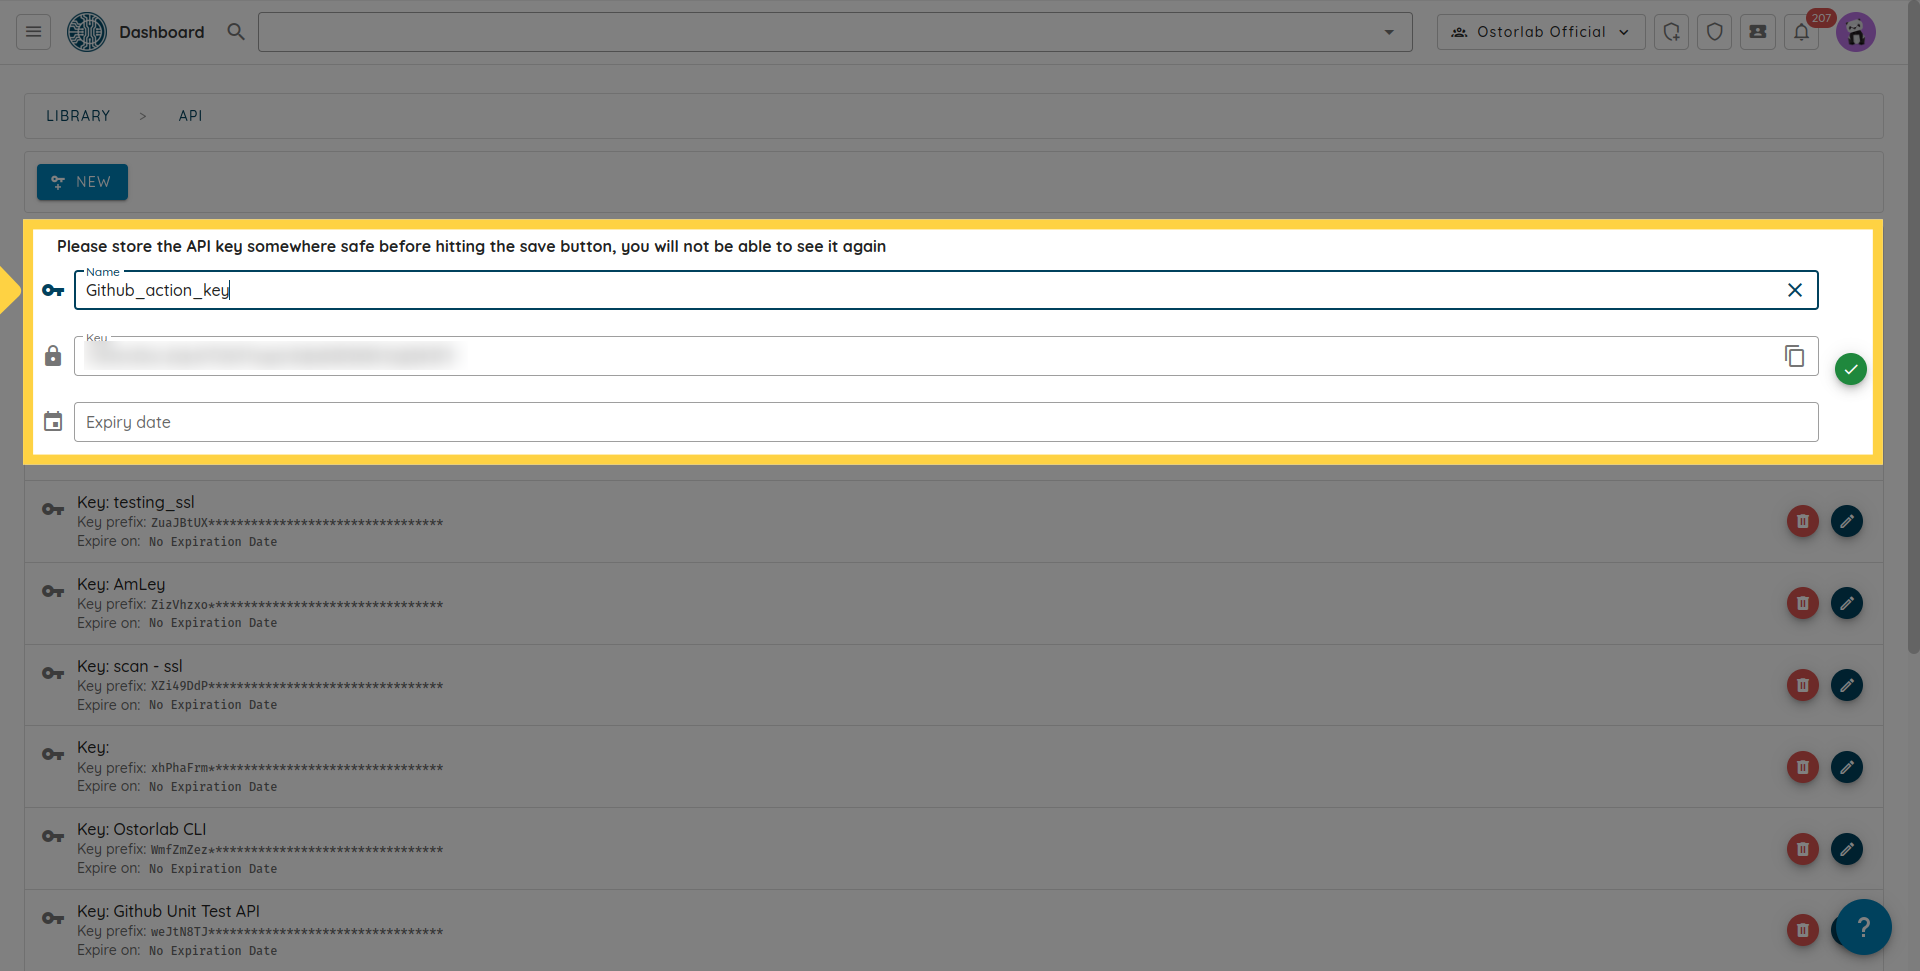
Don't forget to click the save button to save your key.
2. Add Ostorlab's API key to Jenkins Credentials
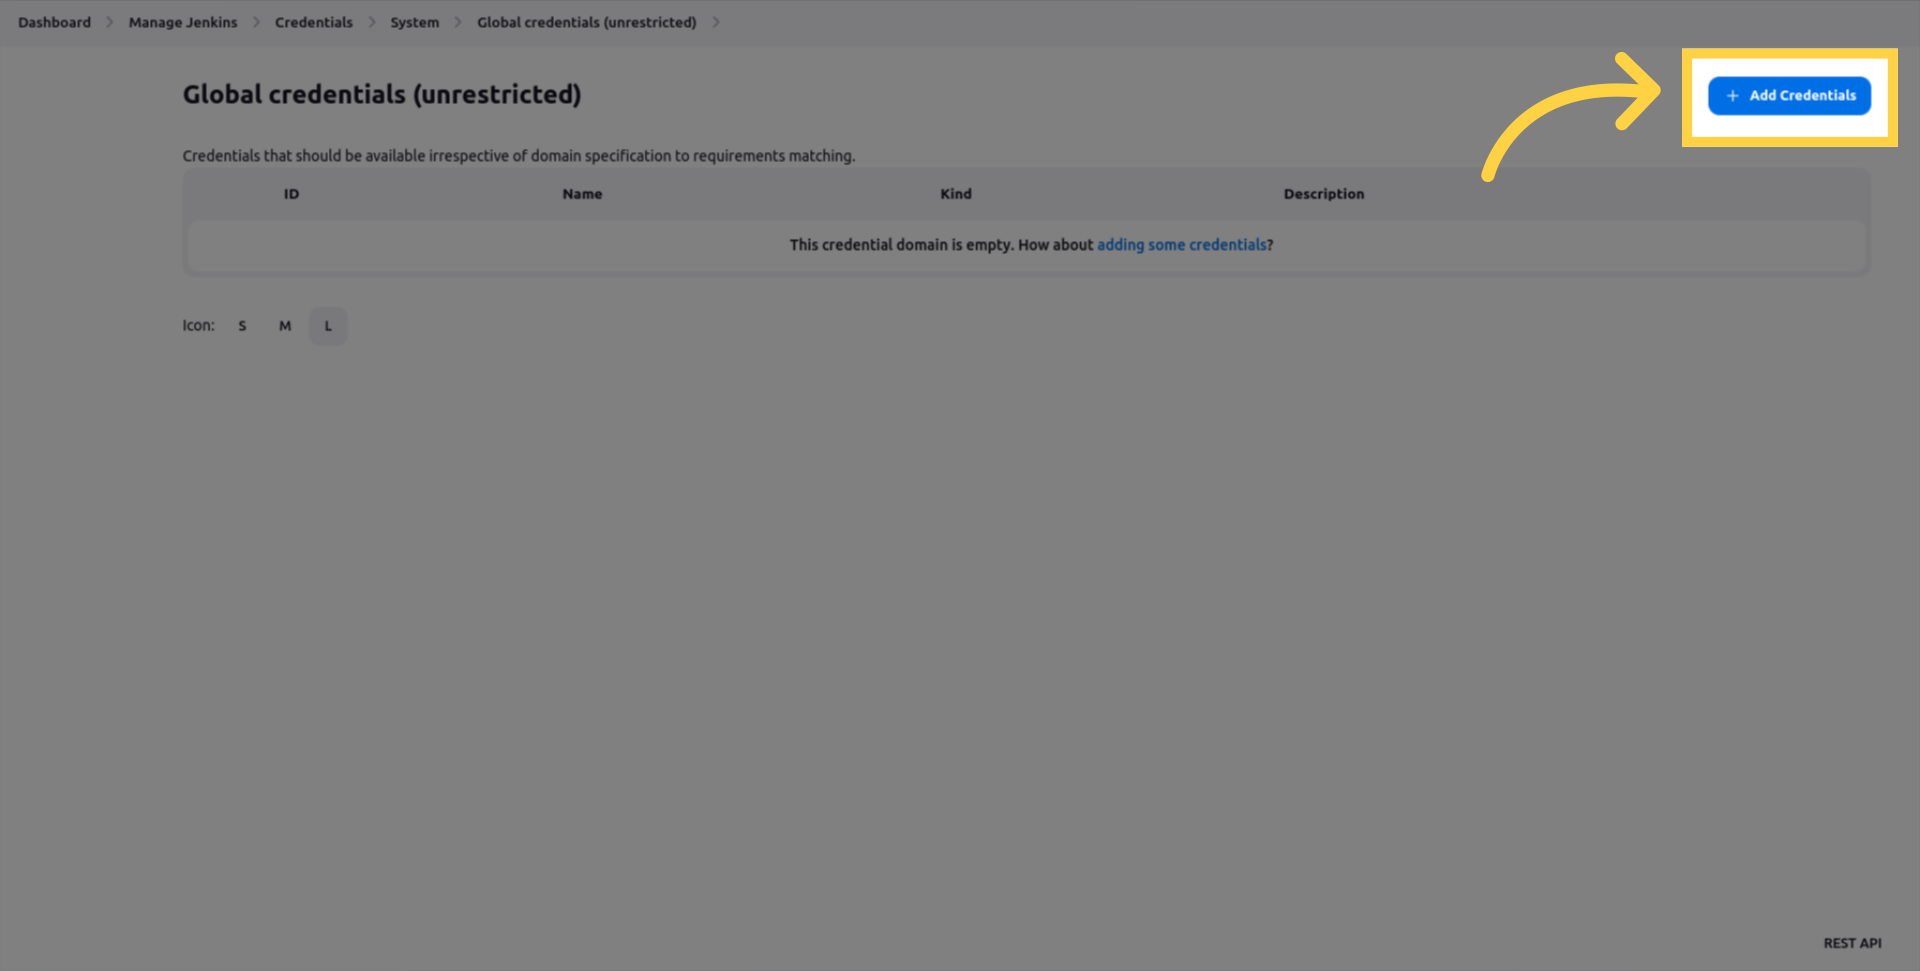
From the main Jenkins dashboard, click the Add Credentials button.
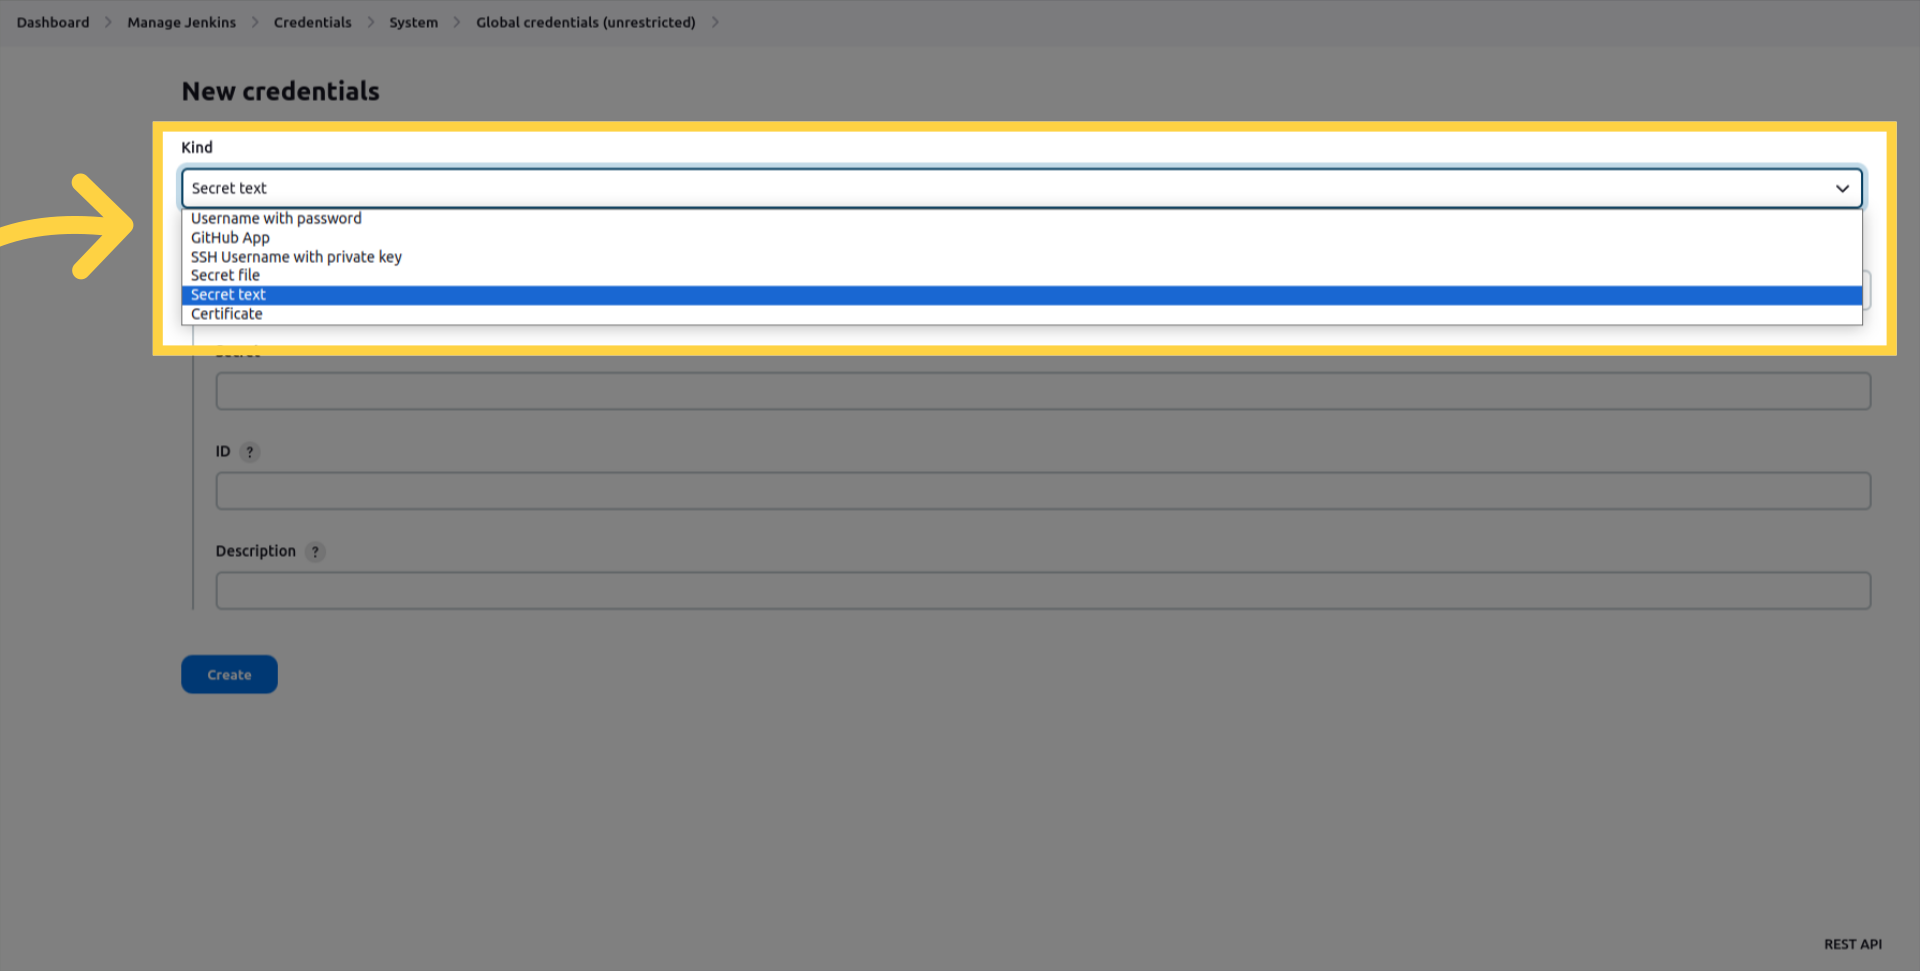
In the Kind drop-down list, select Secret text.
Enter apiKey in the ID field.
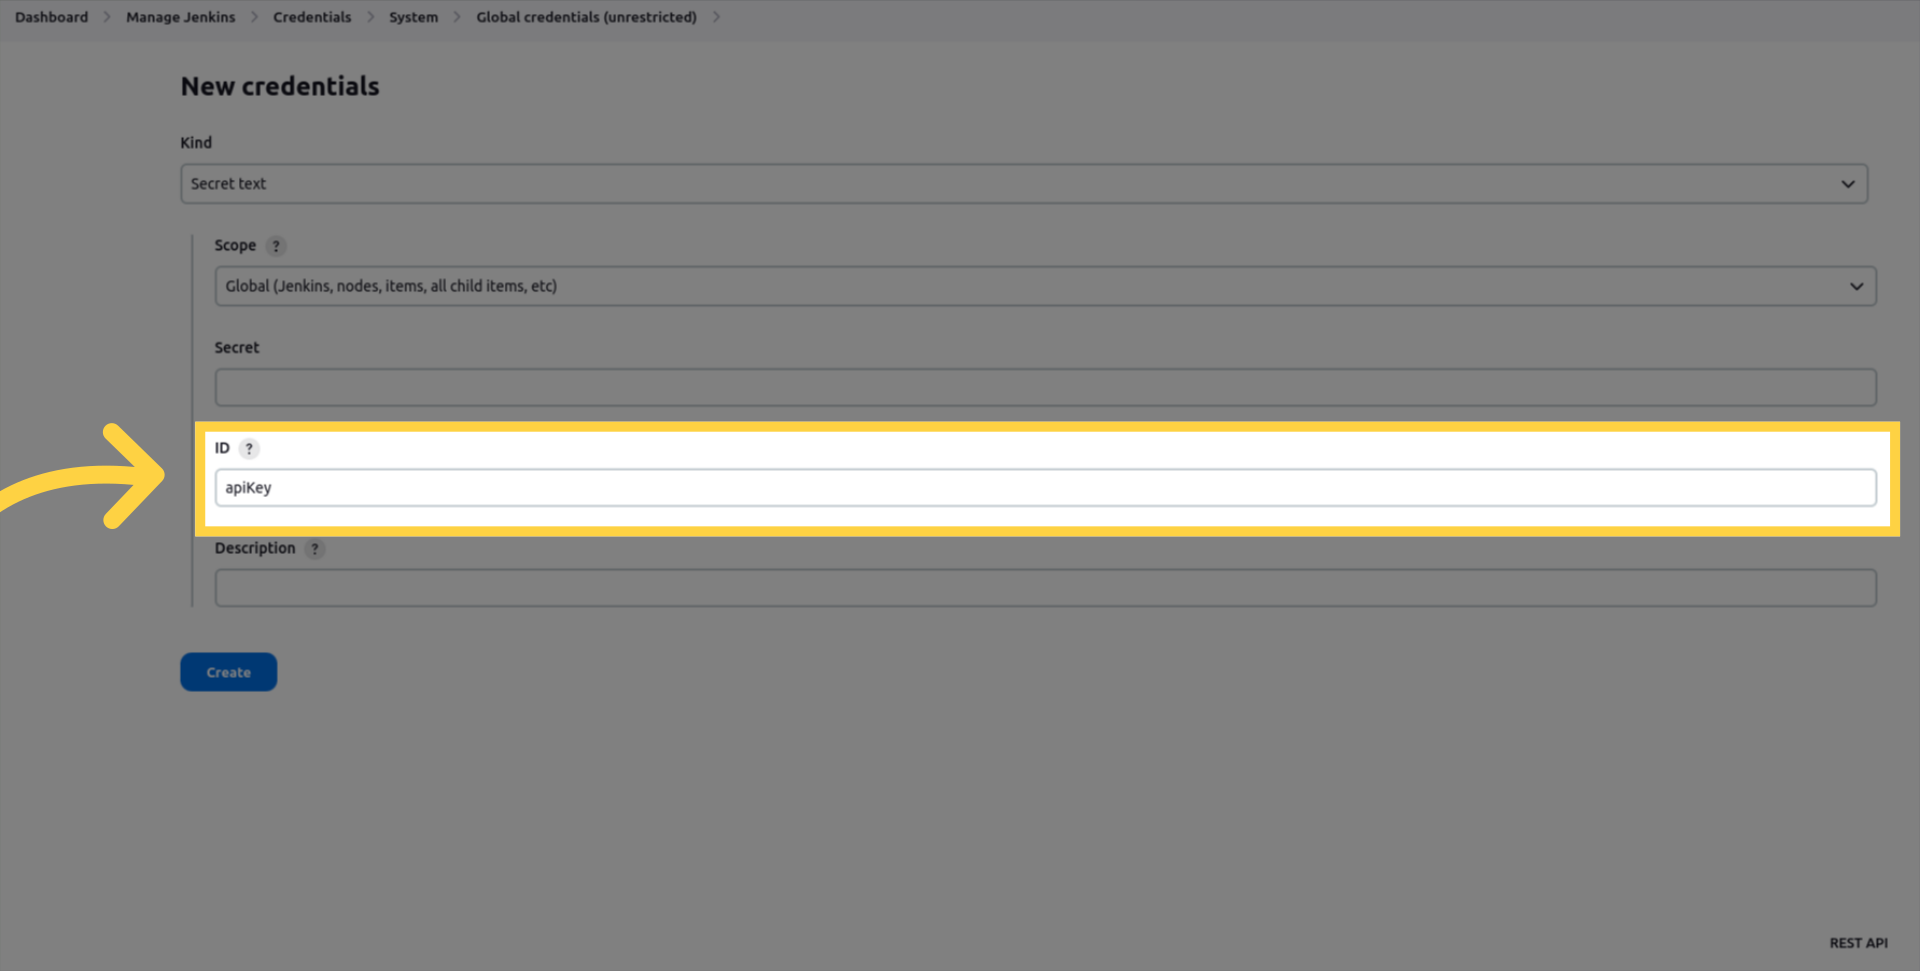
Enter your API key in the Secret field.
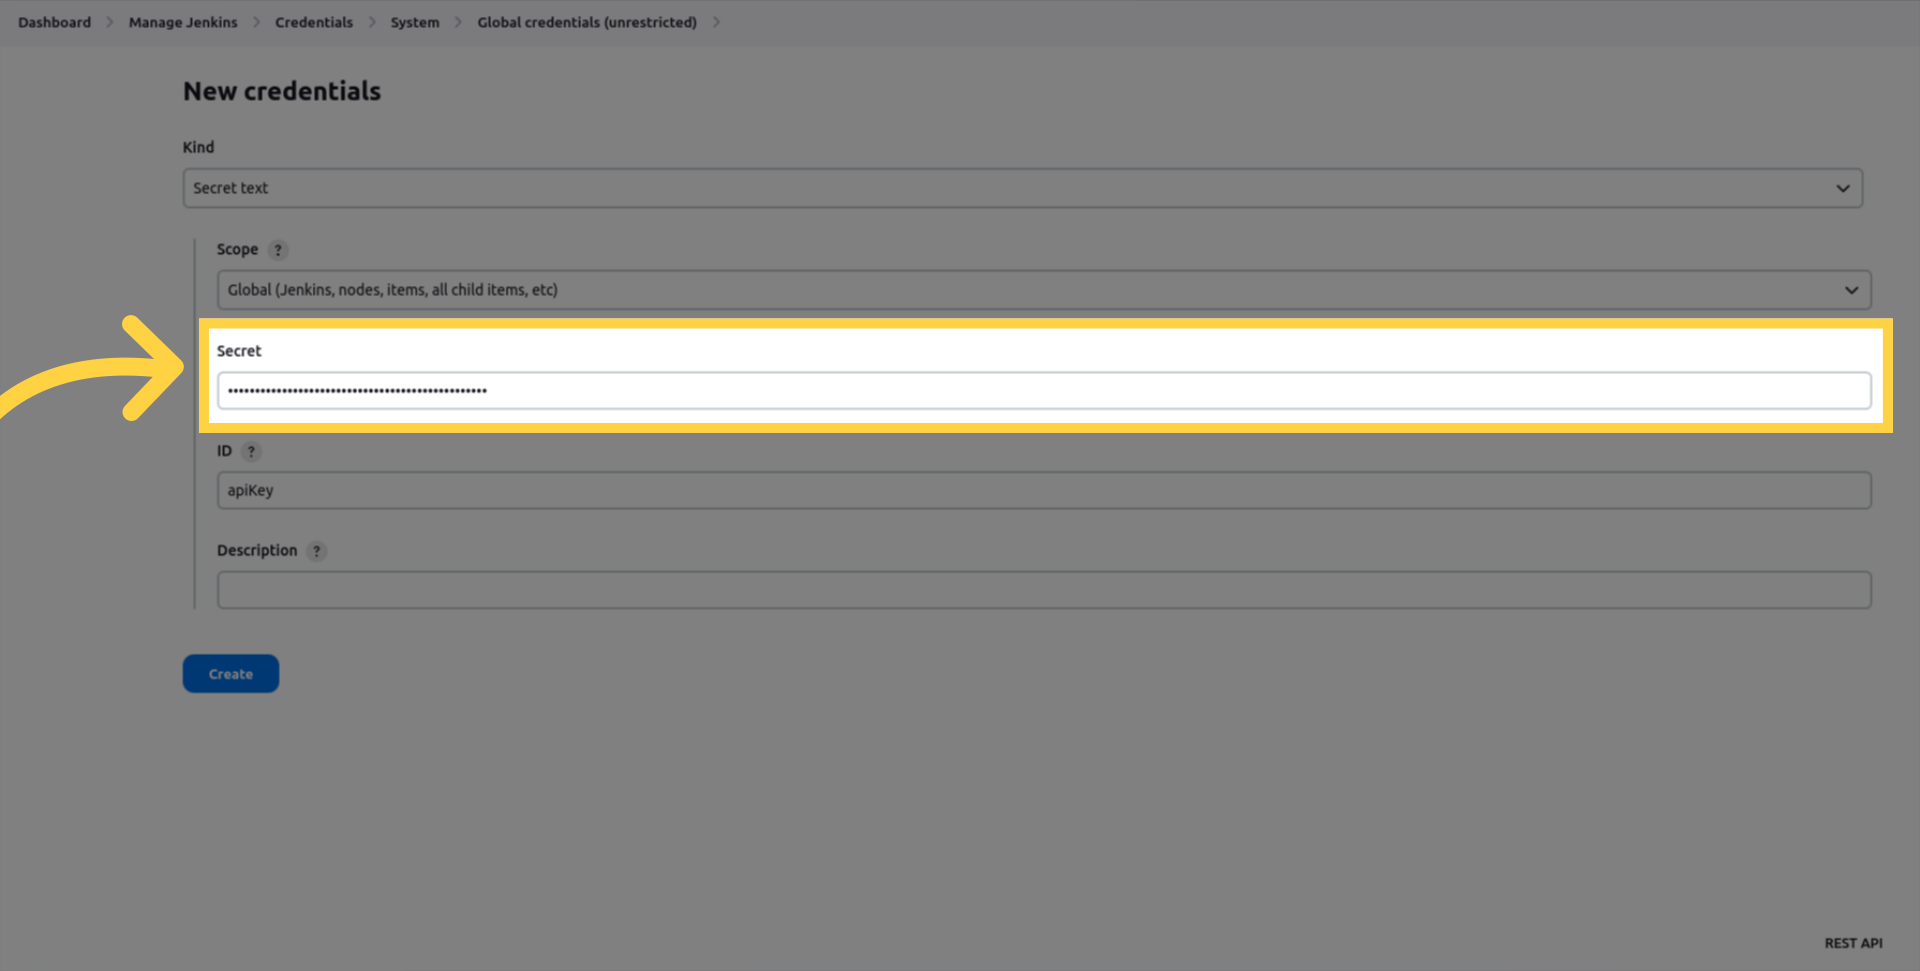
Enter a description to identify the key
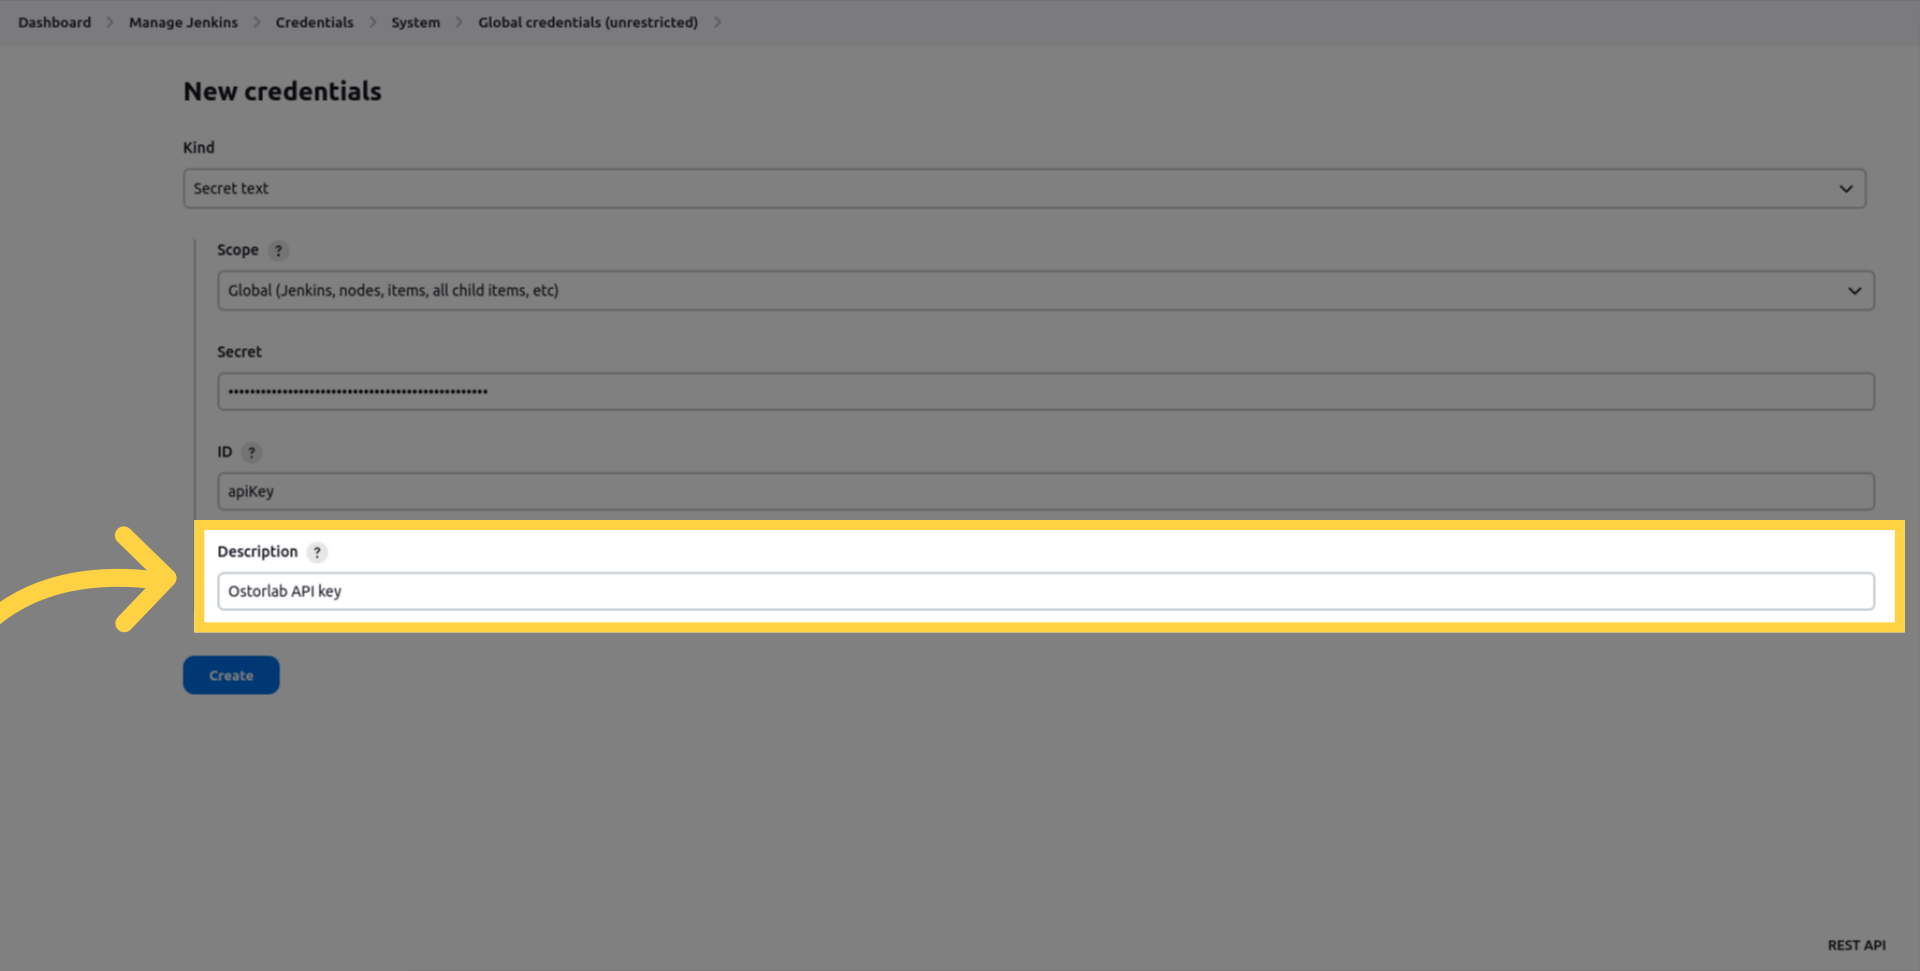
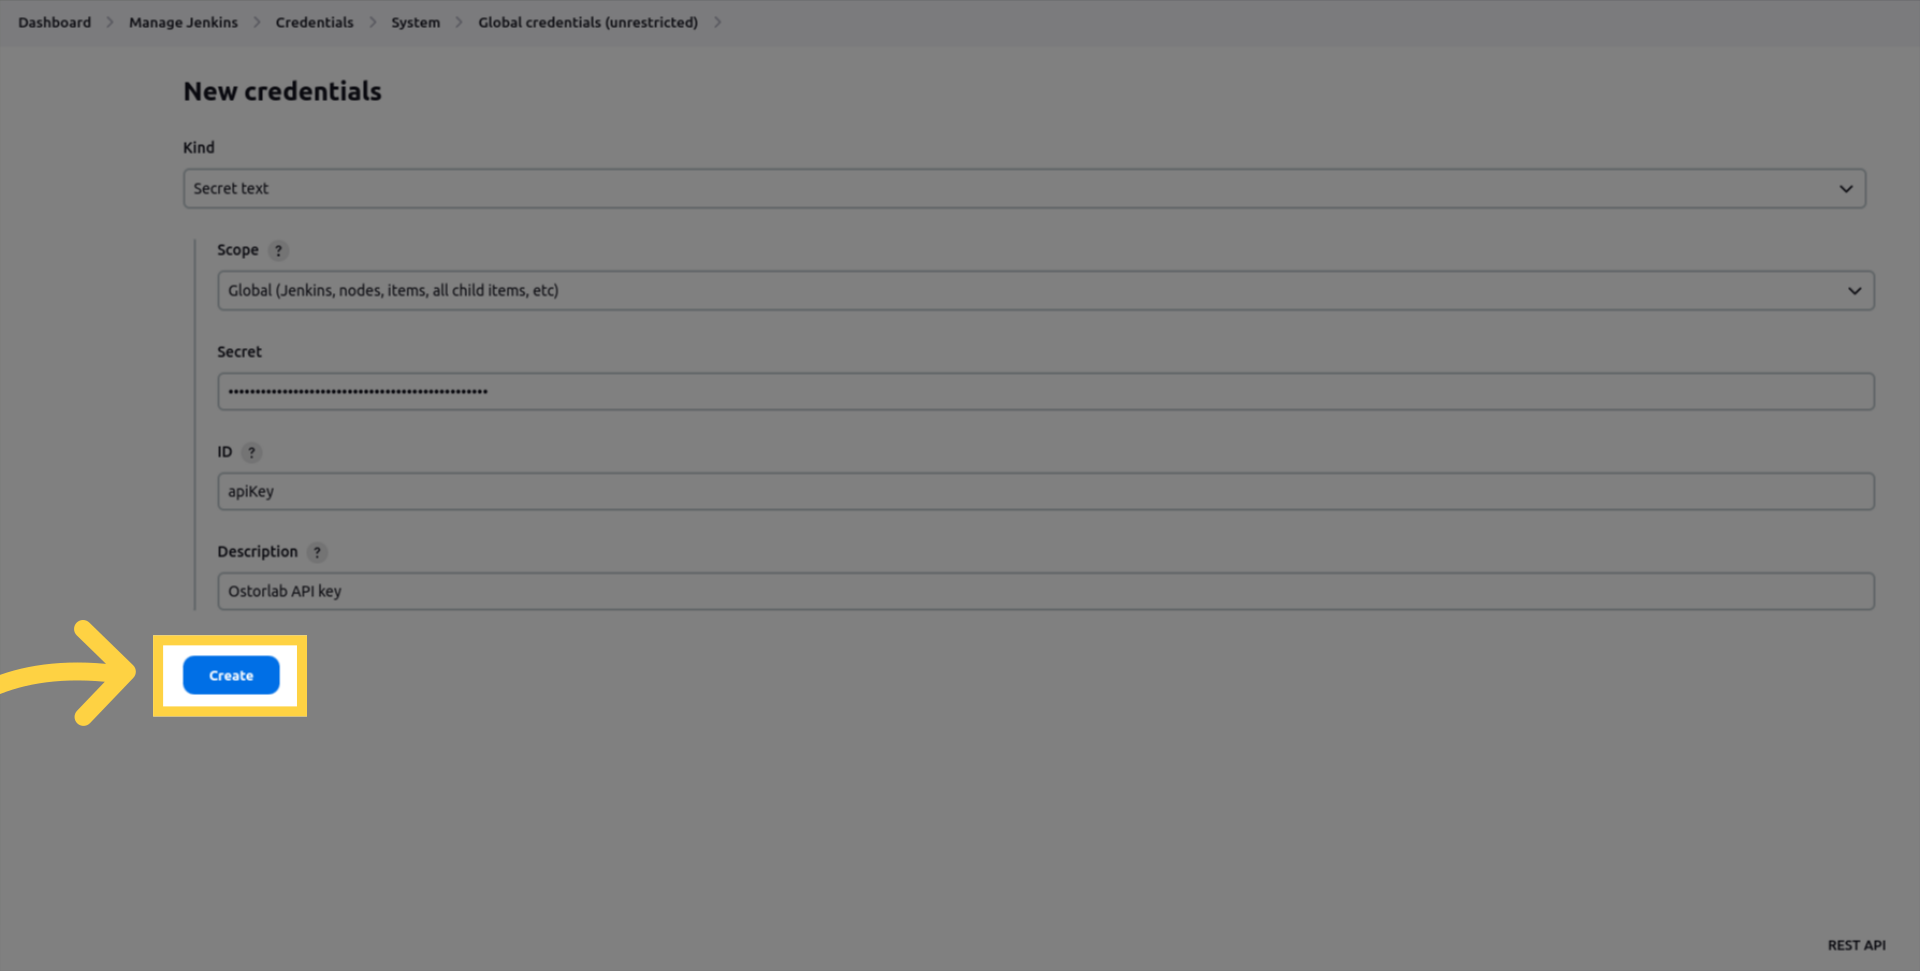
Click create to save the credentials.
Freestyle project
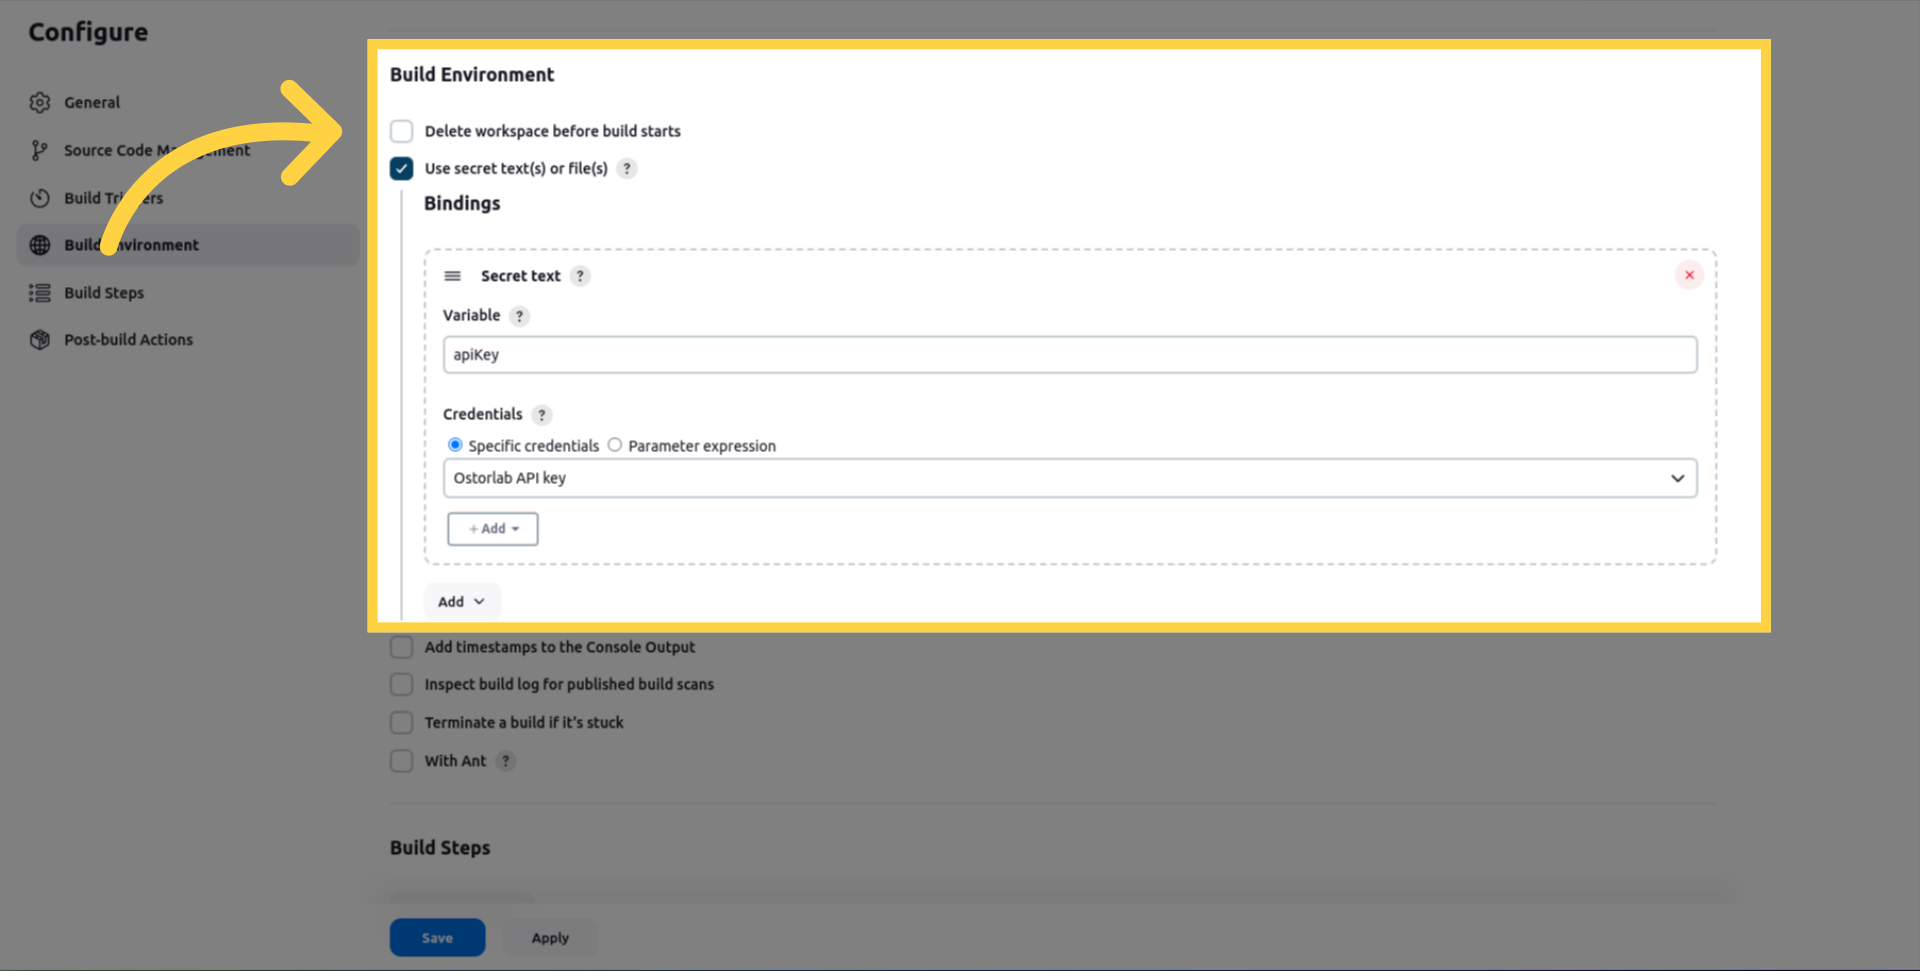
To define jenkins job in your freestyle project, follow the next steps:
In your Build Environment, Add a Secret text binding to your Jenkins project configuration and enter the following information:
Add a "Run Ostorlab Security Scanner" build step to your Jenkins project configuration.
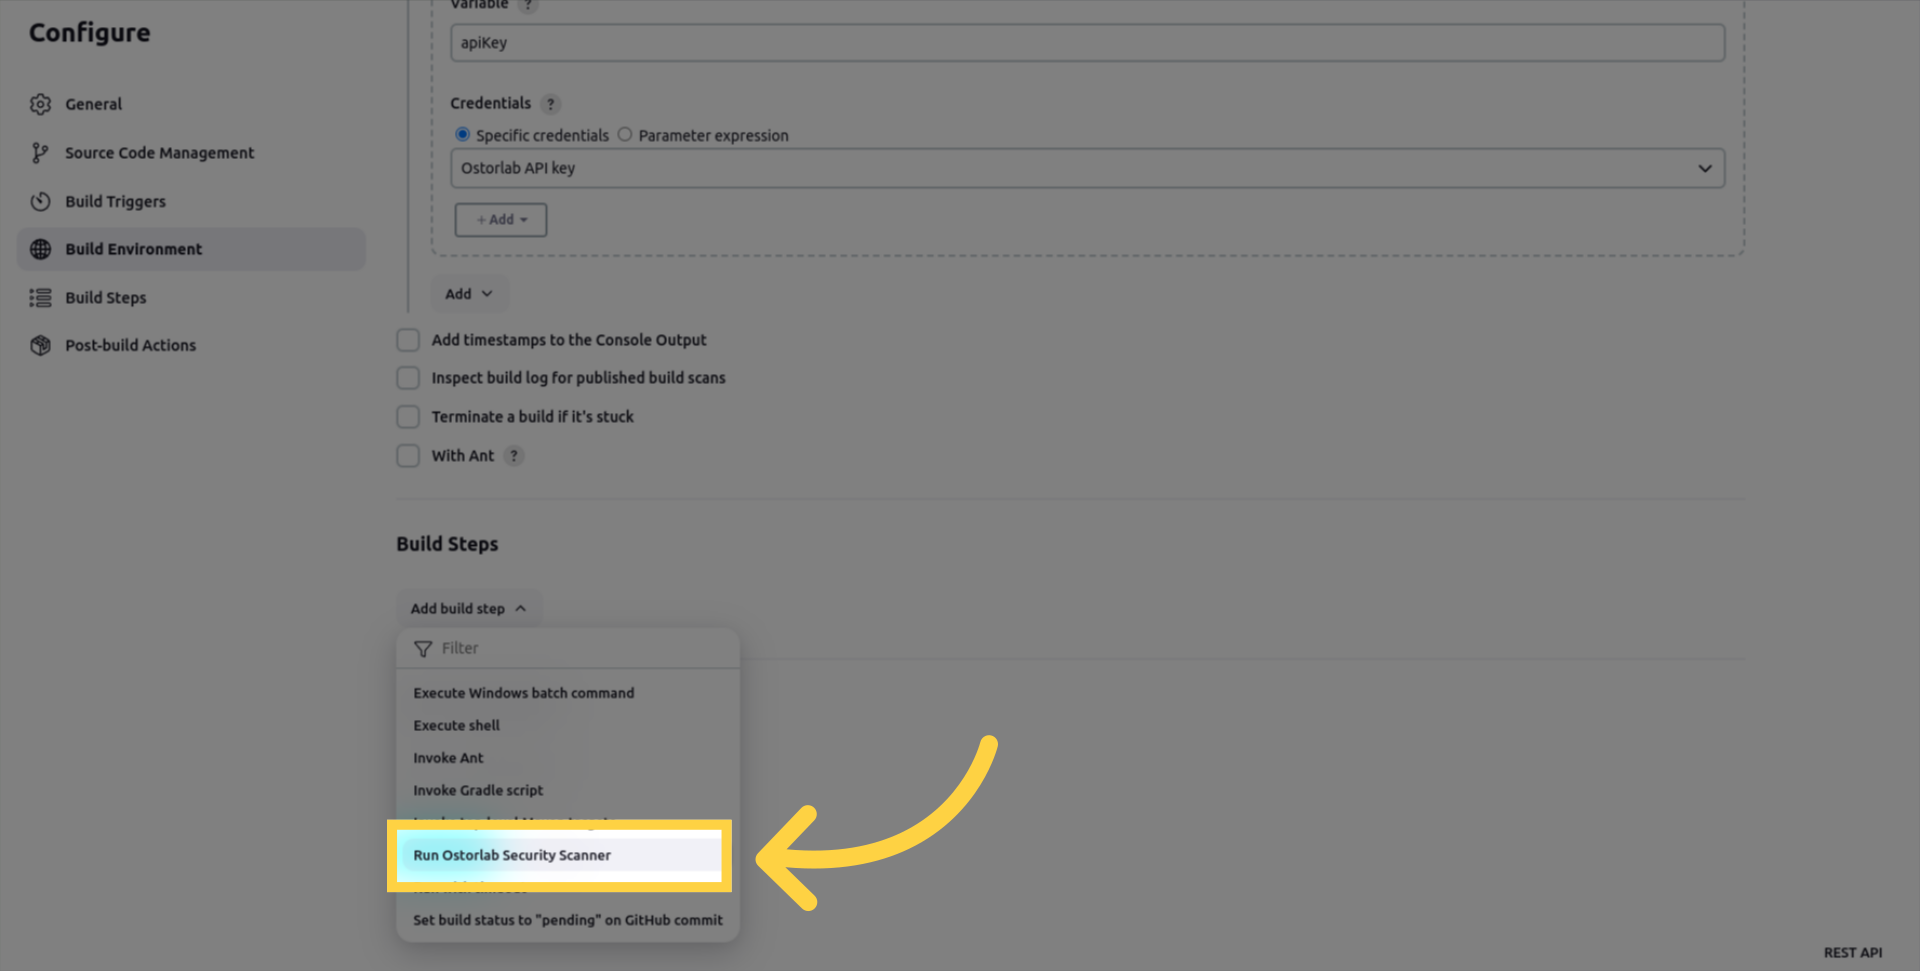
And enter the following information:
the file_path to the mobile application file that you want to scan.
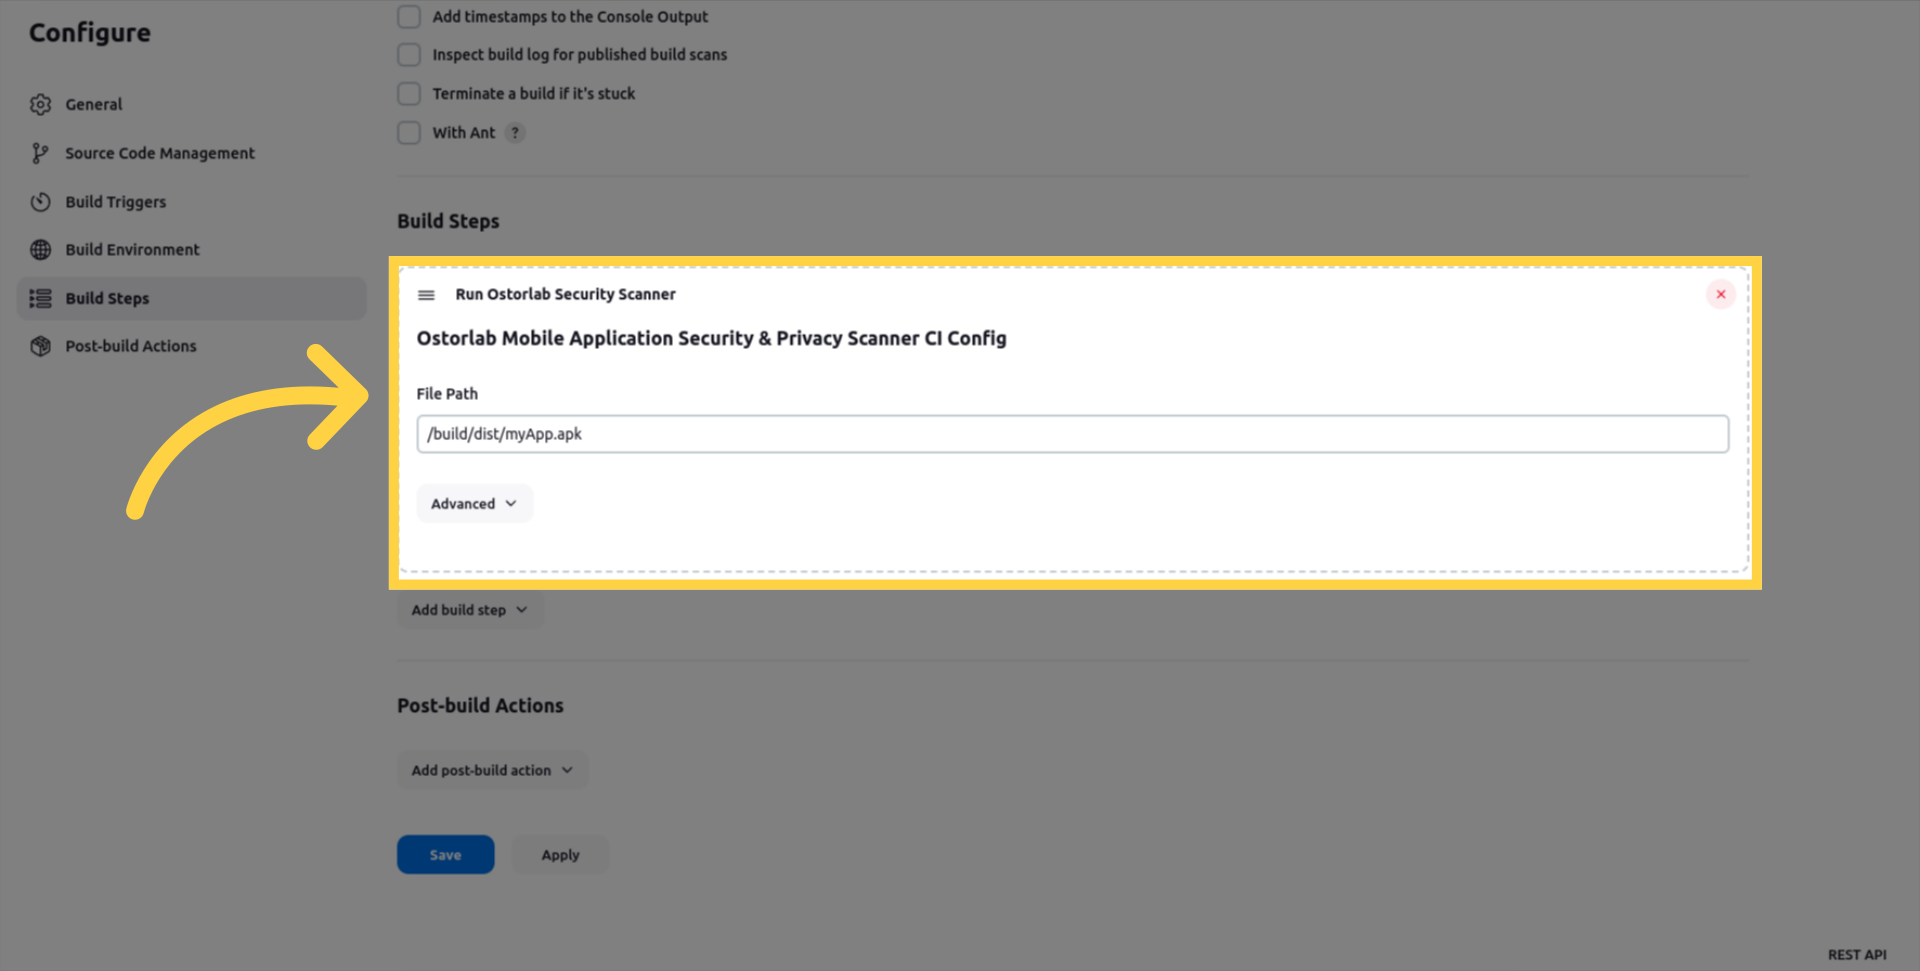
Click on Advanced settings to configure your run:
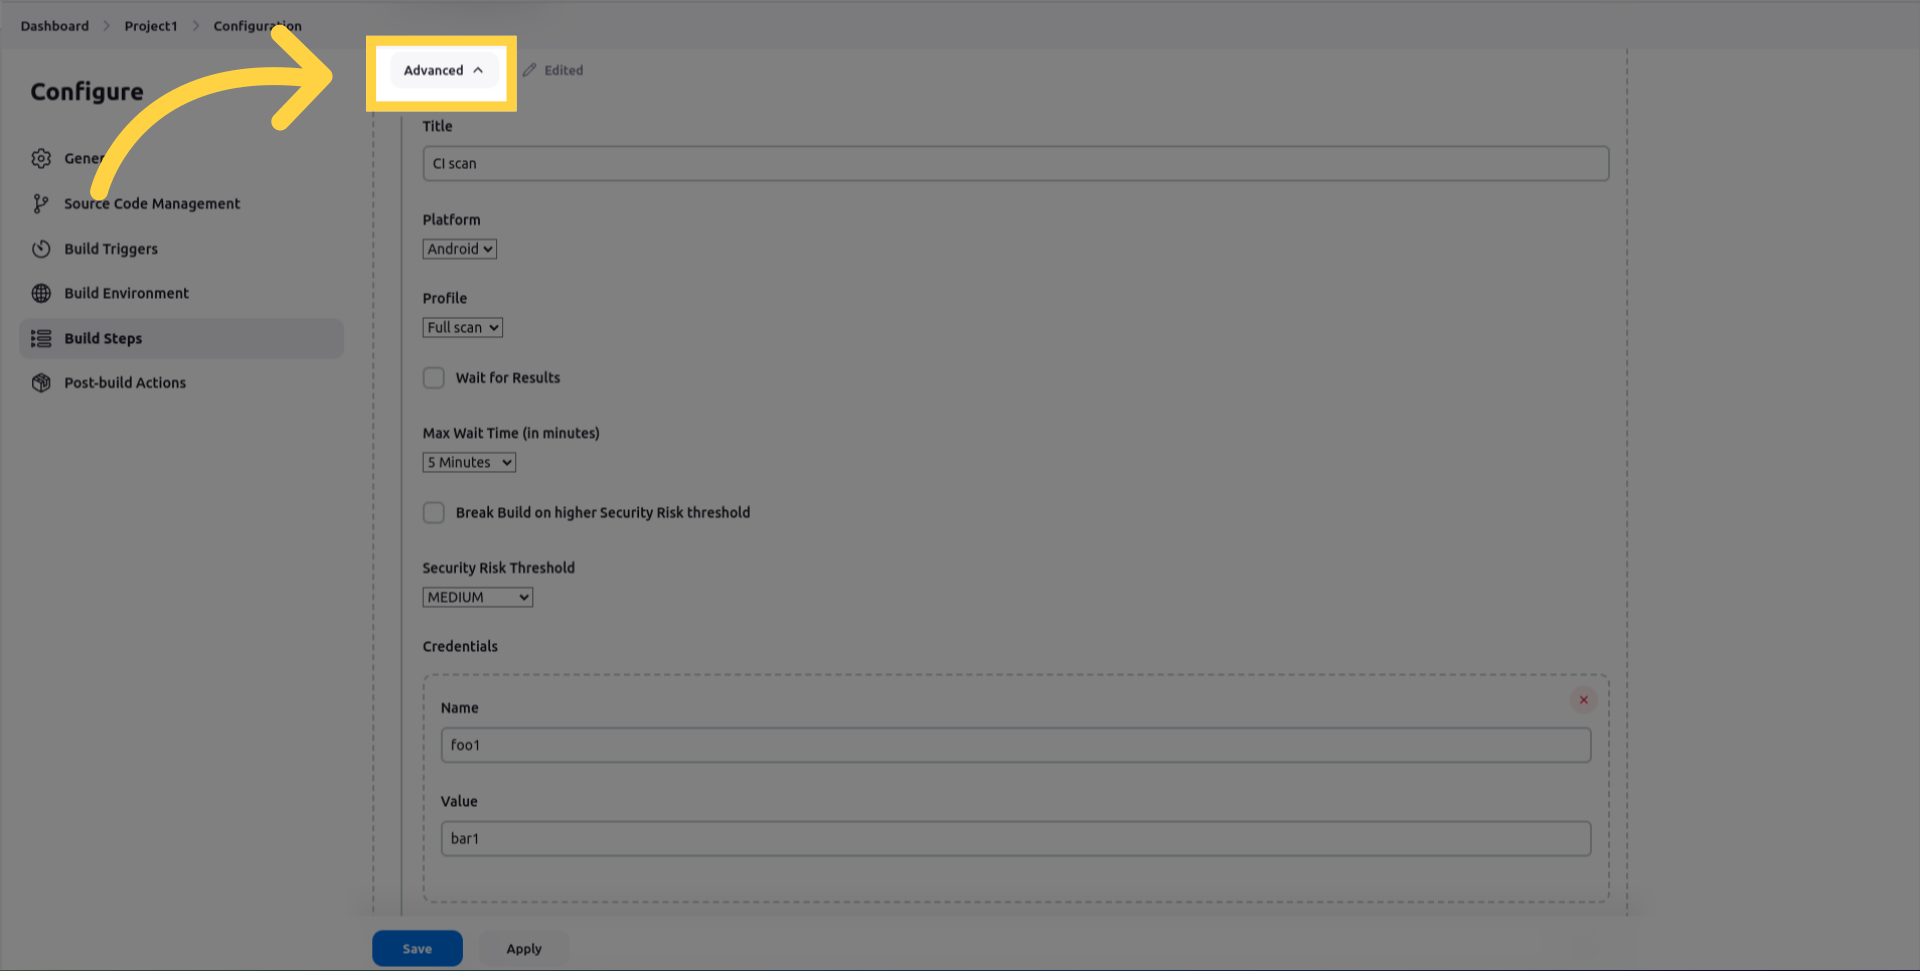
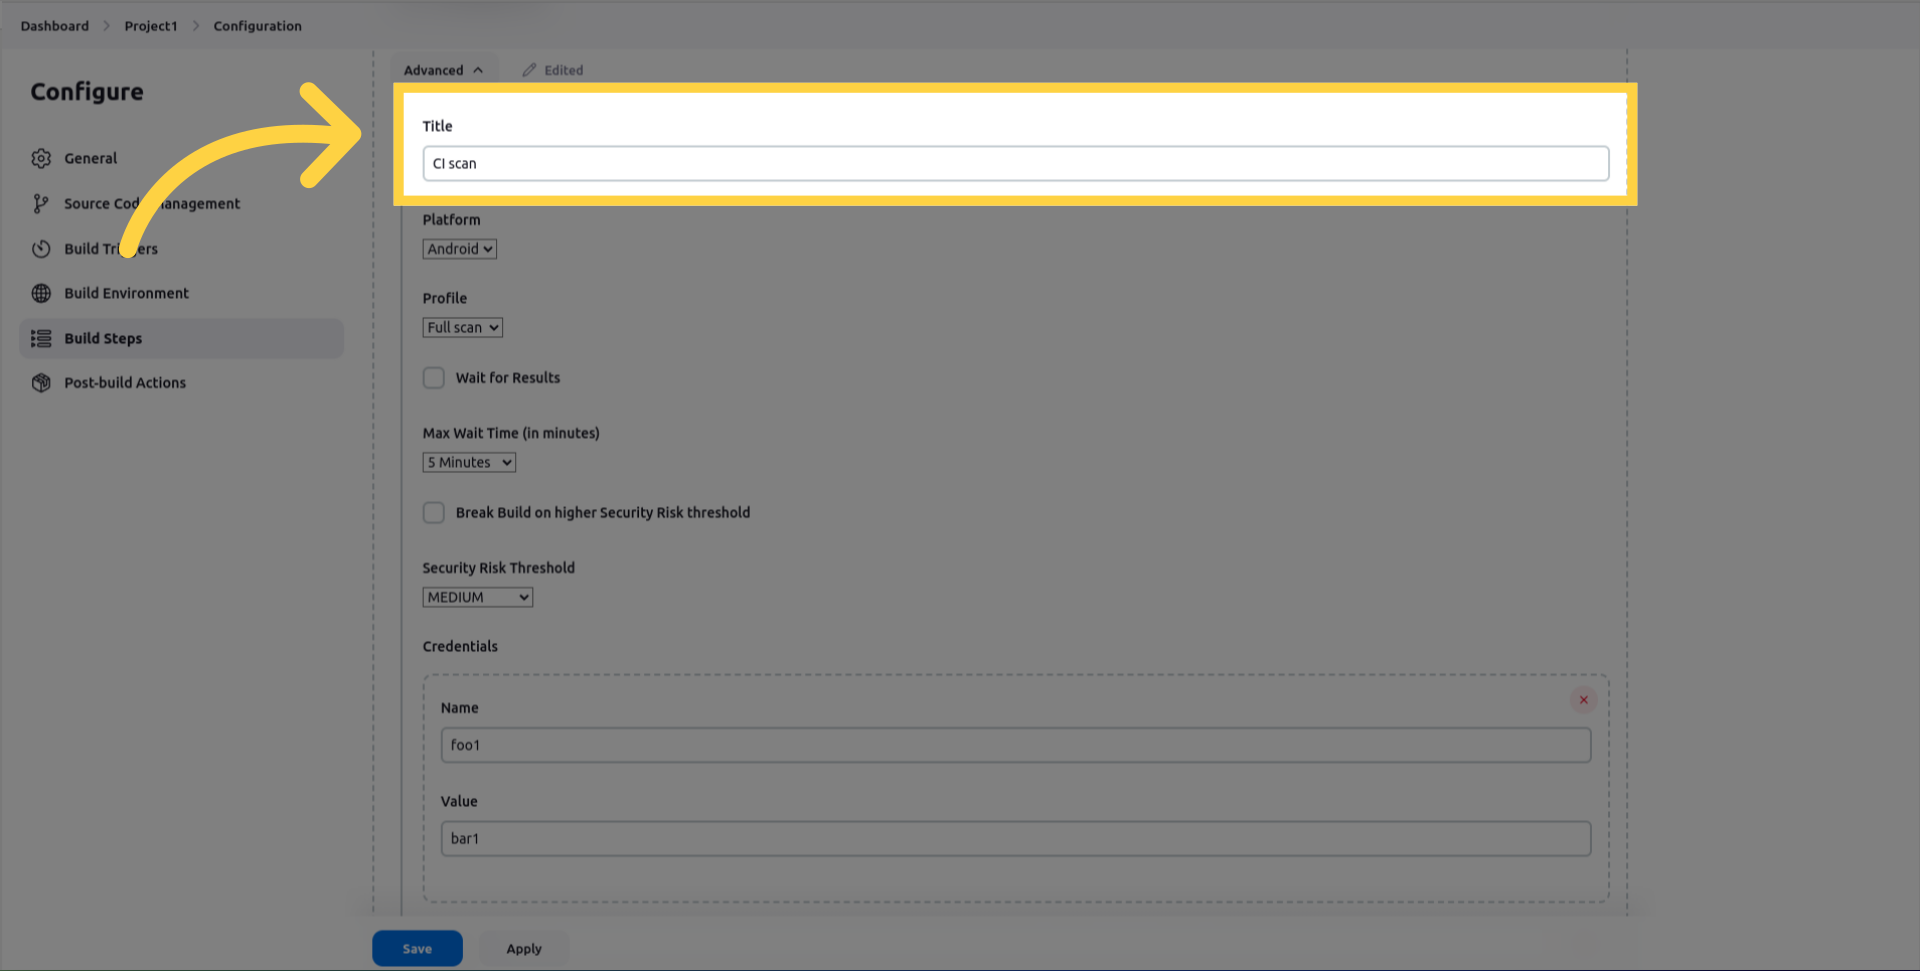
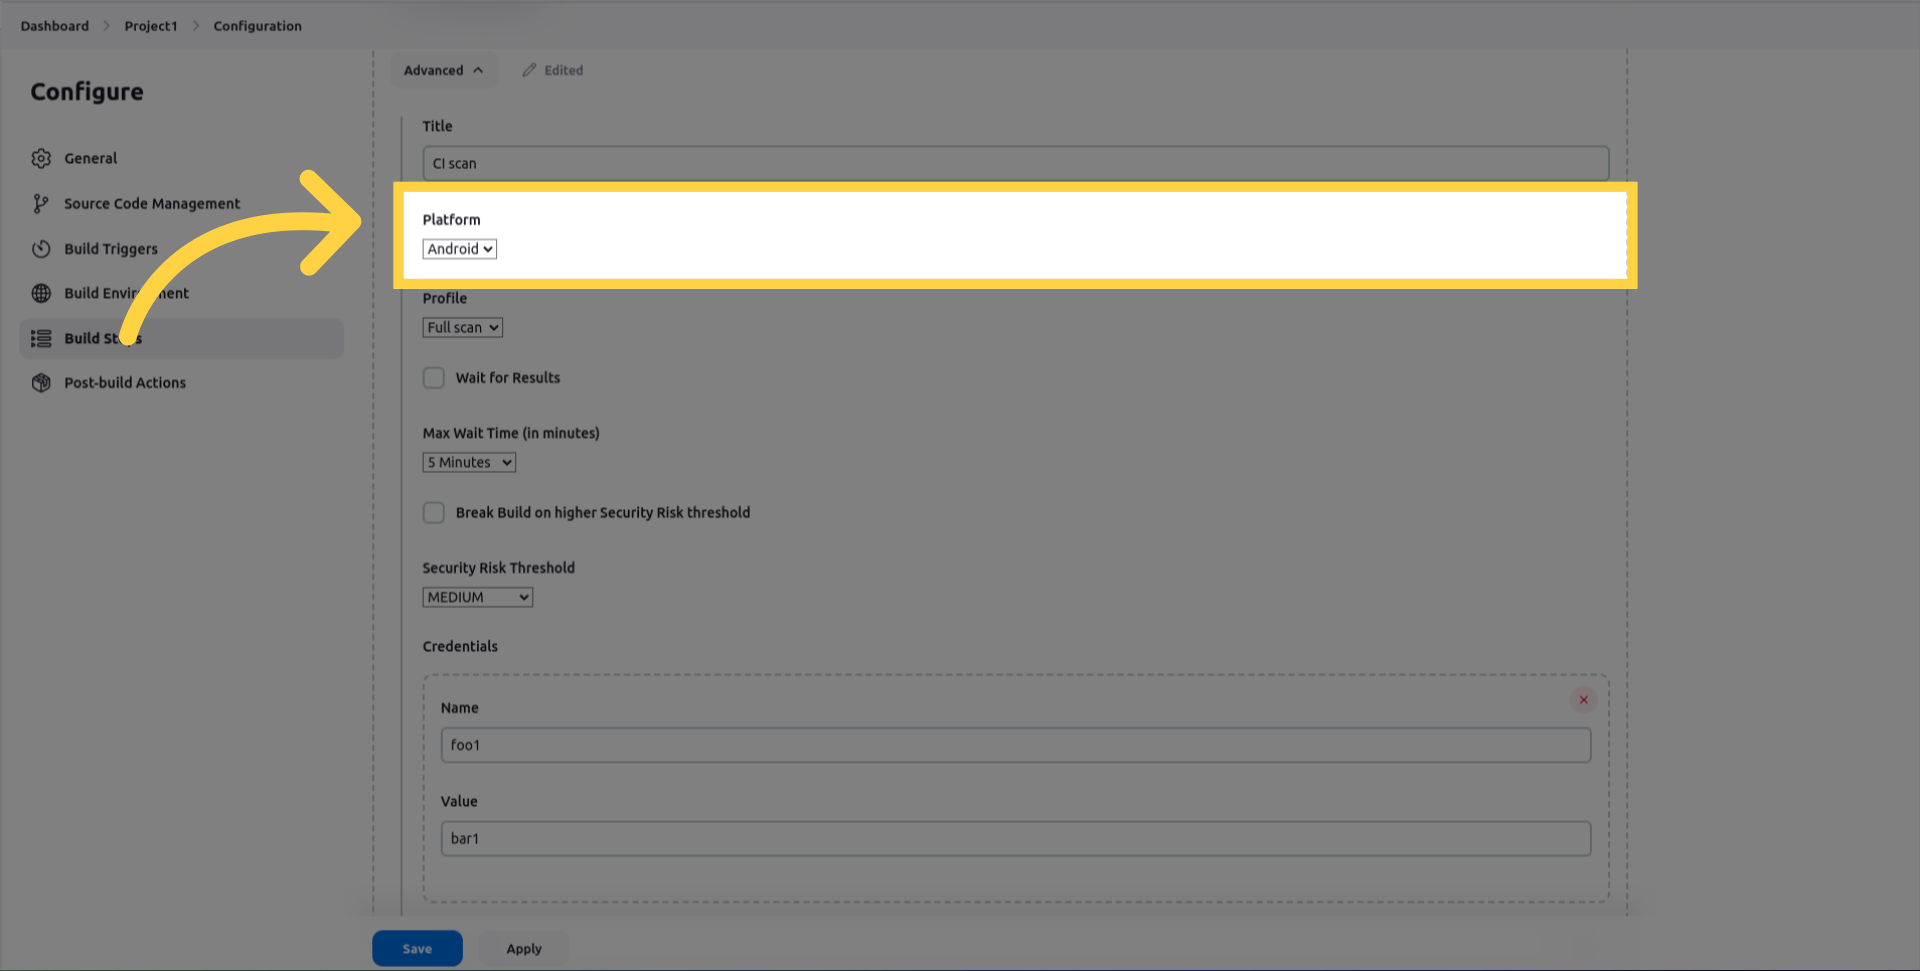
Enter the scan_title.
Select whether the platform is Android or iOS.
Select the scan_profile to use for the scan. You can choose between Fast Scan for rapid static analysis or Full Scan for full Static, Dynamic and Backend analysis.

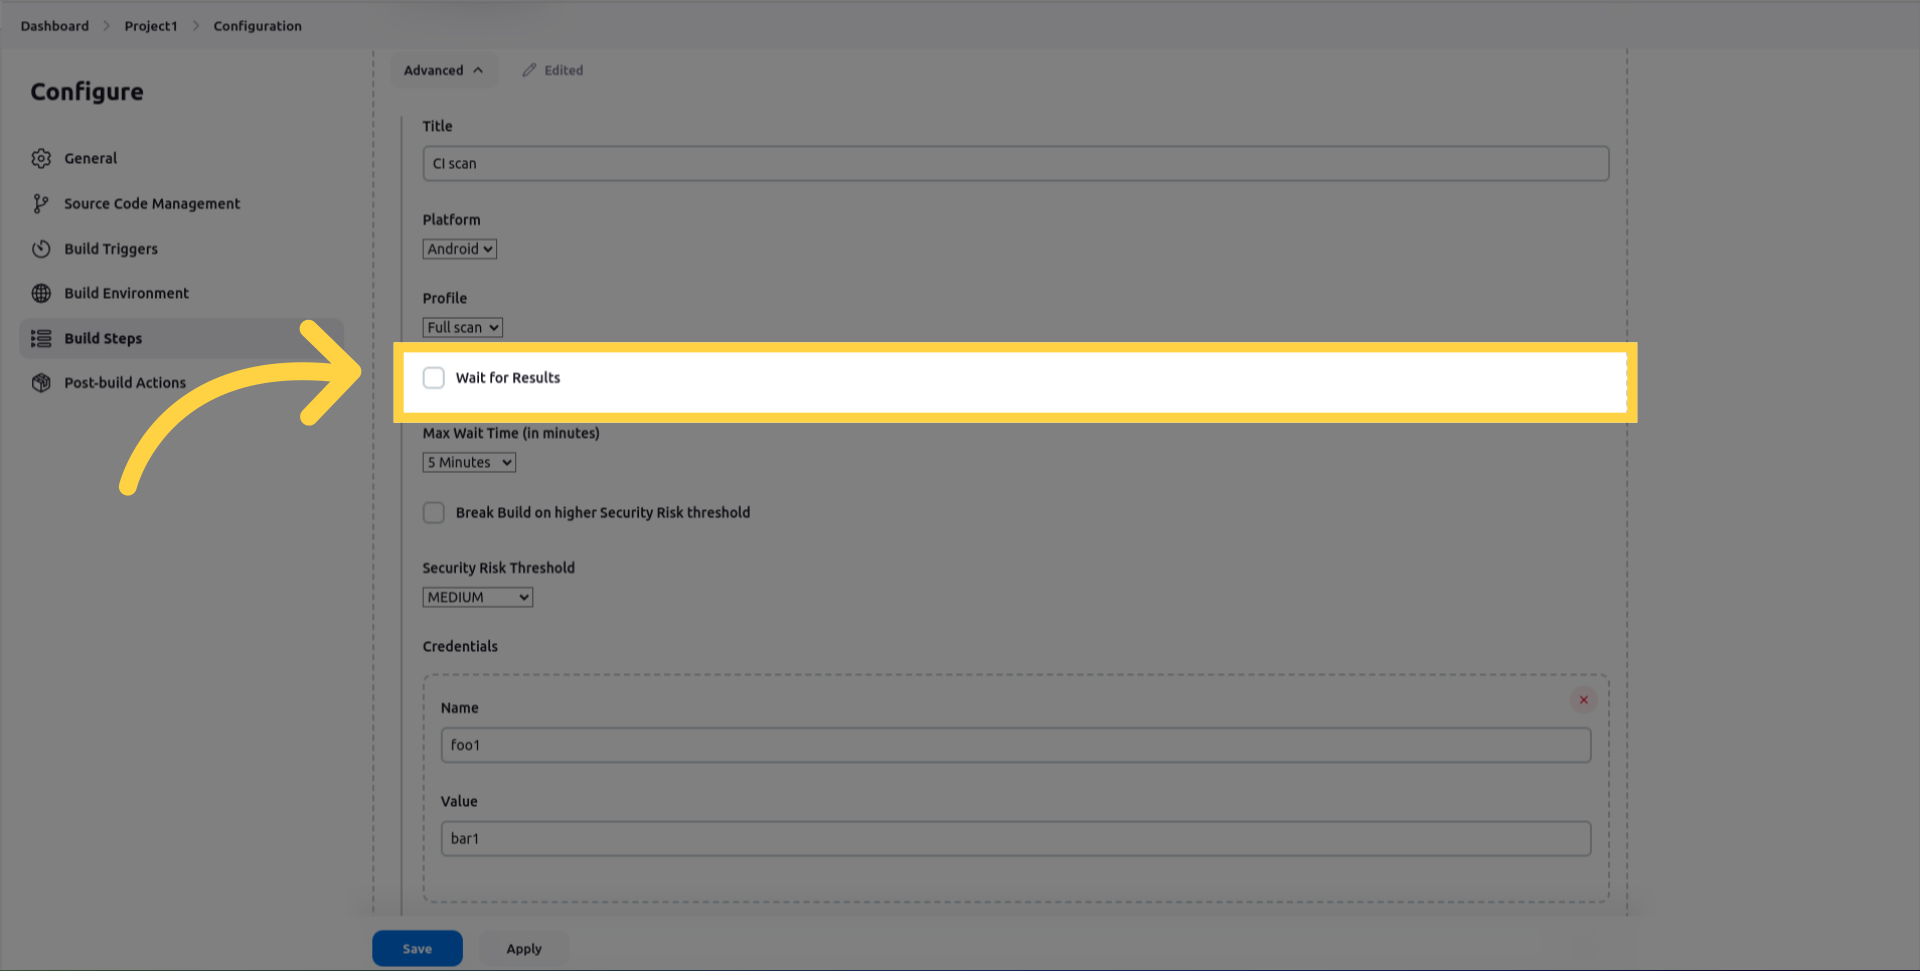
wait_for_results which Suspend the job until security analysis completes or times out.
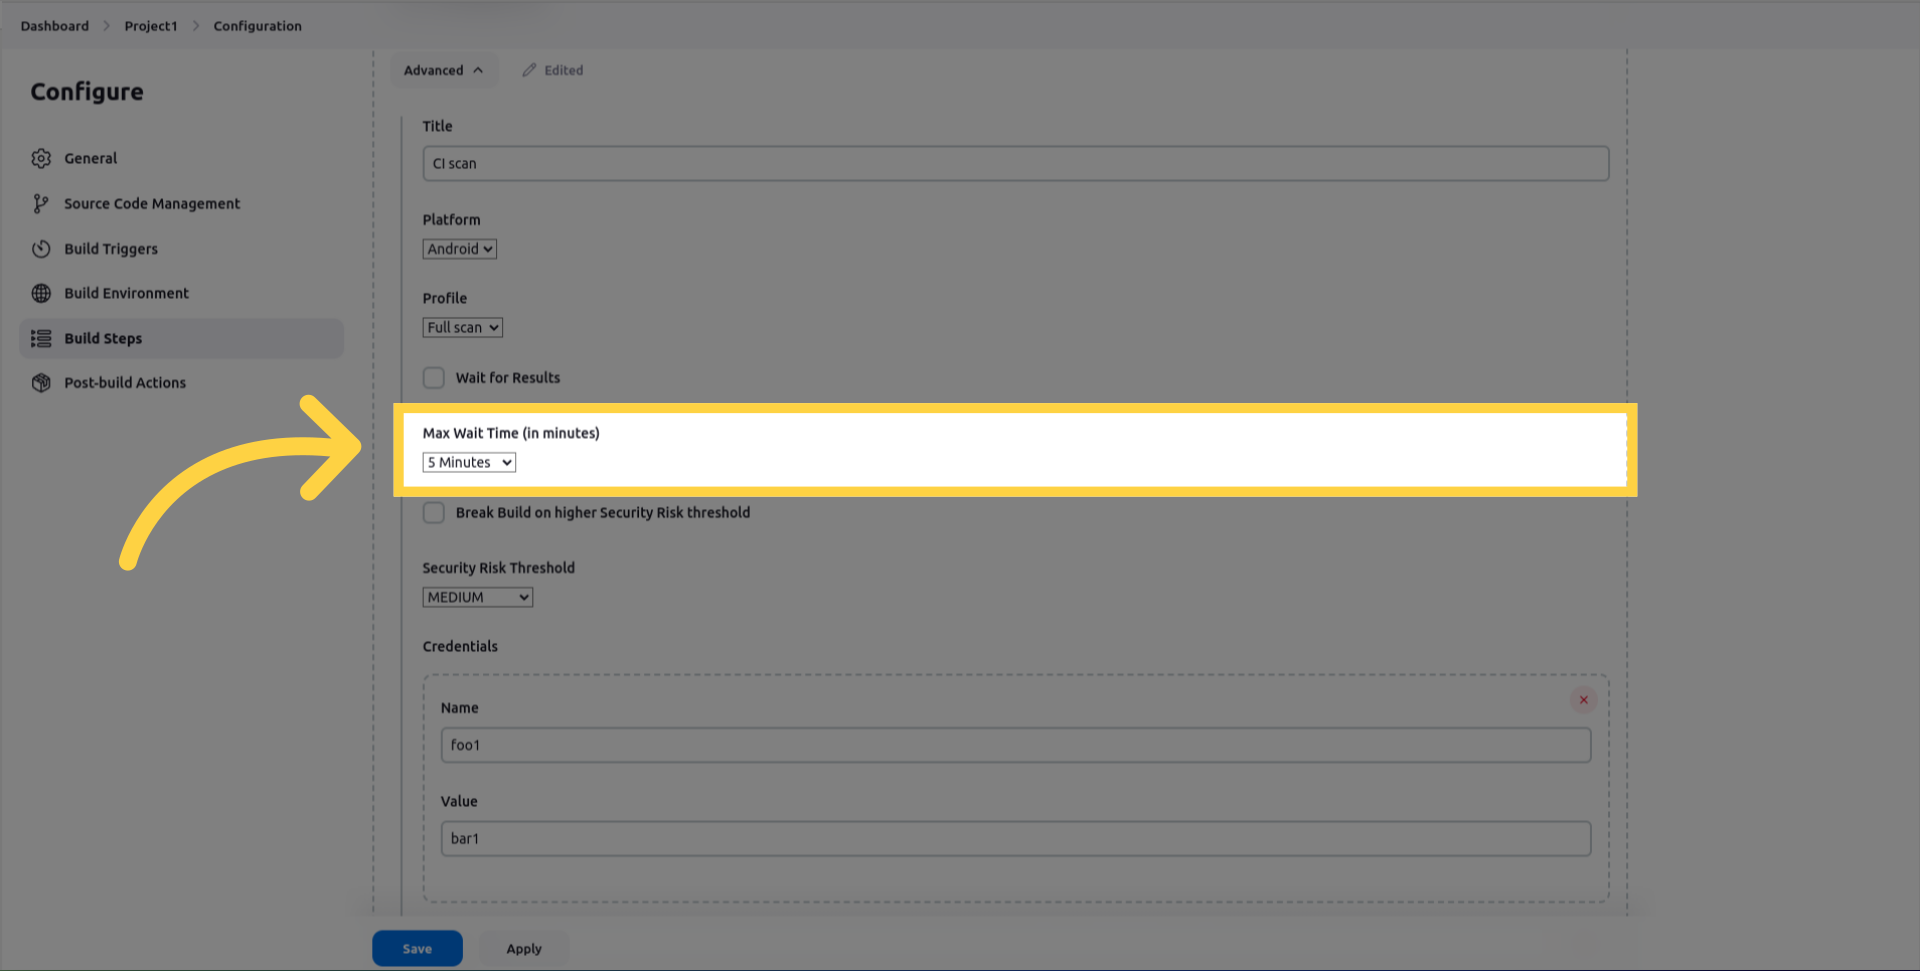
max_wait_minutes which is the duration to wait before the job times out.
break_build_on_higher_security_risk_threshold, if selected, the Jenkins job will fail if the findings risk equals or exceeds the specified thresholds.
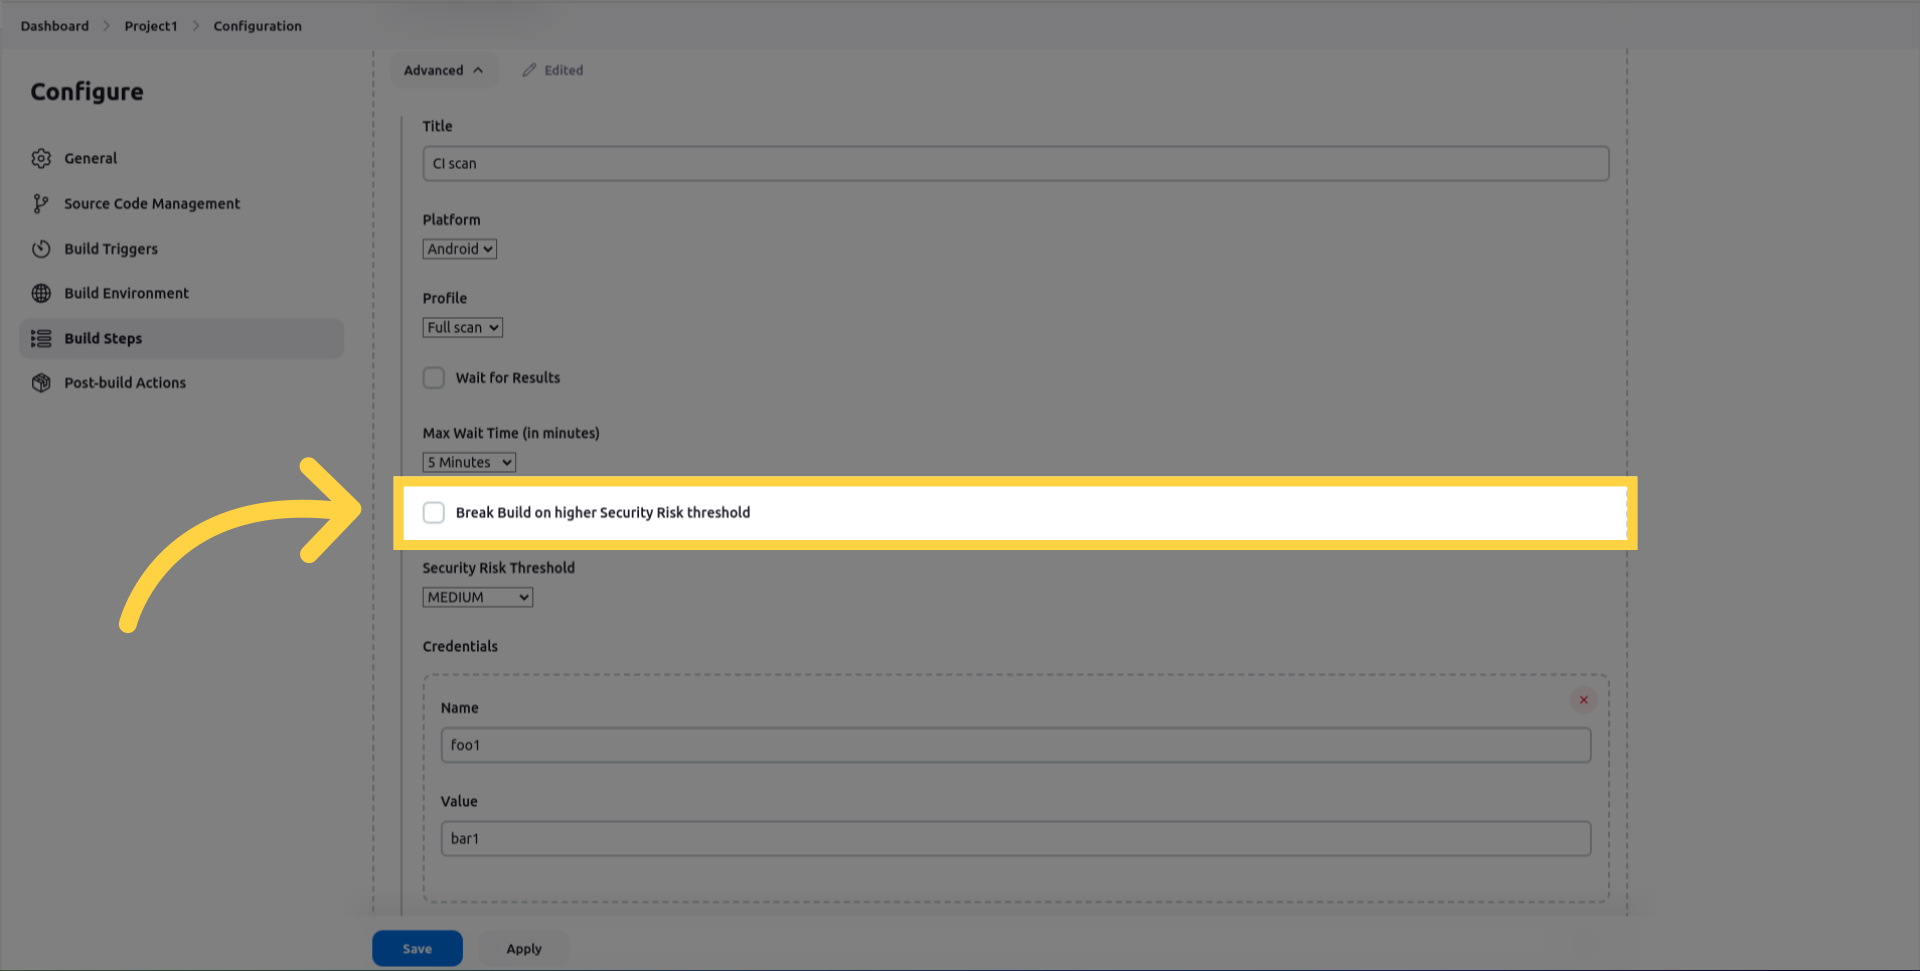
security_risk_threshold, minimum Risk threshold that will cause a build to fail.
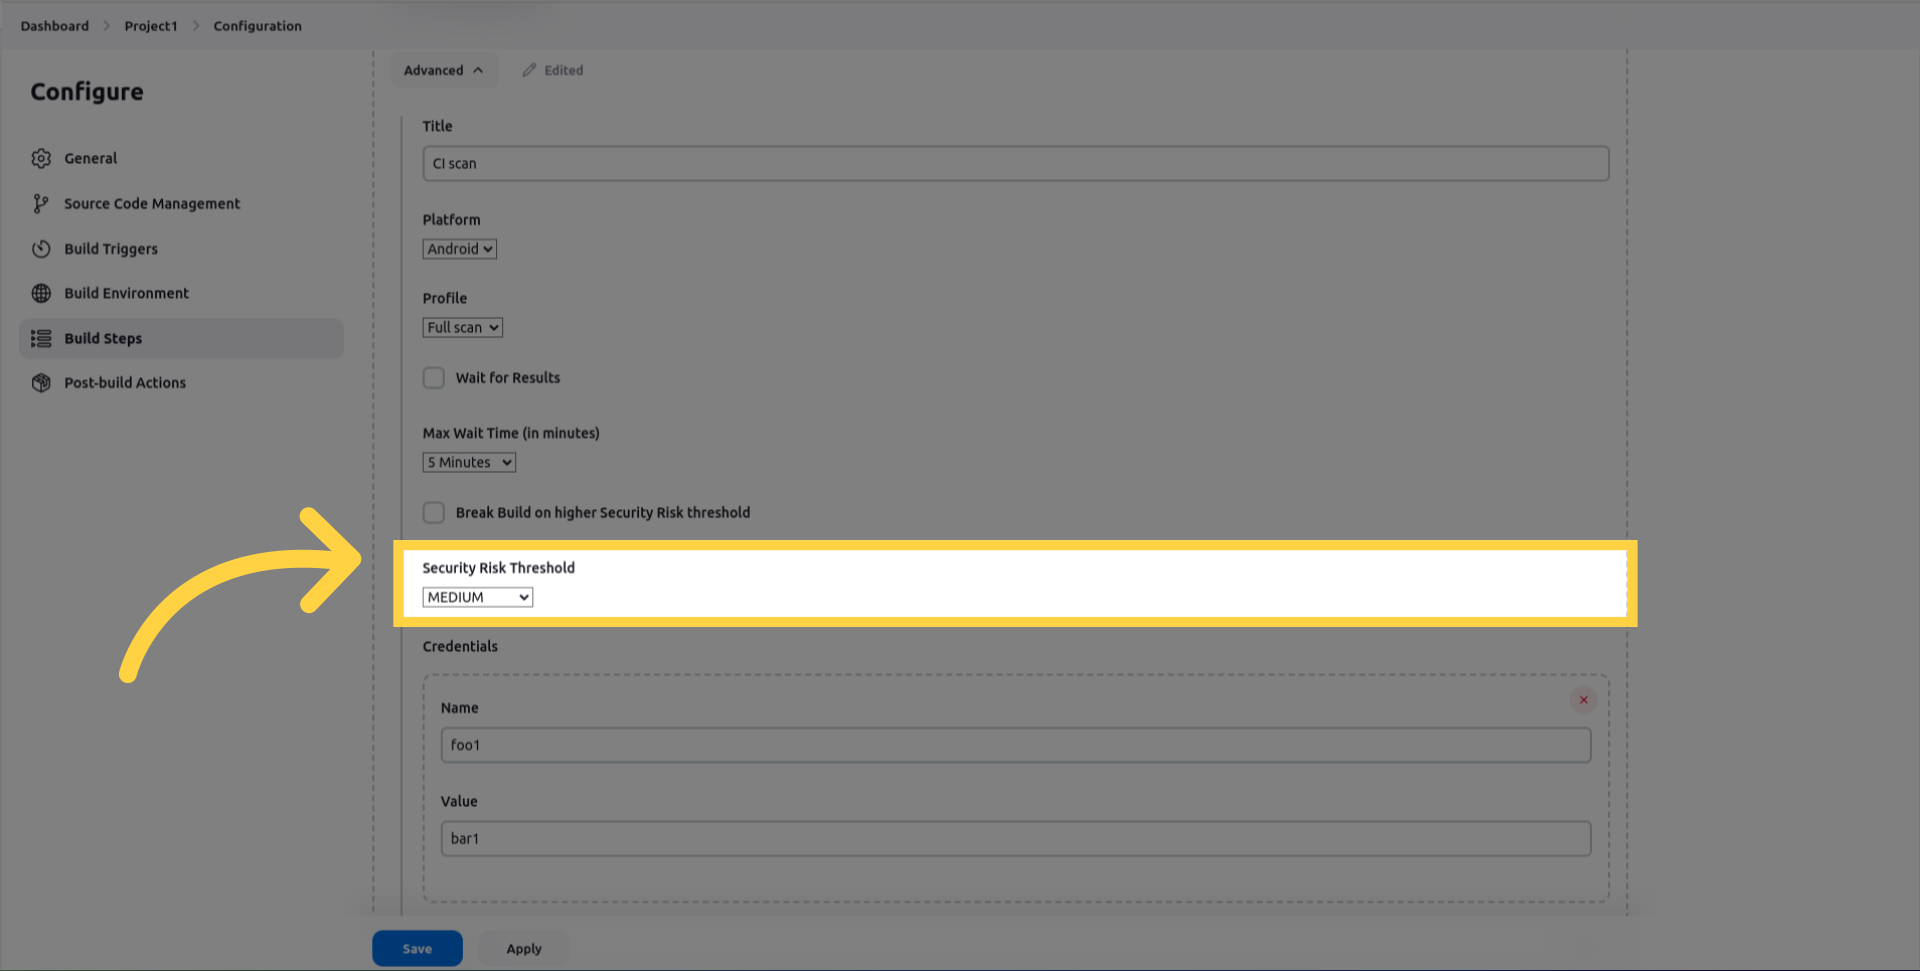
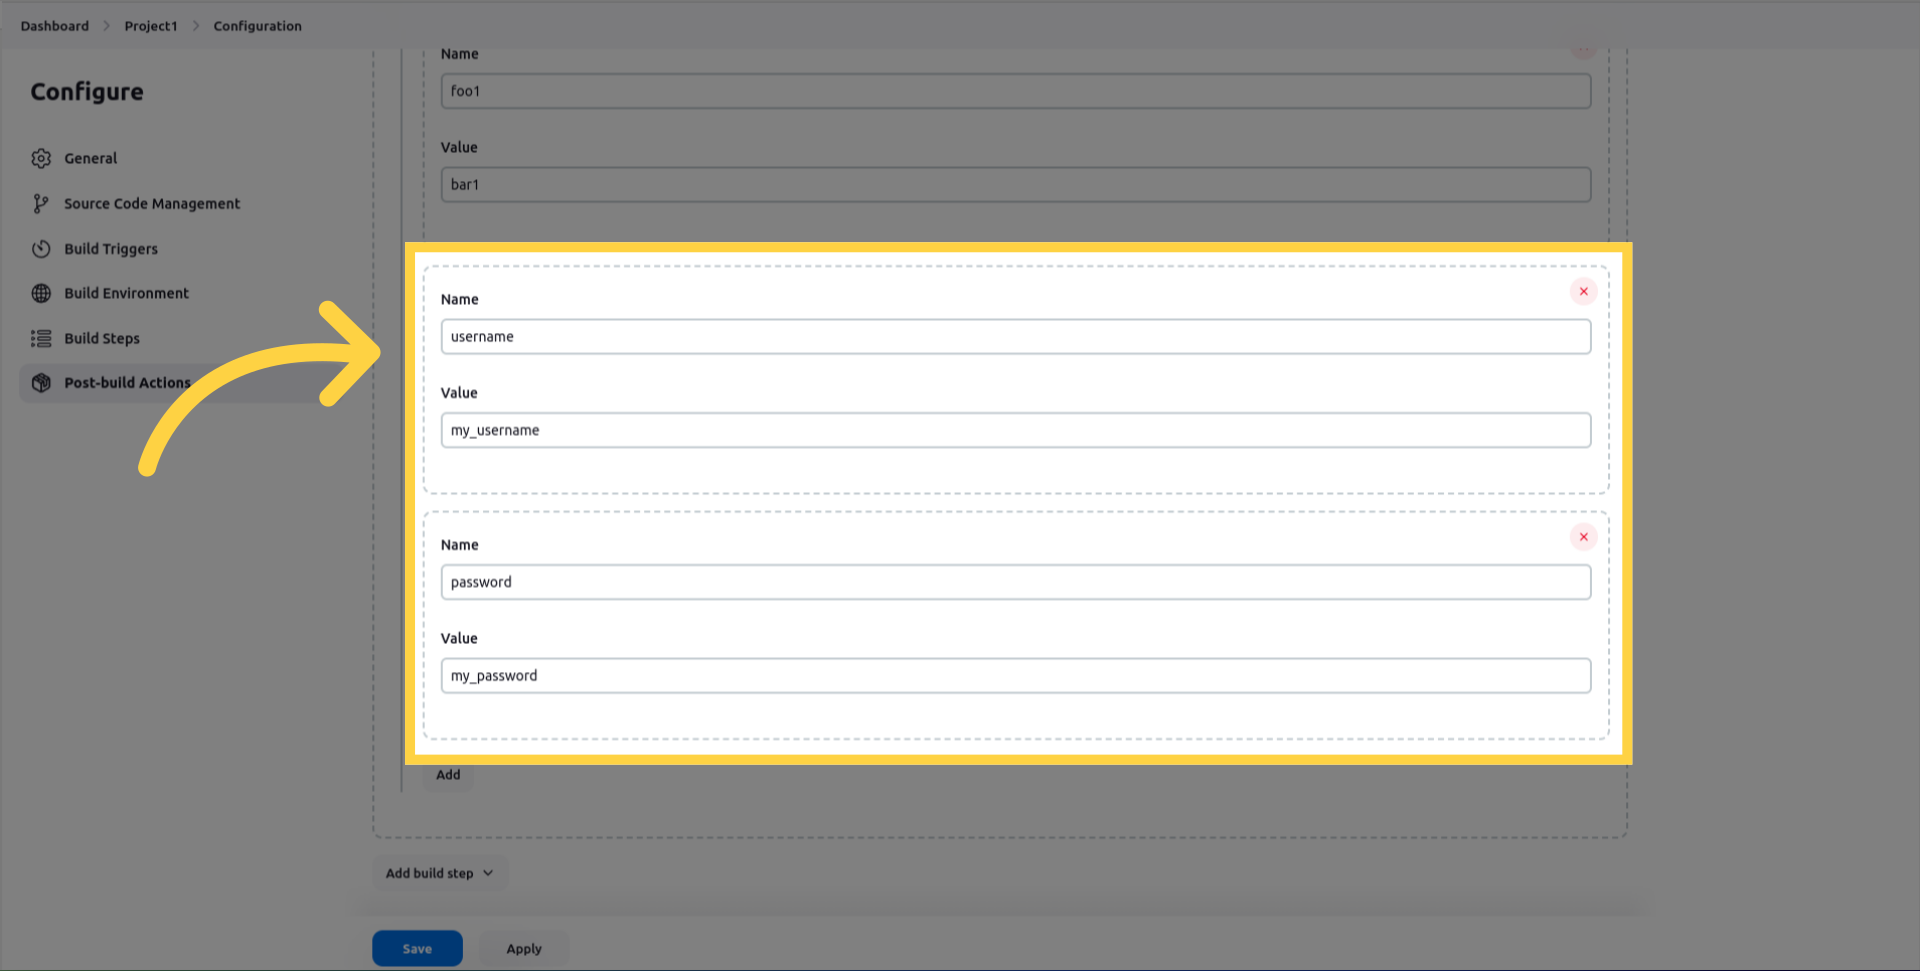
credentials, to be used during the dynamic testing.
The name corresponds to the ID or the label of the field in the view (For example username or password).
The value corresponds to the input to type in the field.
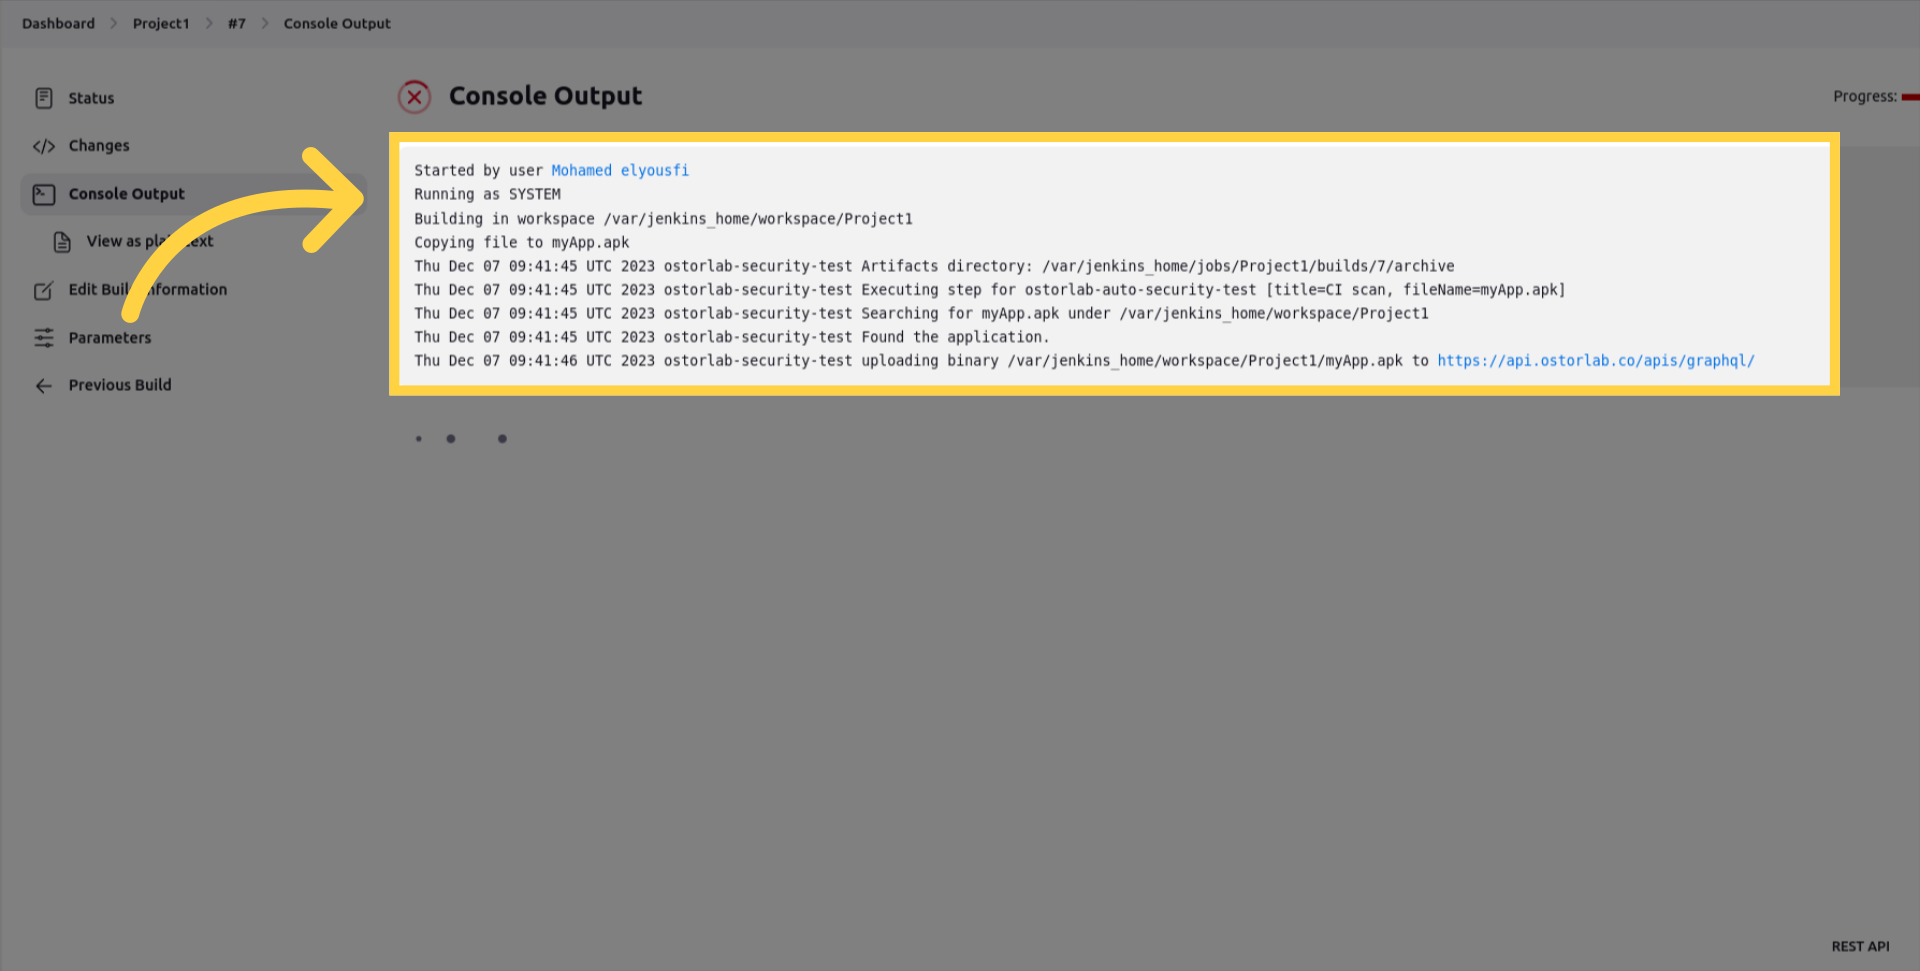
Kick off your mobile builds and you will see the scan risk in the artifacts folder.
Jenkins Pipeline
Additionally, you can do the integration in the case of Jenkins Pipeline also.
Here a sample step to run the scan:
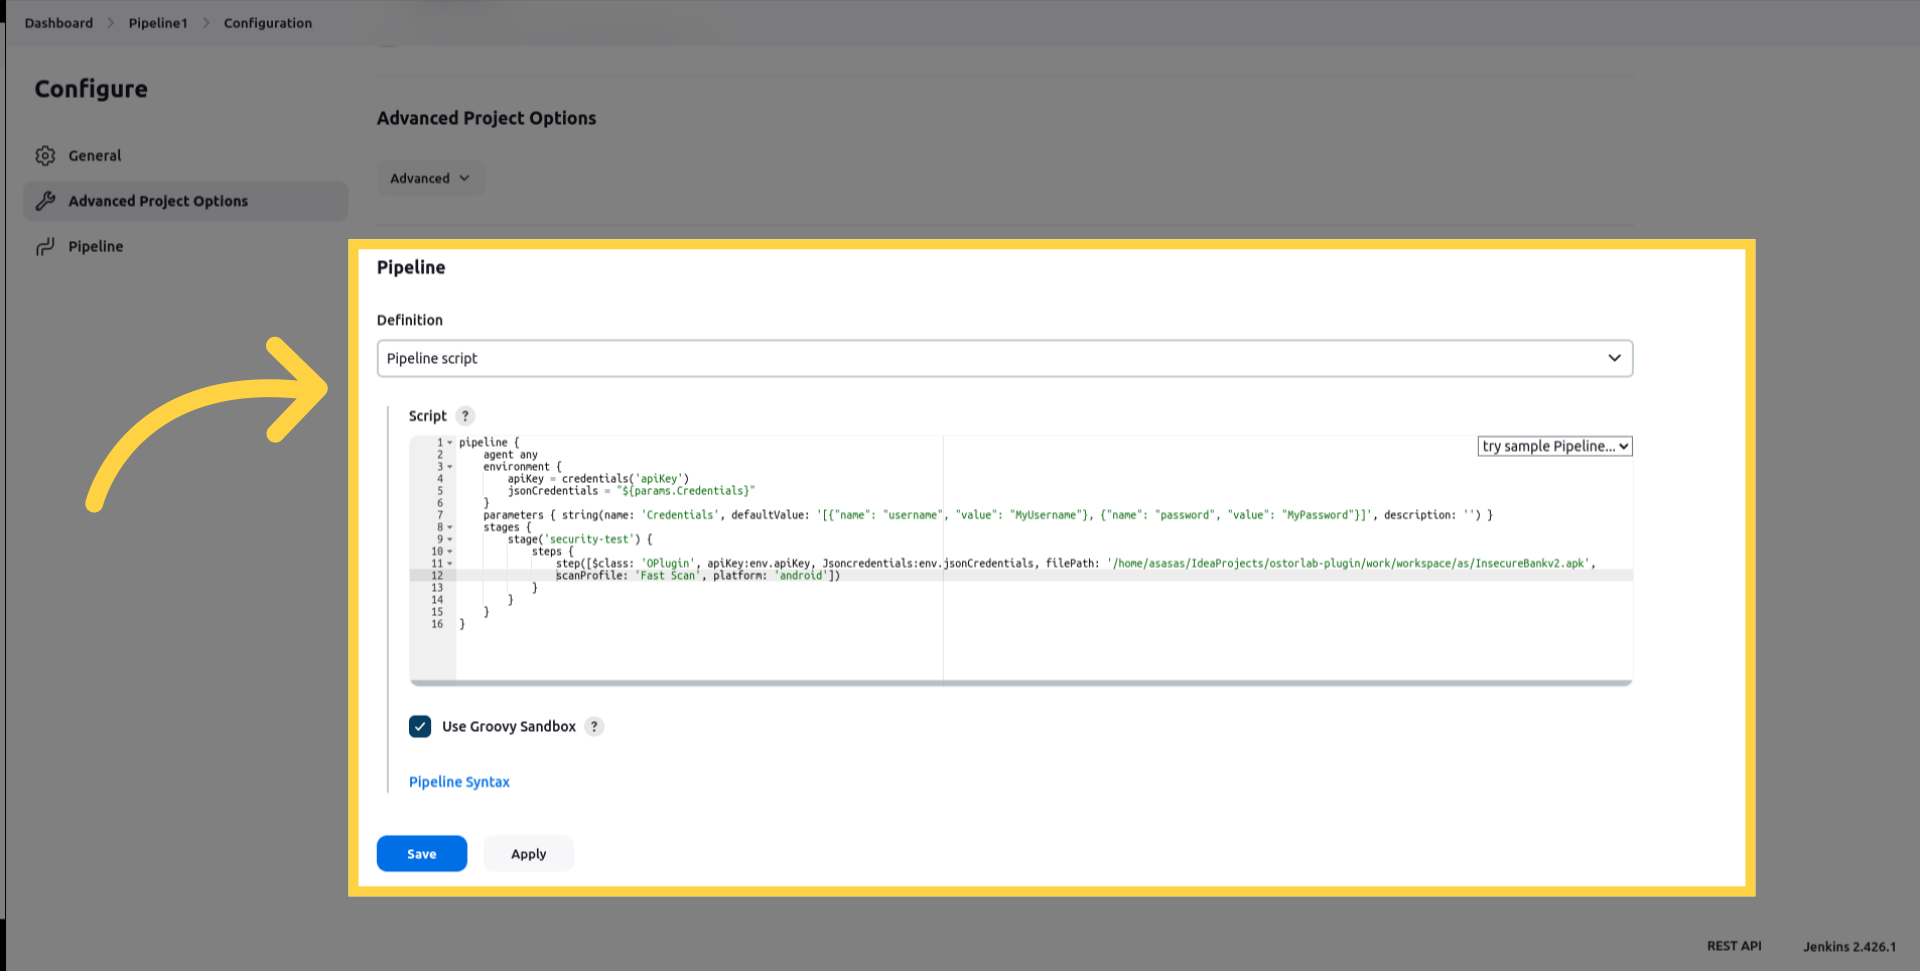
pipeline {
    agent any
    environment {
        apiKey = credentials('apiKey')
        jsonCredentials = "${params.Credentials}"
    }
    parameters { string(name: 'Credentials', defaultValue: '[{"name": "username", "value": "MyUsername"}, {"name": "password", "value": "MyPassword"}]', description: '') }
    stages {
        stage('security-test') {
            steps {
                step([$class: 'OPlugin', apiKey:env.apiKey, Jsoncredentials:env.jsonCredentials, filePath: '/home/asasas/IdeaProjects/ostorlab-plugin/work/workspace/as/InsecureBankv2.apk',
                scanProfile: 'Fast Scan', platform: 'android'])
            }
        }
    }
}
The list of parameters supported:
- filePath: (Mandatory) Enter the mobile application path.
- apiKey: (Mandatory) Enter the API key to authenticate the API requests.
- scanProfile: Select the scan profile to run. You can choose between Fast Scan for rapid static analysis or Full Scan for full Static, Dynamic and Backend analysis.
- platform: Set the platform type [android, iOS].
- waitForResults: (Optional) Suspend job until security analysis completes or times out.
- waitMinutes: (Optional) Duration to wait before the job times out.
- breakBuildOnScore: (Optional) If set to true, the step will fail if the findings risk equals or exceeds the thresholds.
- riskThreshold: (Optional) Minimum Risk threshold that will cause a build to fail.
- JsonCredentials: (Optional) Credentials to use for the dynamic testing. It should be a string as valid JSON:
[{"name": "username", "value": "MyUsername"}, {"name": "password", "value": "MyPassword"}] - title: (Optional) Enter the scan title.