Ostorlab Github Action
1. Generate a new API key
To use Ostorlab Github Action, the first step is to generate an API key. To do so, simply follow the following steps:
Go to report.ostorlab.co
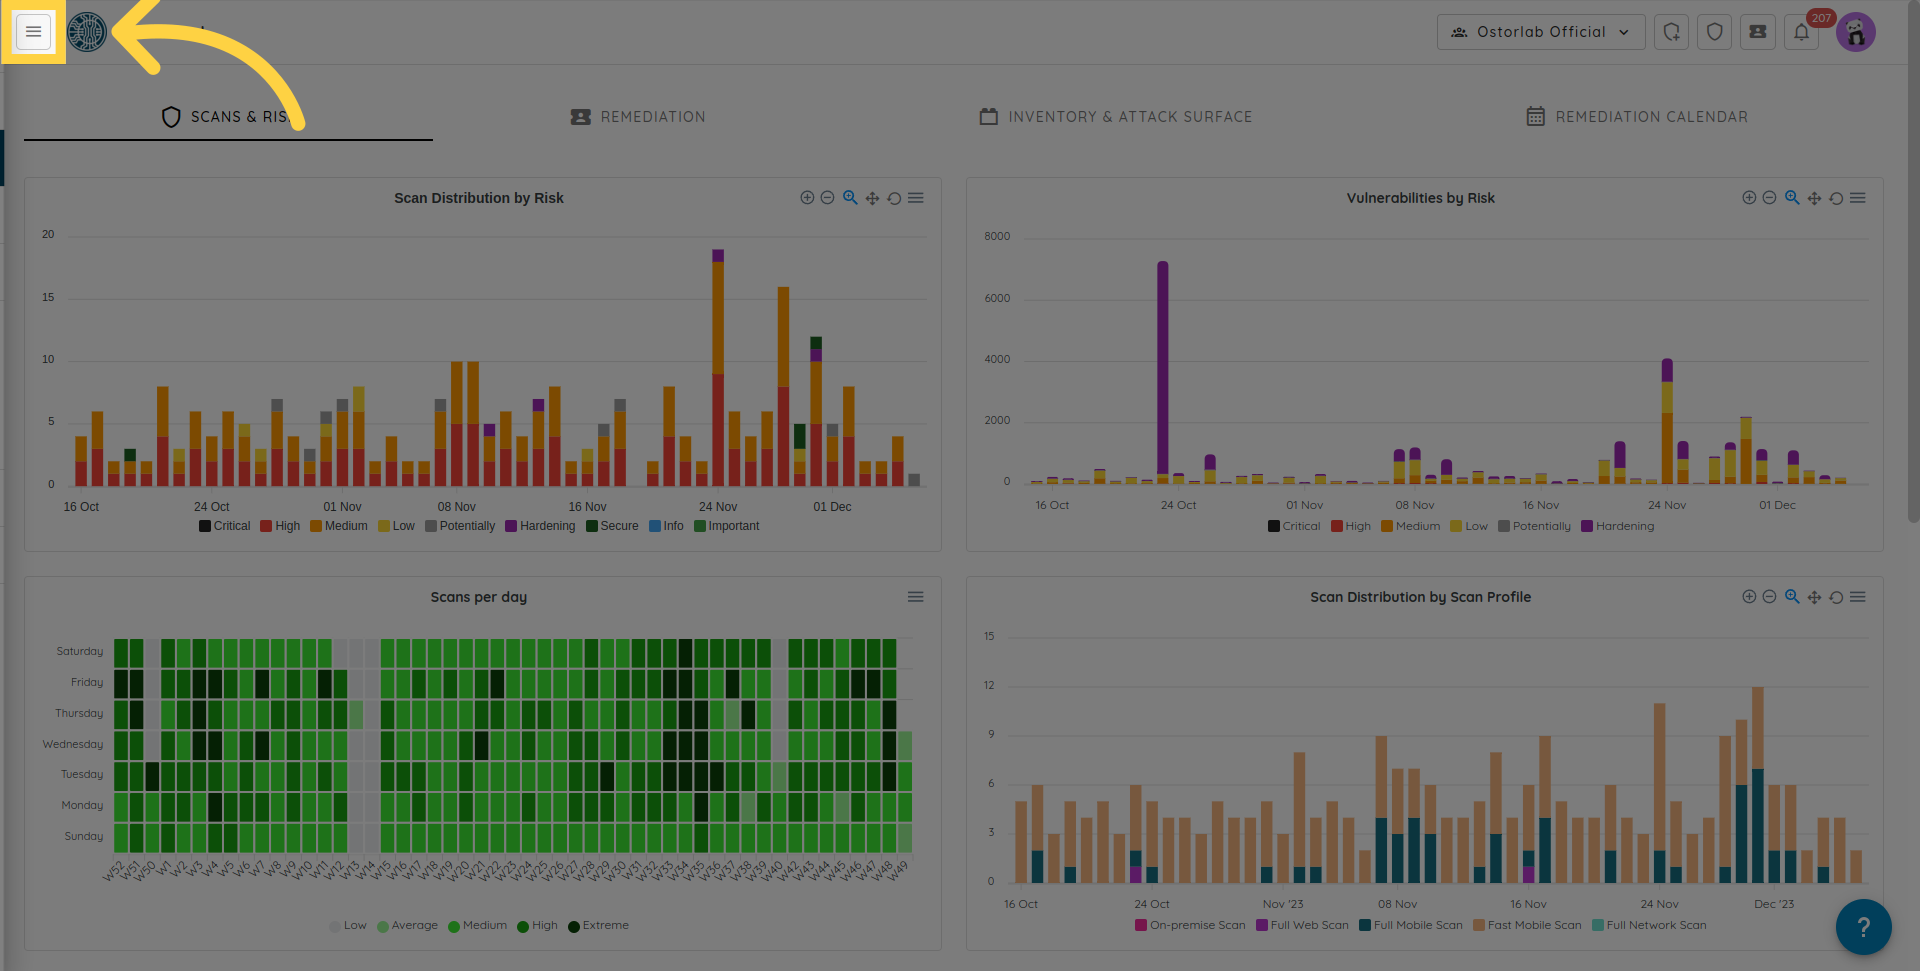
Click the Menu button
Click Integrations/API to expand
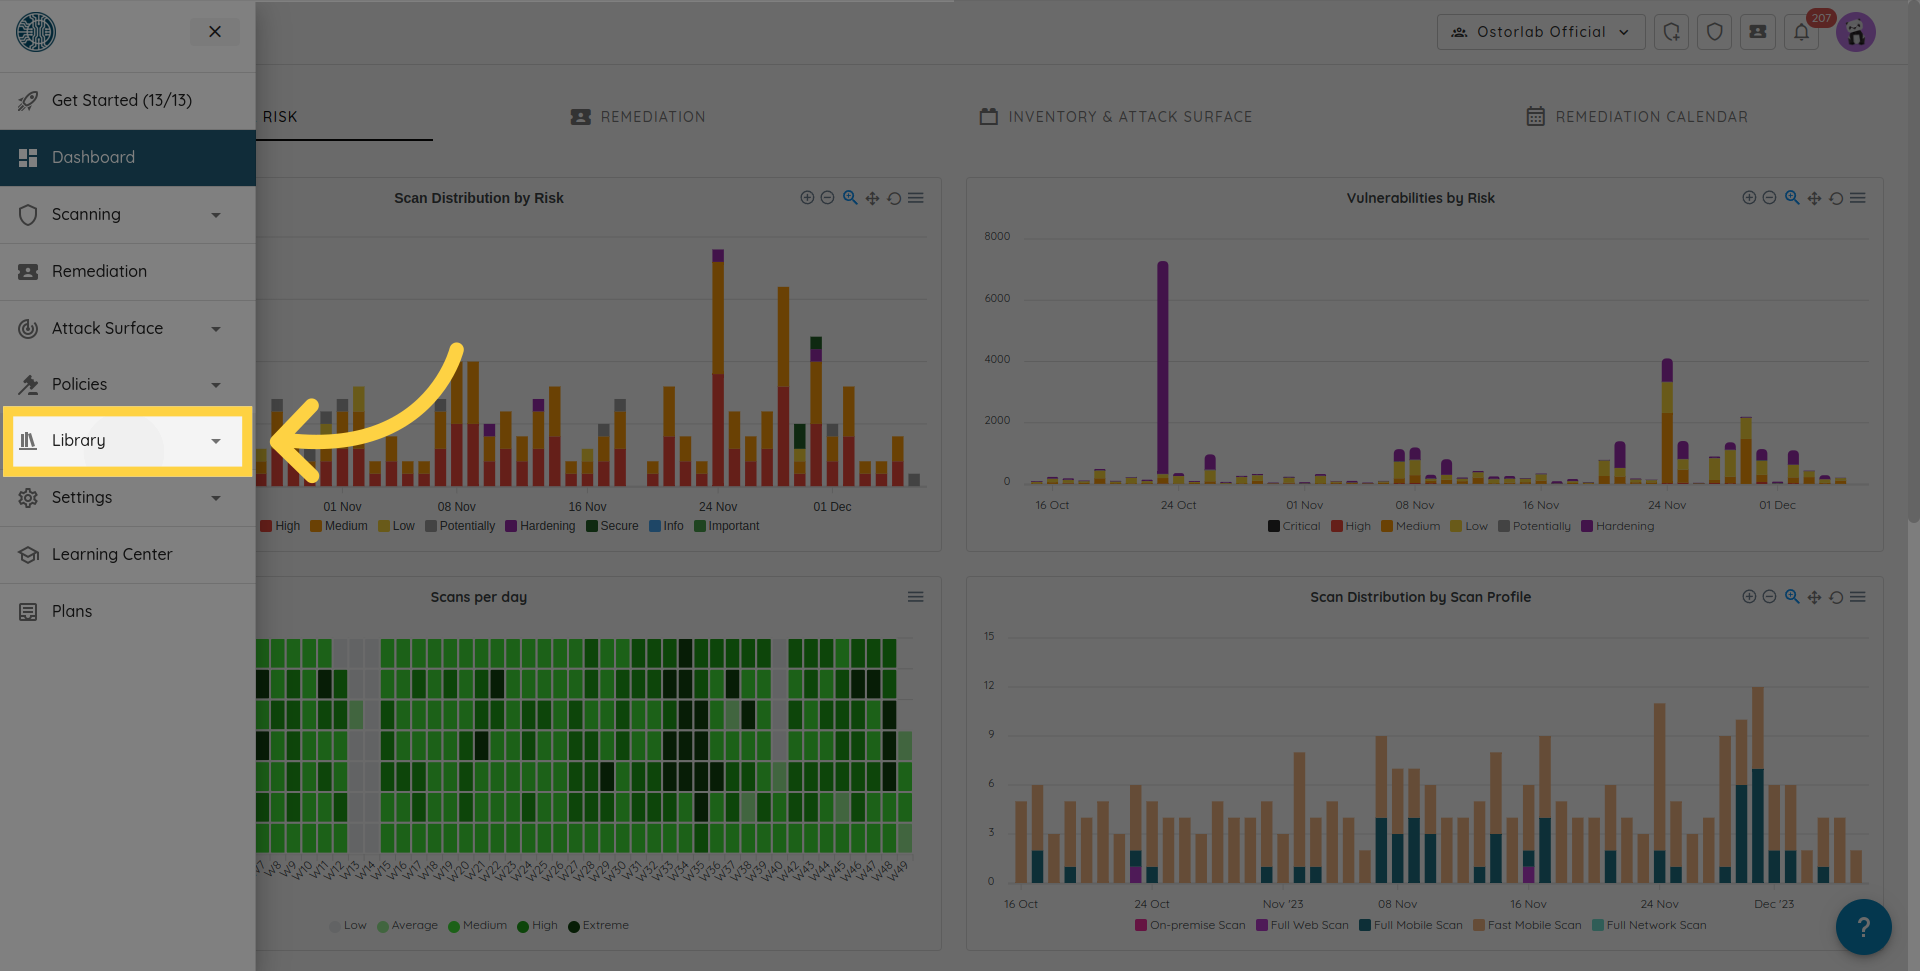
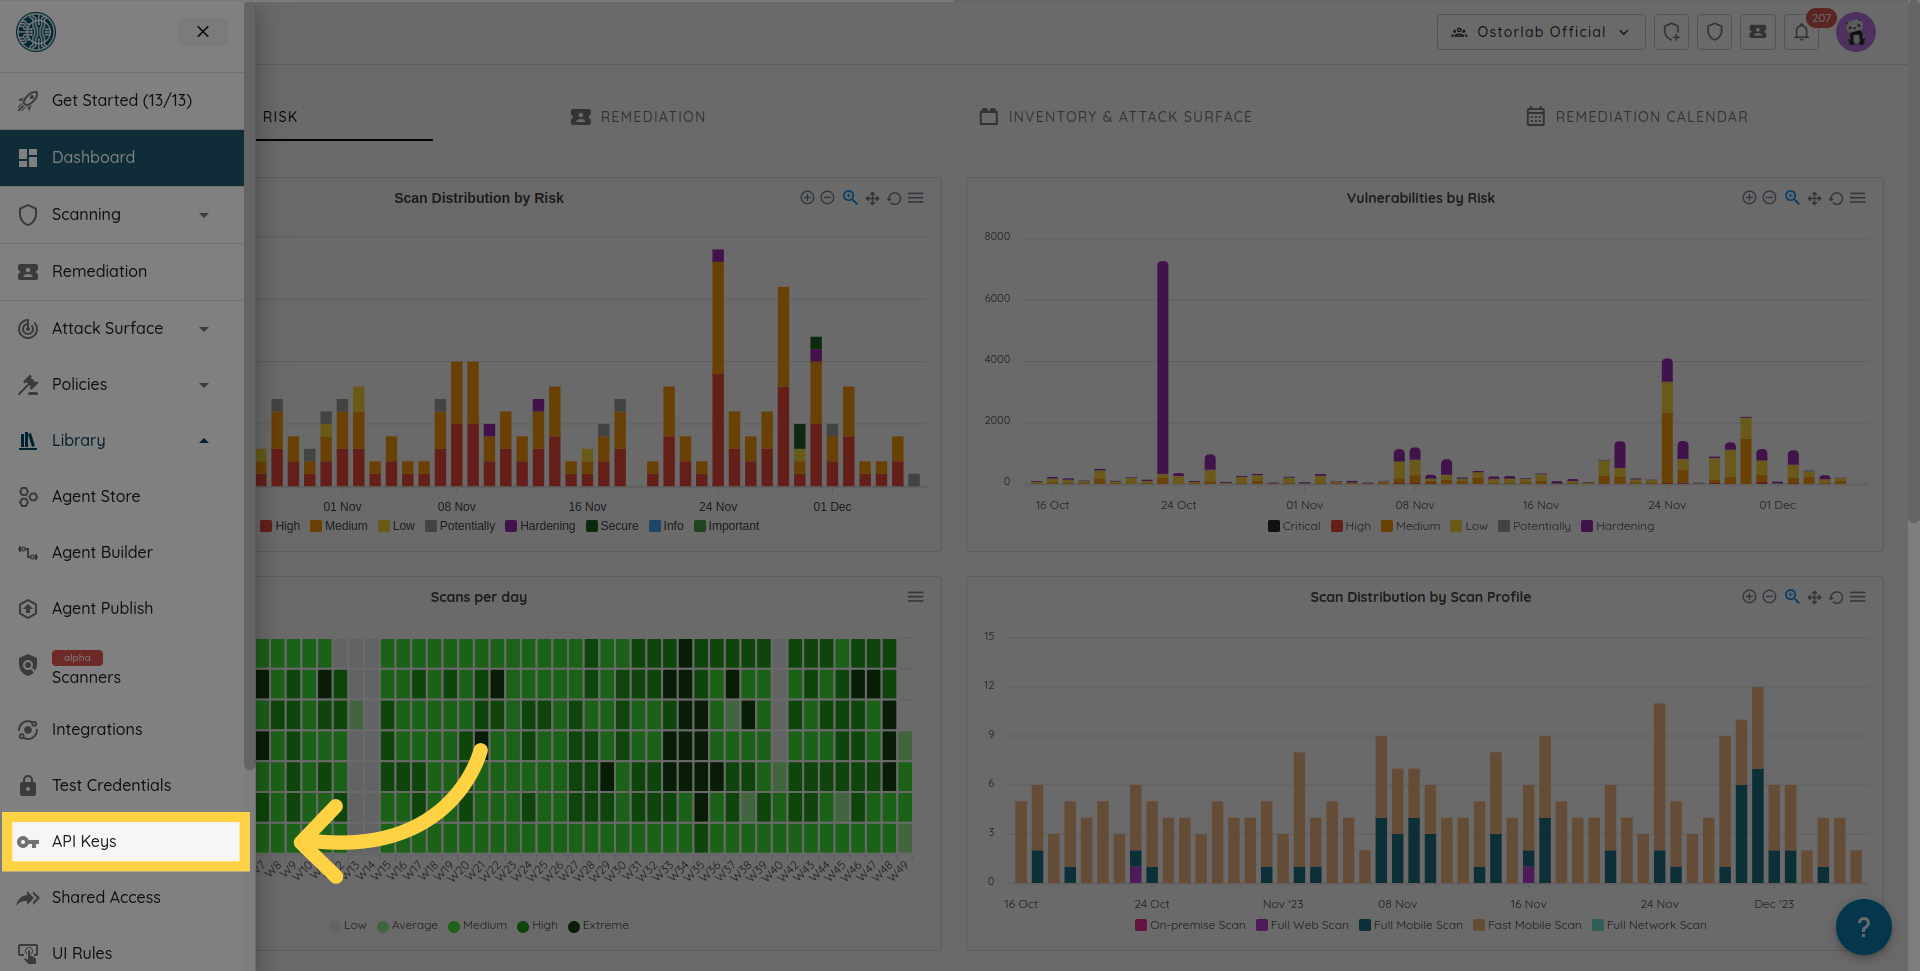
Click API Keys
Click New to generate a new API key
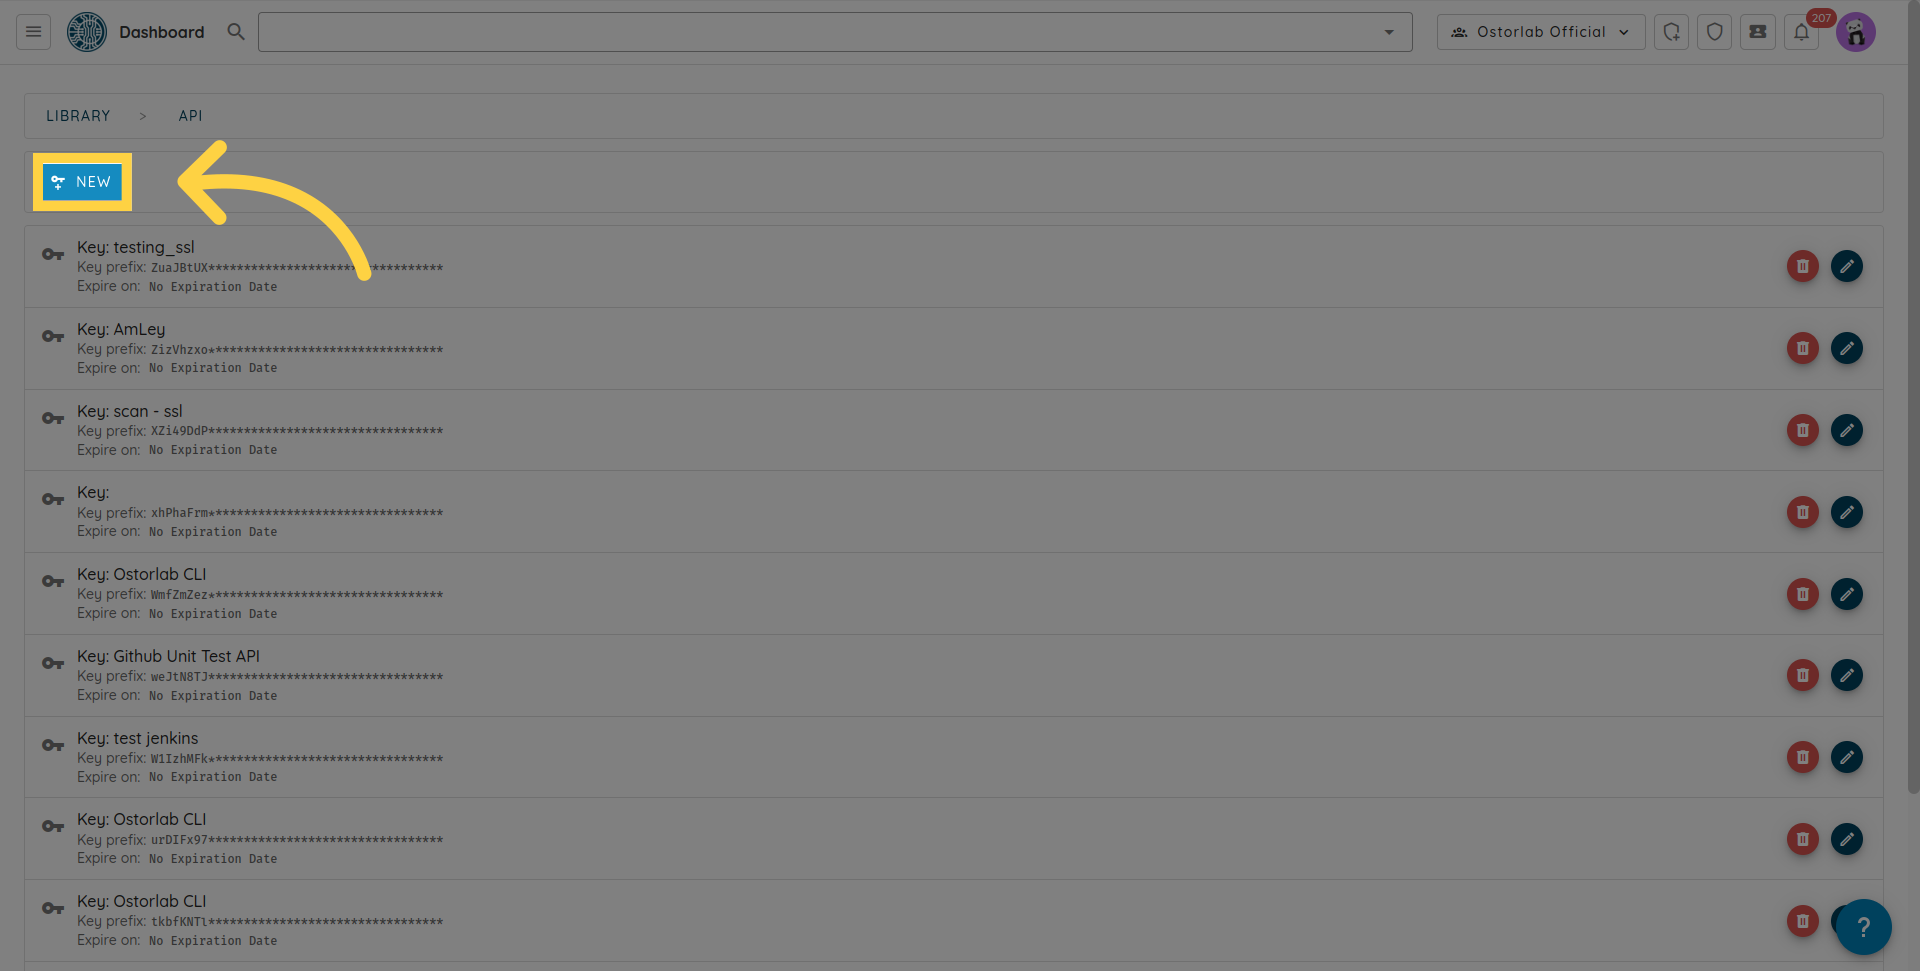
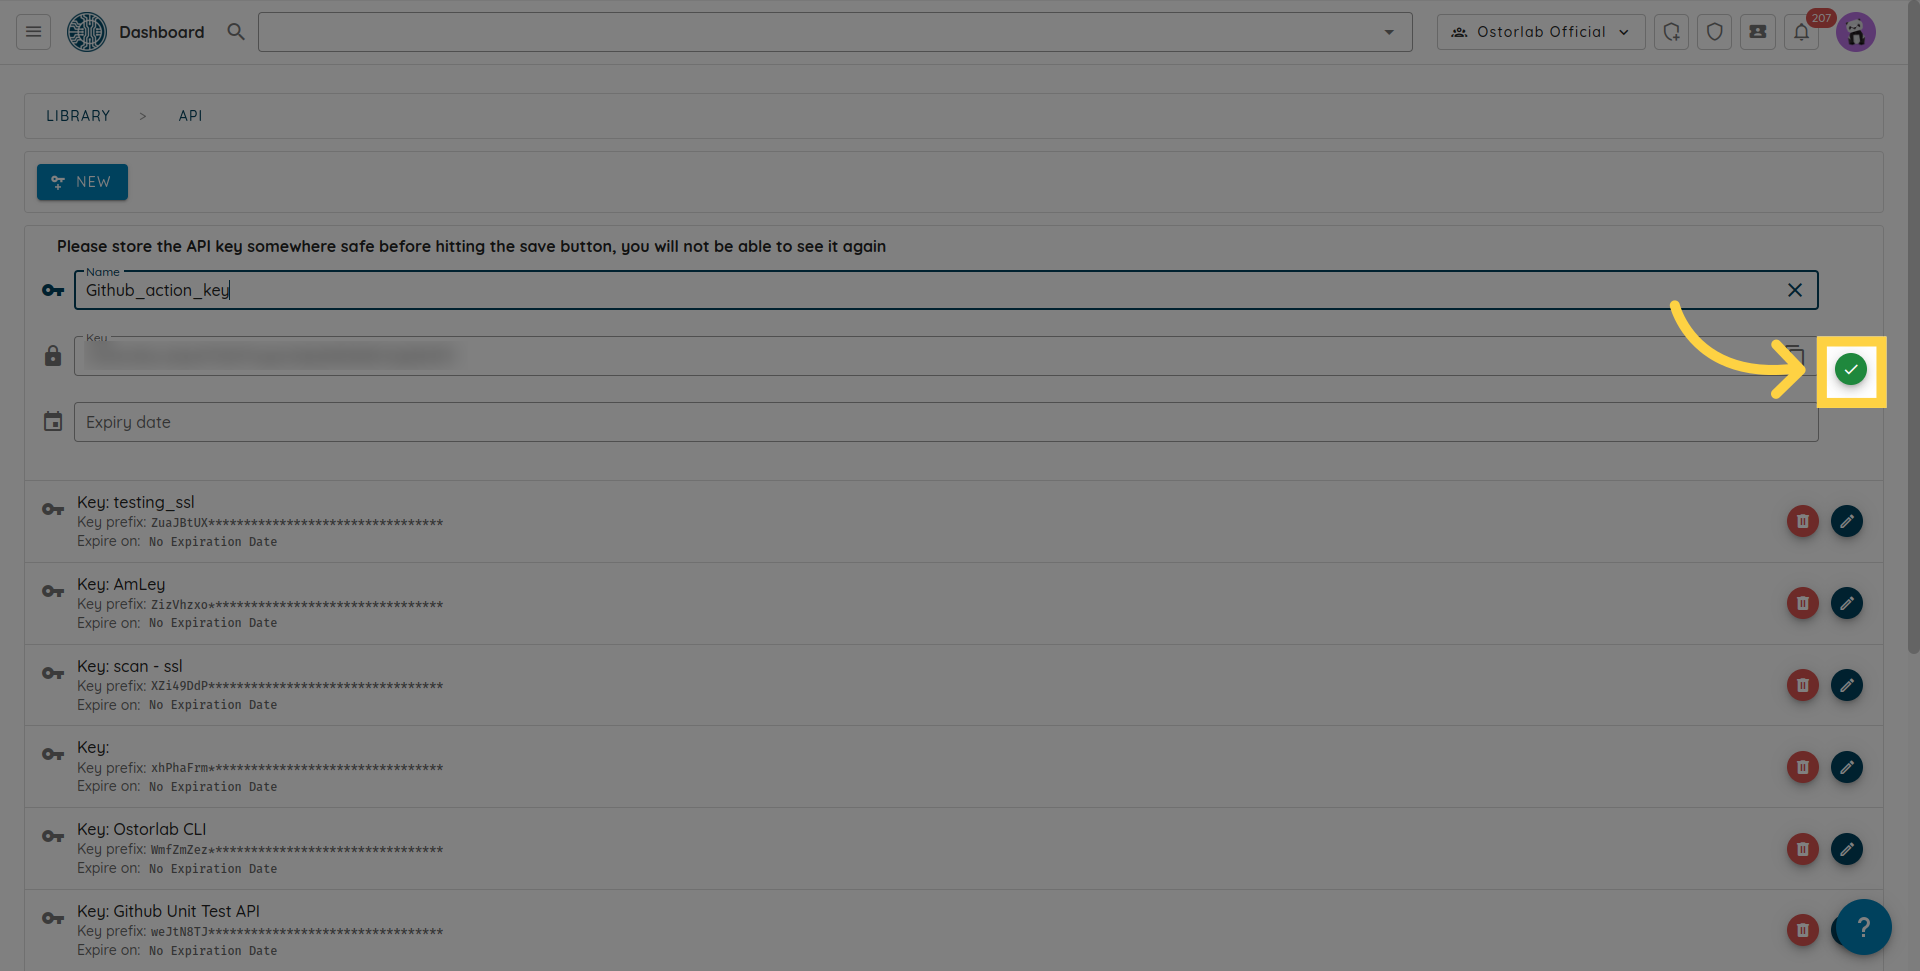
Copy the API key. You can also add a name and an expiry date to your key.
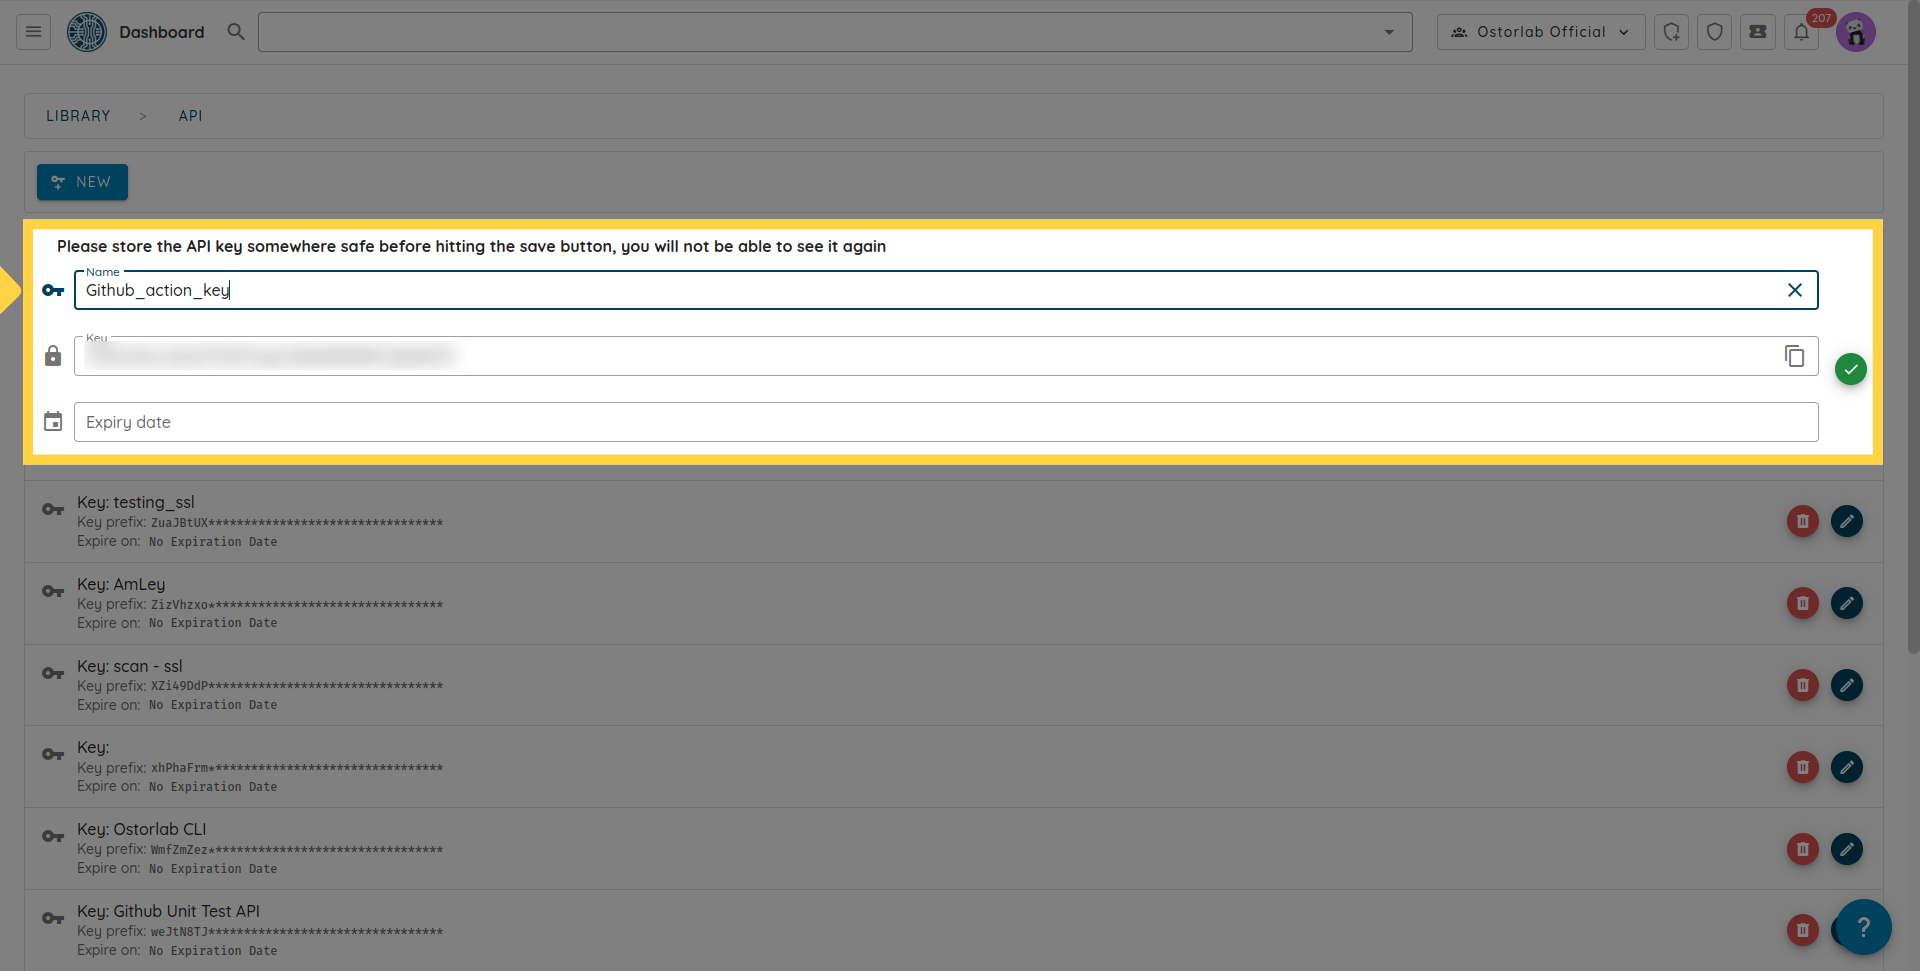
Don't forget to click the save button to save your key.
2. Add Ostorlab Github Action to your workflow
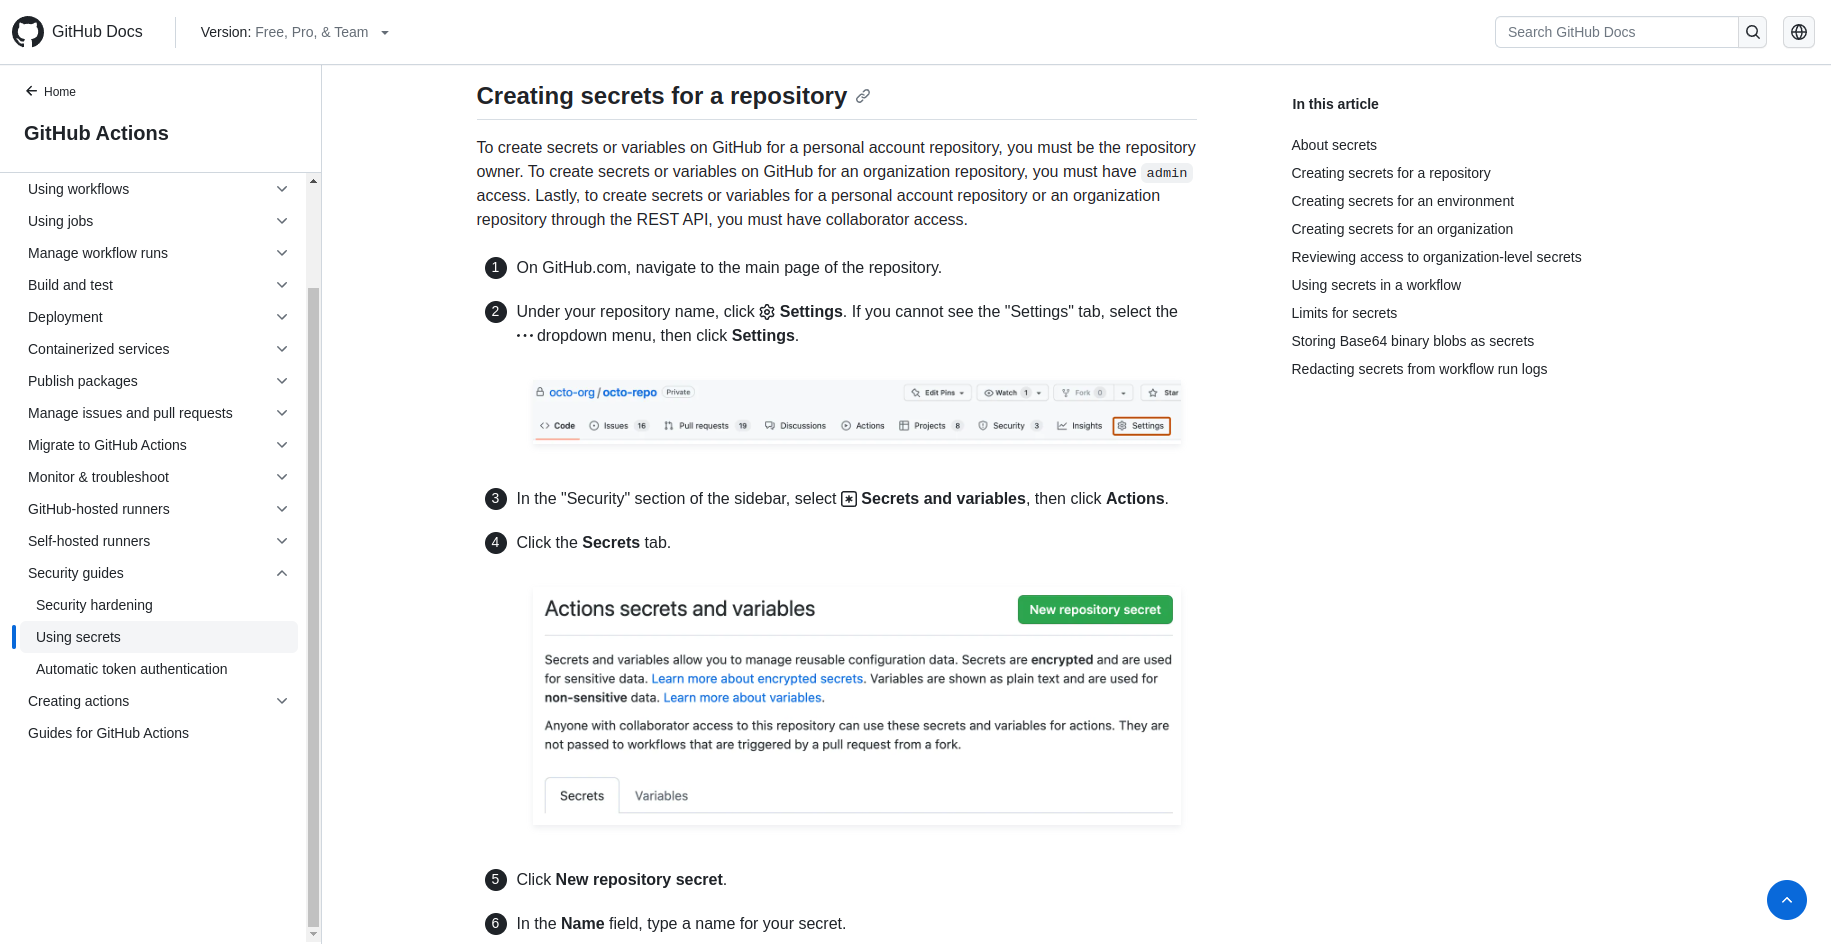
Once you have generated your API, add it to GitHub Secrets. Make sure the name matches the secrets. in the YAML file. You can follow the steps in Github documentation at the following link for more detailed instructions.
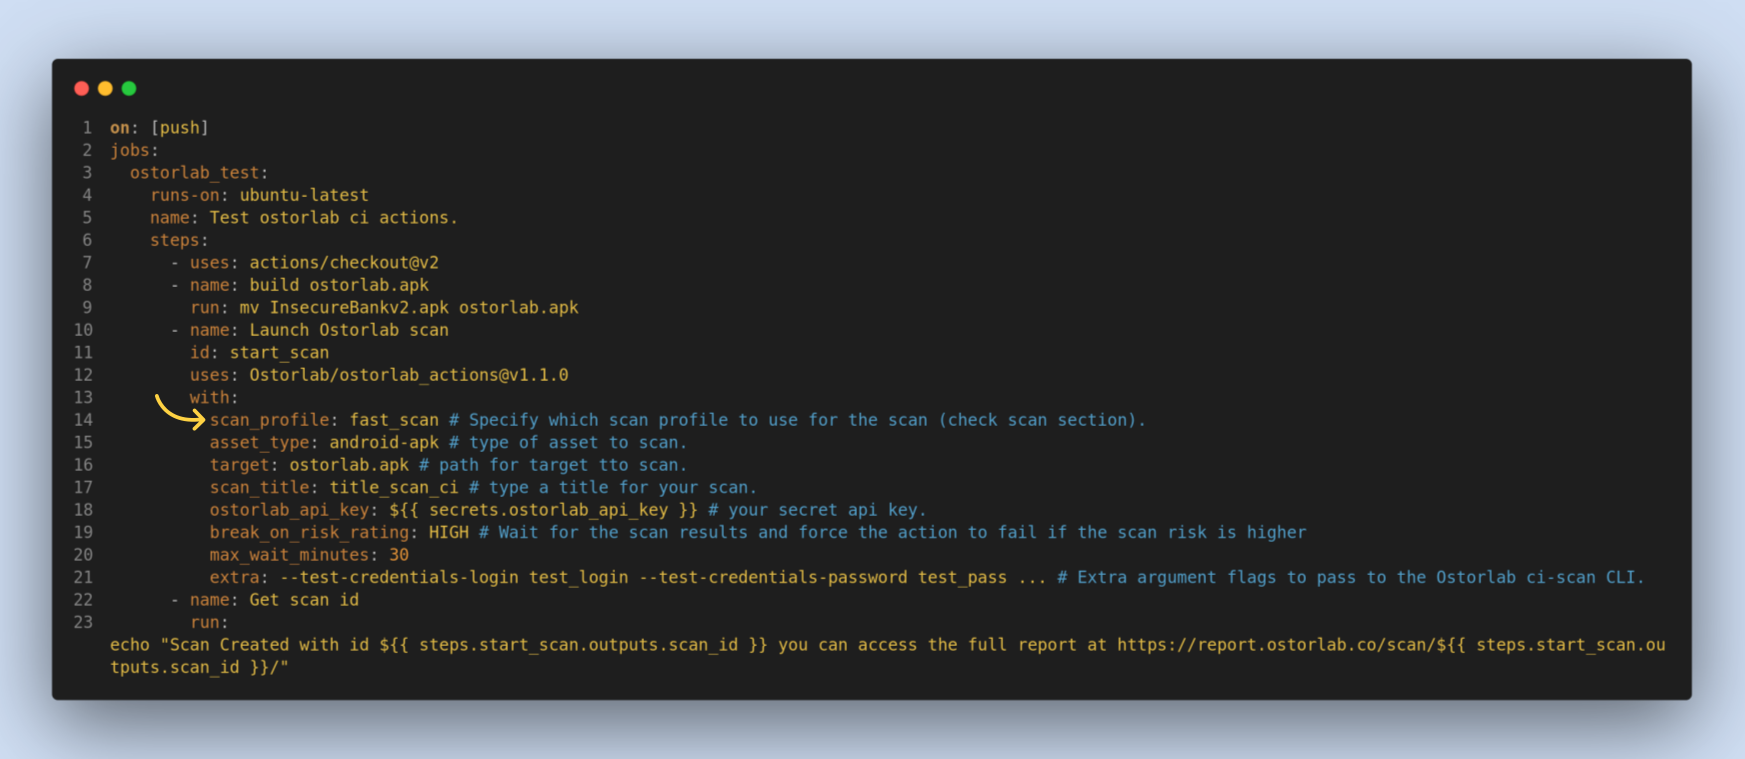
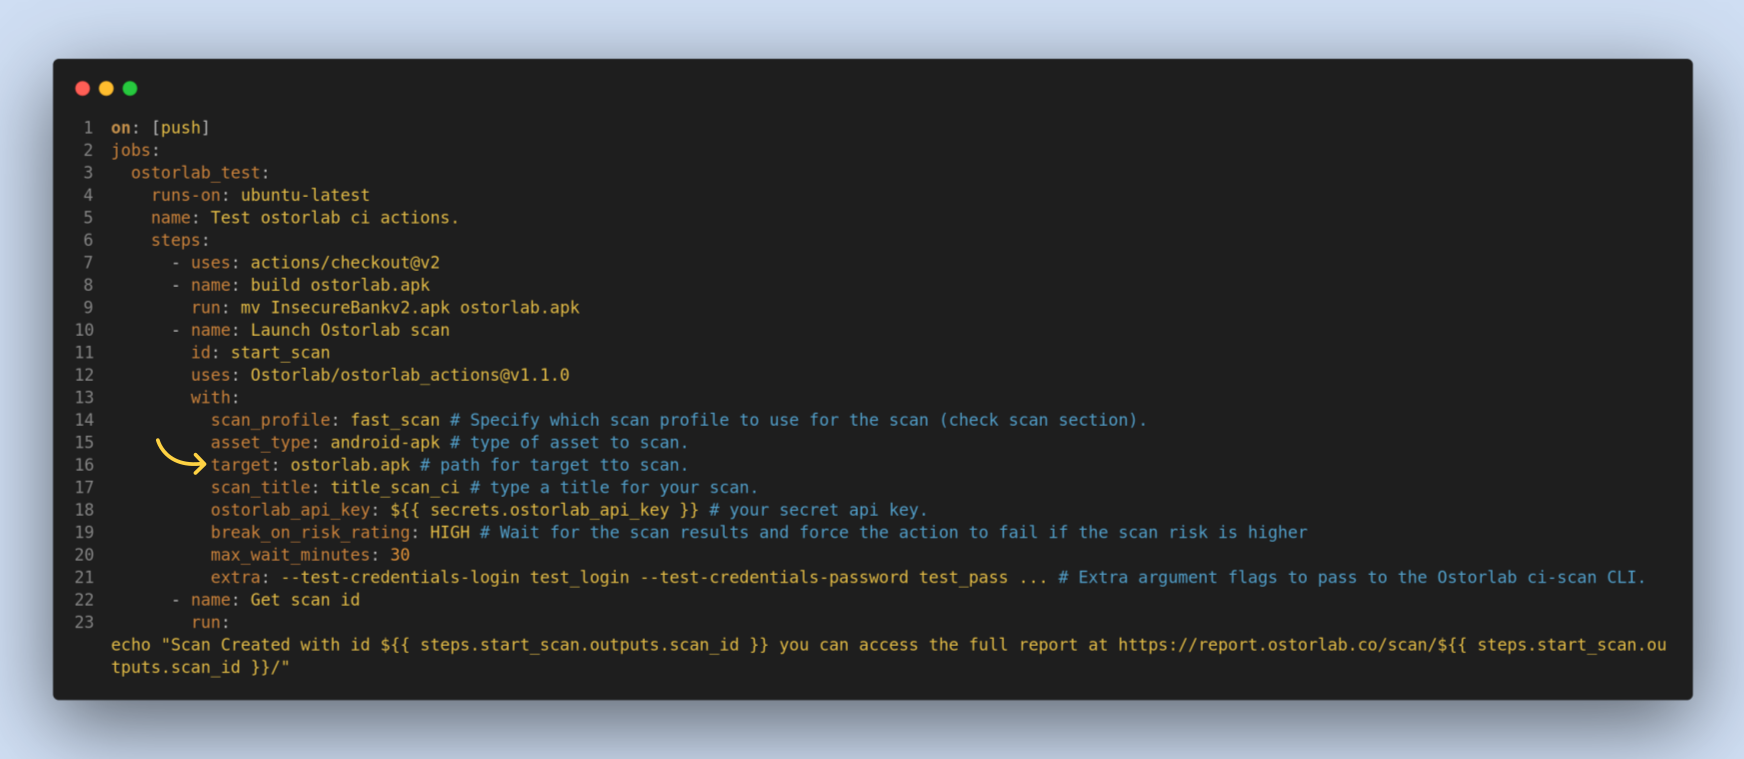
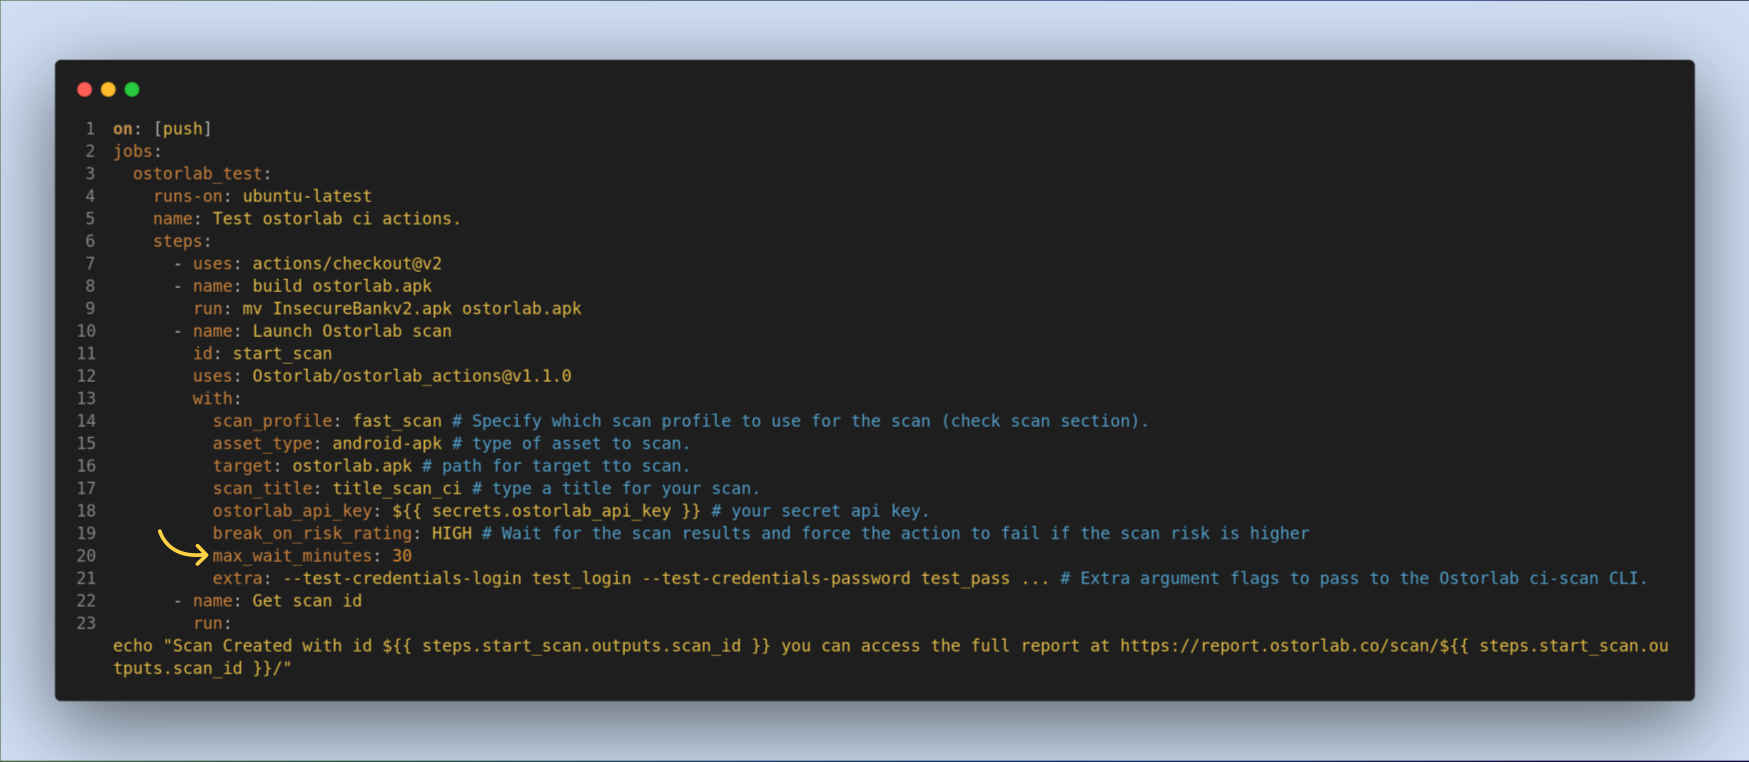
The next step is to update your workflow to add an Ostorlab step to trigger the scan. Following is a sample performing a rapid scan on an Android APK and failing the pipeline on vulnerabilities with HIGH severity.
on: [push]
jobs:
  ostorlab_test:
    runs-on: ubuntu-latest
    name: Test ostorlab ci actions.
    steps:
      - uses: actions/checkout@v2
      - name: build ostorlab.apk
        run: mv InsecureBankv2.apk ostorlab.apk
      - name: Launch Ostorlab scan
        id: start_scan
        uses: Ostorlab/ostorlab_actions@v2.1.0
        with:
          scan_profile: fast_scan # Specify which scan profile to use for the scan (check scan section).
          asset_type: android-apk # type of asset to scan.
          target: ostorlab.apk # path for target tto scan.
          scan_title: title_scan_ci # type a title for your scan.
          ostorlab_api_key: ${{ secrets.ostorlab_api_key }} # your secret api key.
          break_on_risk_rating: HIGH # Wait for the scan results and force the action to fail if the scan risk is higher
          max_wait_minutes: 30
      - name: Get scan id
        run: echo "Scan Created with id ${{ steps.start_scan.outputs.scan_id }} you can access the full report at https://report.ostorlab.co/scan/${{ steps.start_scan.outputs.scan_id }}/"
3. Scanning Web Applications
In addition to mobile applications, Ostorlab also supports scanning web applications through GitHub workflows. To scan web applications, configure your workflow as shown in the example below:
on: [push]
jobs:
  ostorlab_web_scan:
    runs-on: ubuntu-latest
    name: Test ostorlab web scan.
    steps:
      - uses: actions/checkout@v2
      - name: Launch Ostorlab web scan
        id: start_scan
        uses: Ostorlab/ostorlab_actions@v2.1.0
        with:
          scan_profile: full_web_scan
          asset_type: link --url
          target: https://target1.ostorlab.co --url https://target2.ostorlab.co --url https://target3.ostorlab.co
          scan_title: web_scan_ci
          ostorlab_api_key: ${{ secrets.ostorlab_api_key }}
          break_on_risk_rating: HIGH
          max_wait_minutes: 60
      - name: Get scan id
        run: echo "Scan Created with id ${{ steps.start_scan.outputs.scan_id }} you can access the full report at https://report.ostorlab.co/scan/${{ steps.start_scan.outputs.scan_id }}/"
For web application scanning:
- Use scan_profile: full_web_scan
- Set asset_type: link --url
- List your target URLs with --url flag for each additional URL
Ostorlab Github actions takes the following inputs:
scan_profile, which is a required option that specifies the scan profile, it can be fast scan for fast static analysis only, full_scan for full static, dynamic and backend coverage, or full_web_scan for web application scanning.
asset_type, a required option which specifies the target asset type, for example, Android APK, iOS IPA, or link for web applications.

target, a required option. It's a target file to scan or URL for web applications.
scan_title, an optional option. It's a title to identify your scan.

ostorlab_api_key, a required option. You can get it from ostorlab dashboard, in Integrations/API then API Keys.

break_on_risk_rating, an optional option. It's a risk rating to break the pipeline if the scan result is equal or higher than the provided value.

max_wait_minutes, an optional option. its a max wait time in minutes, pipeline will not fail if the scan times out. if you want to run the scan without waiting, remove this option.
extra, an optional option. its an extra argument to pass to the Ostorlab CLI. Common use case is passing the scan test credentials.

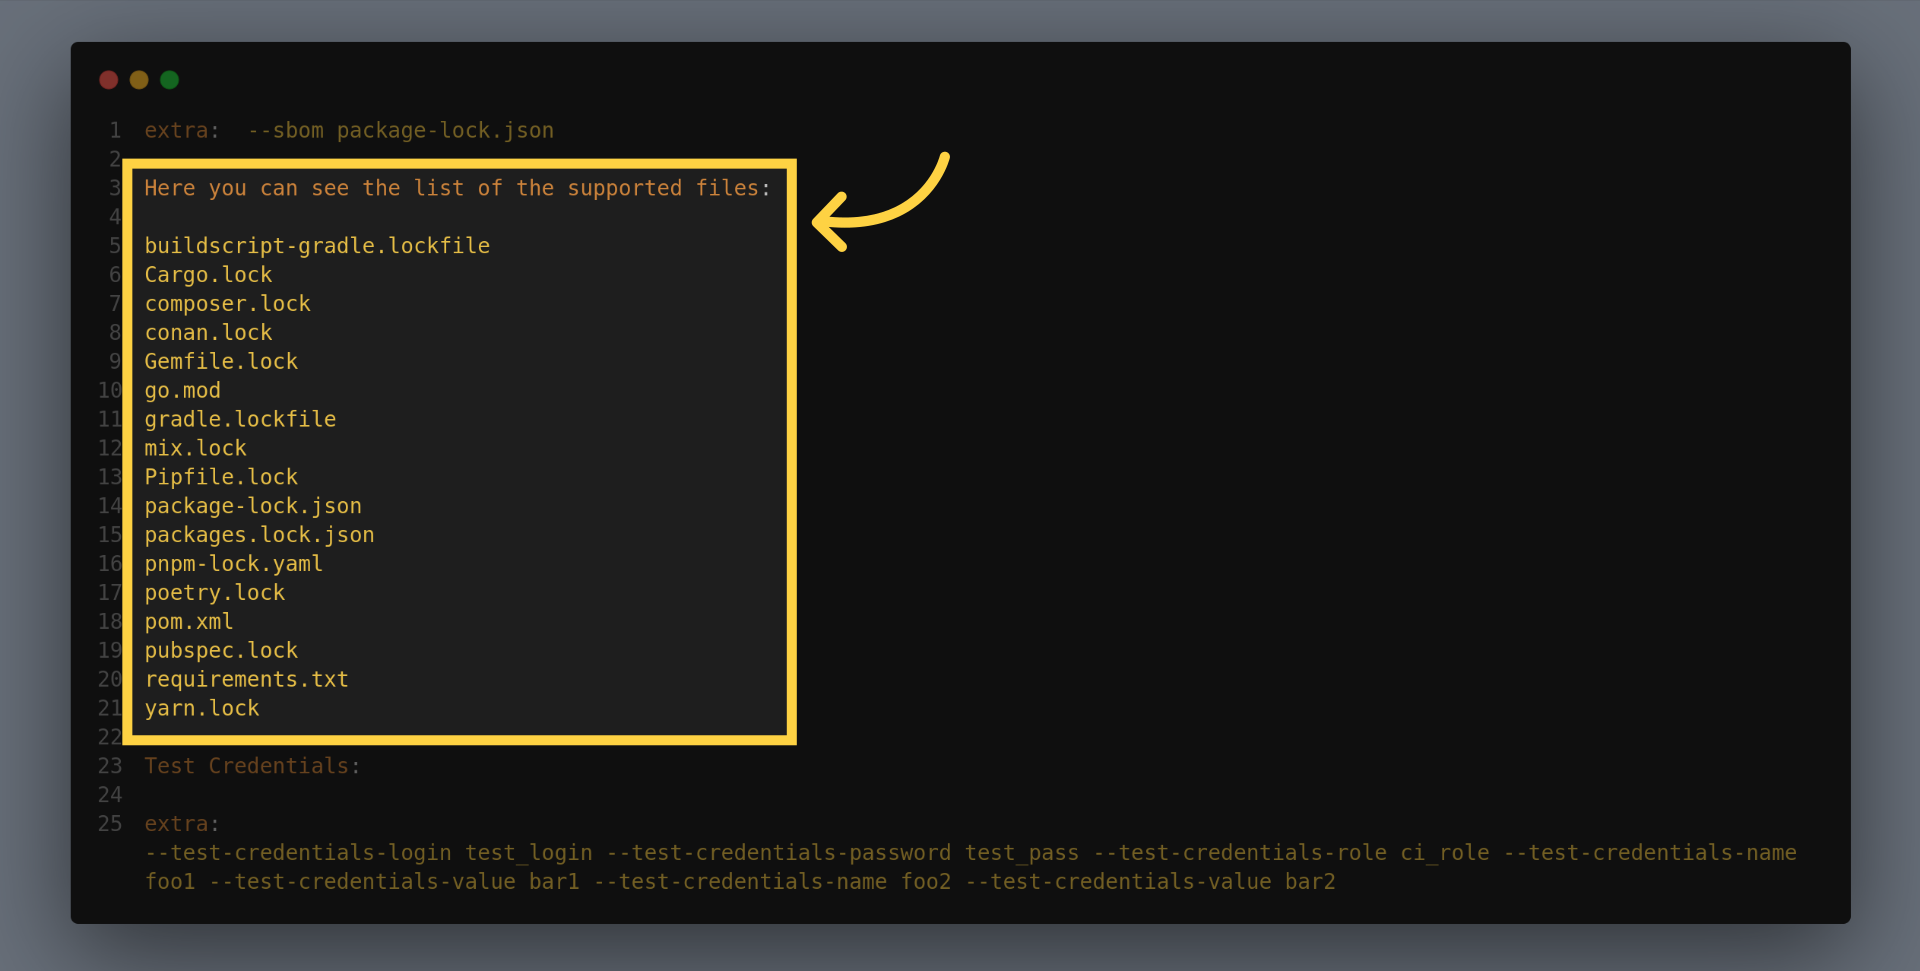
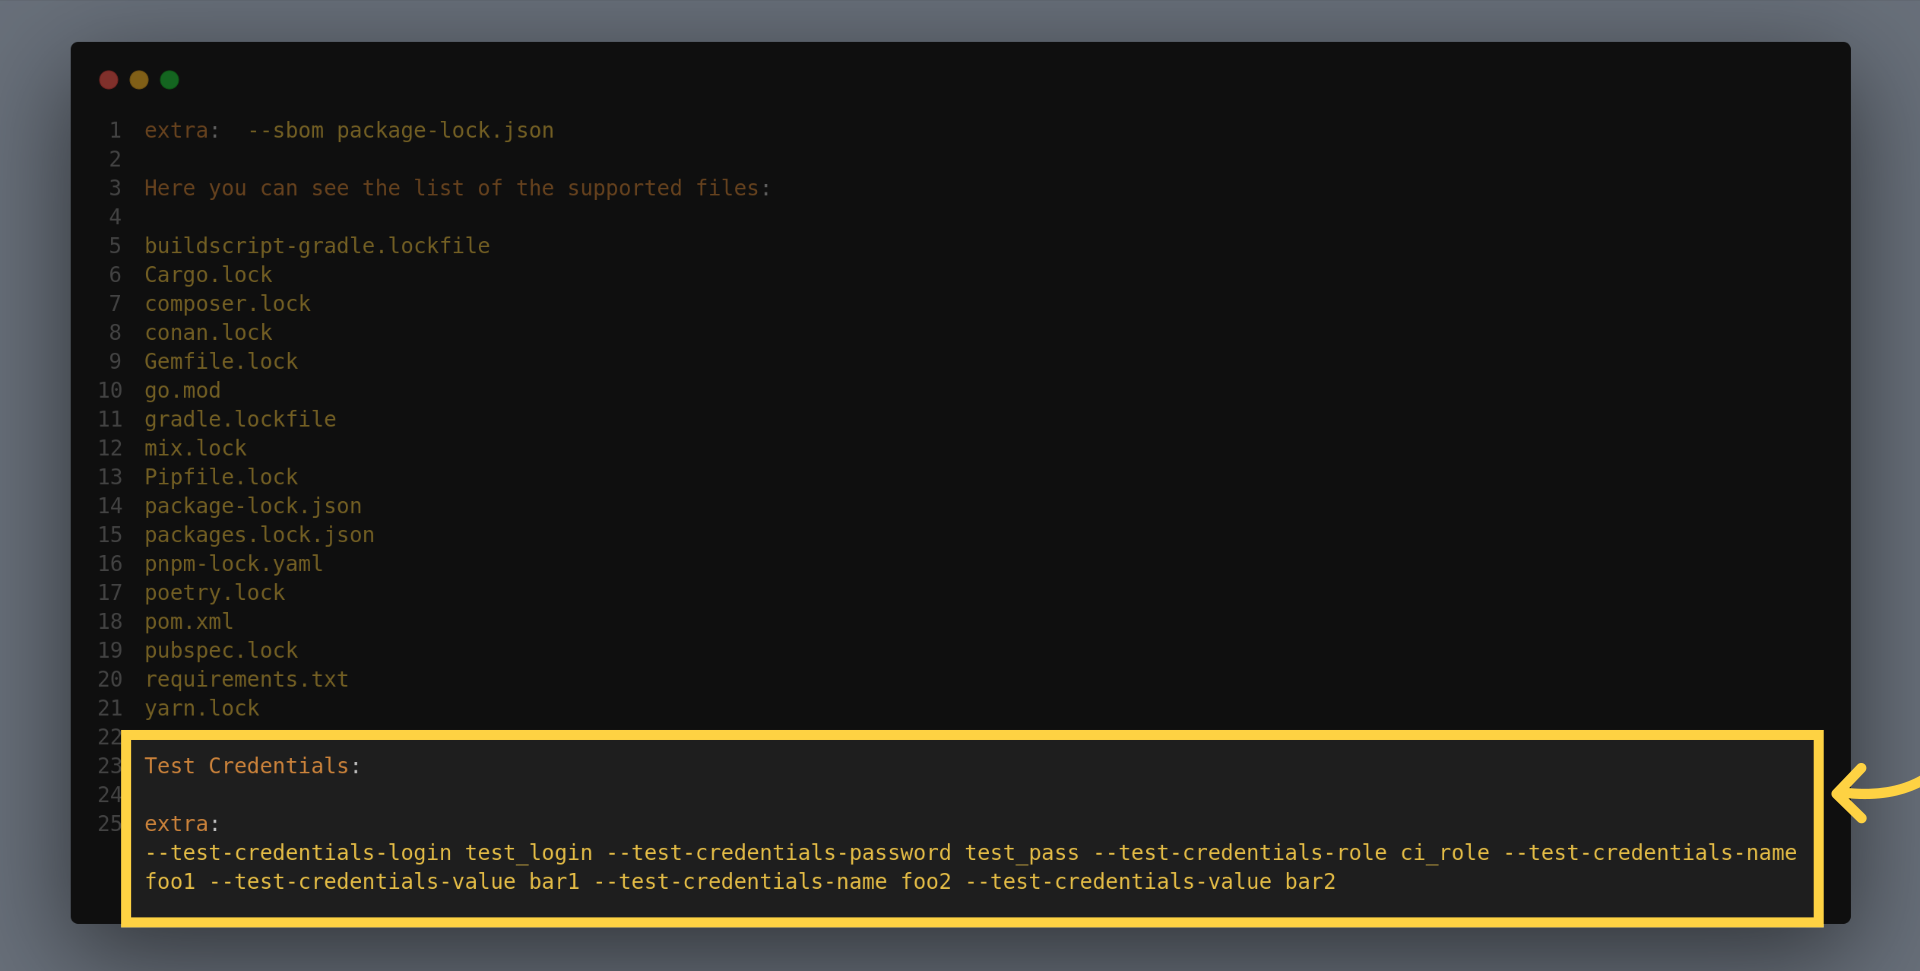
You can supply your SBOM or Lock files to enhance the scan analysis, to do so use the extra input to pass SBOM, for example to add package lock dot json file use the following example:
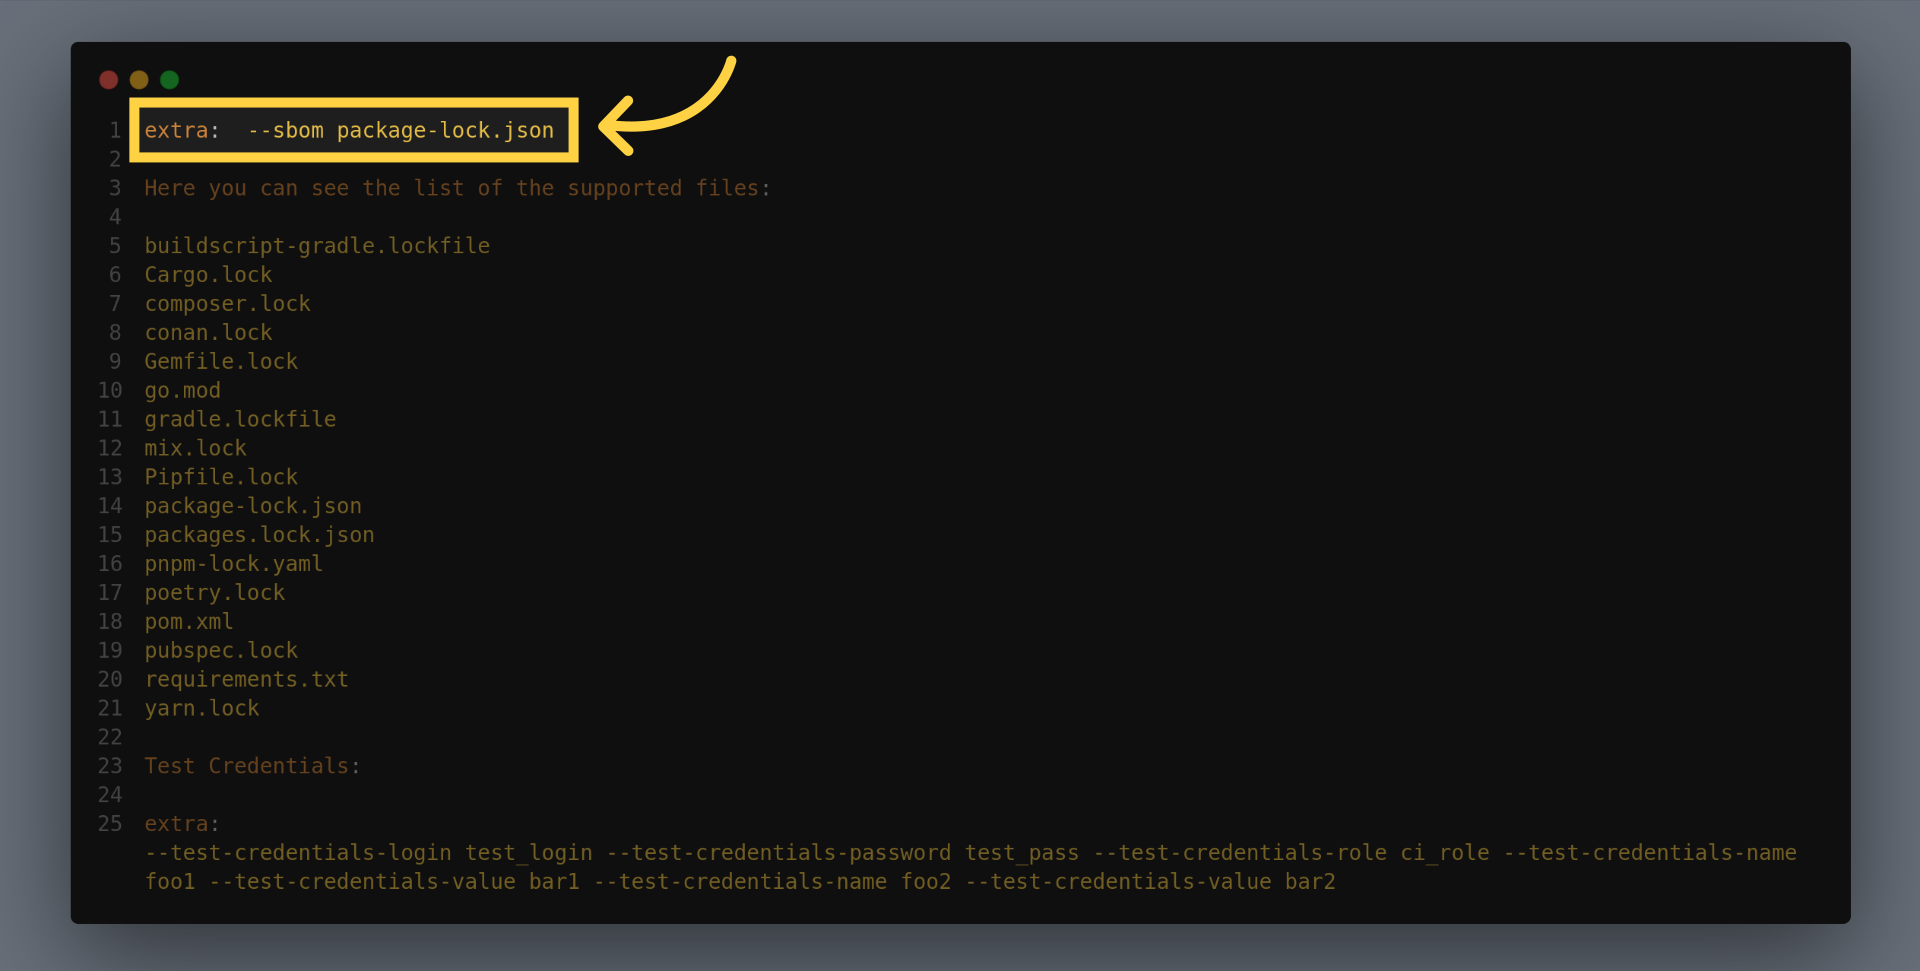
Here you can see the list of the supported files:
Ostorlab supports performing authenticated testing with either simple login password or custom inputs identified with name or label and passing value. To pass test credentials, since the Github YAML Action do not support passing complex objects, you can use the extra input to pass test credentials. For instance to add login & password and a custom credentials with custom names and values, add the following input:
As for the action output, it is possible to access the scan_id using the following syntax ${{ steps.STEP_ID.outputs.scan_id }}.
3. Use Ostorlab Security Scanner GitHub App to Provide actionable insights directly in your PR
The Ostorlab Security Scanner GitHub App should be used in conjunction with an Ostorlab Github Actions workflow as explained in steps 1 and 2.
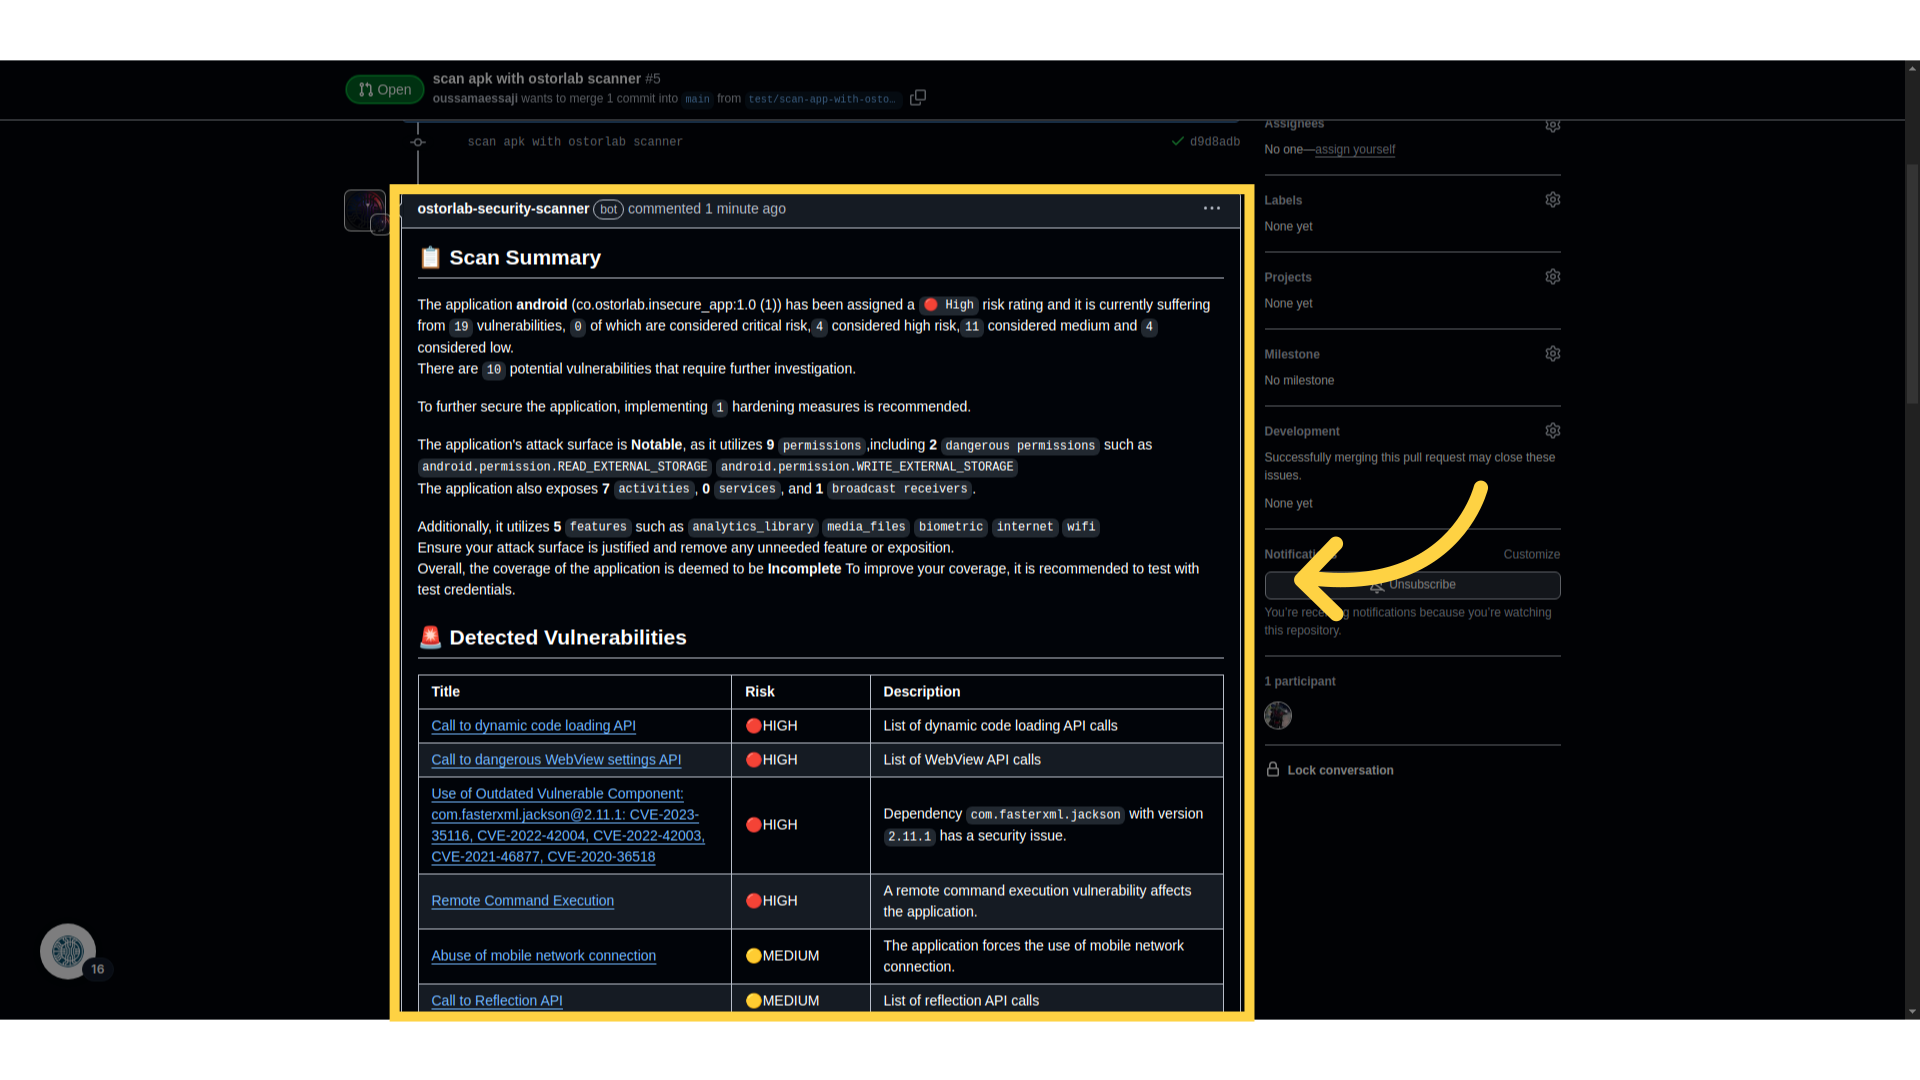
The Ostorlab Security Scanner GitHub App is designed to help developers improve their code security by providing actionable insights directly in Pull Requests. It integrates security into the development workflow with the main goal of pinpointing exactly what piece of code introduced the vulnerability, provide actionable insights and code suggestion that you can automatically commit. This document provides instructions on how to set up and use the App.
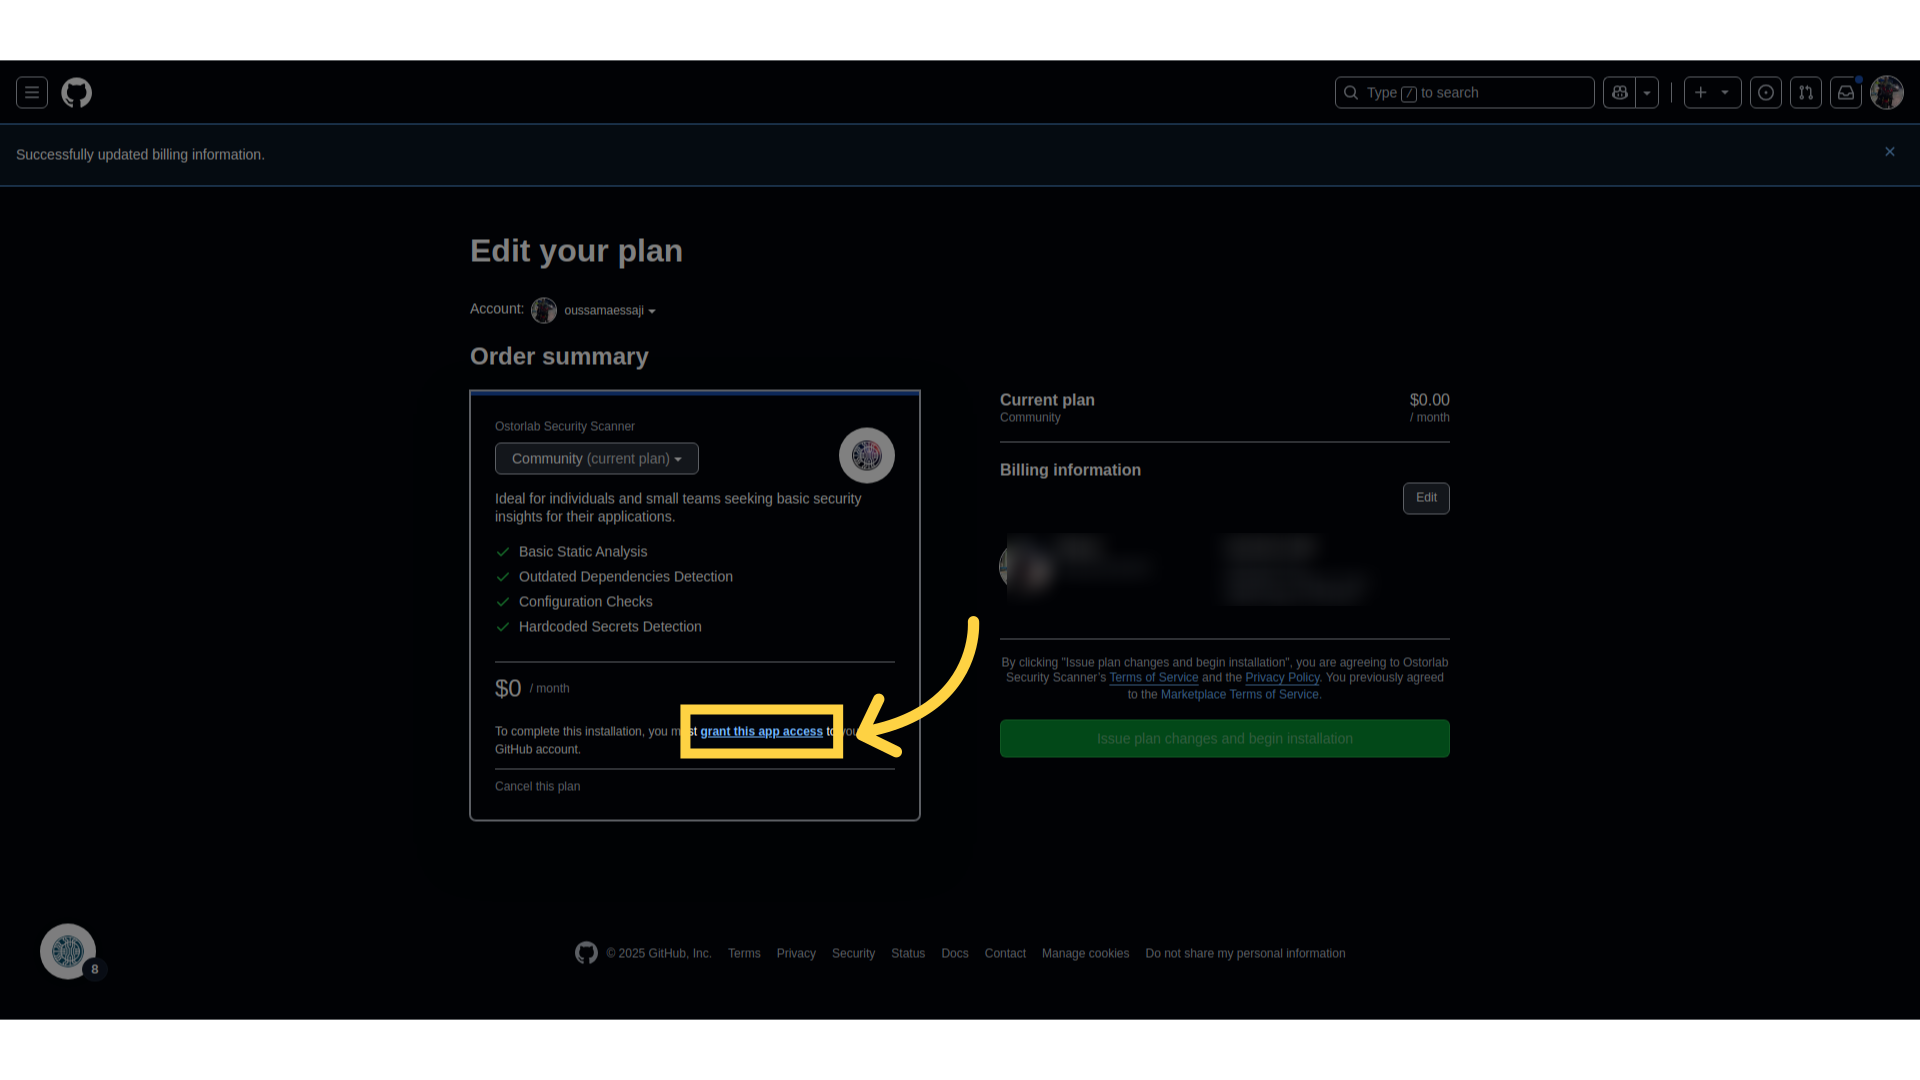
- Add the GitHub App:
- Navigate to the Ostorlab Security Scanner App.
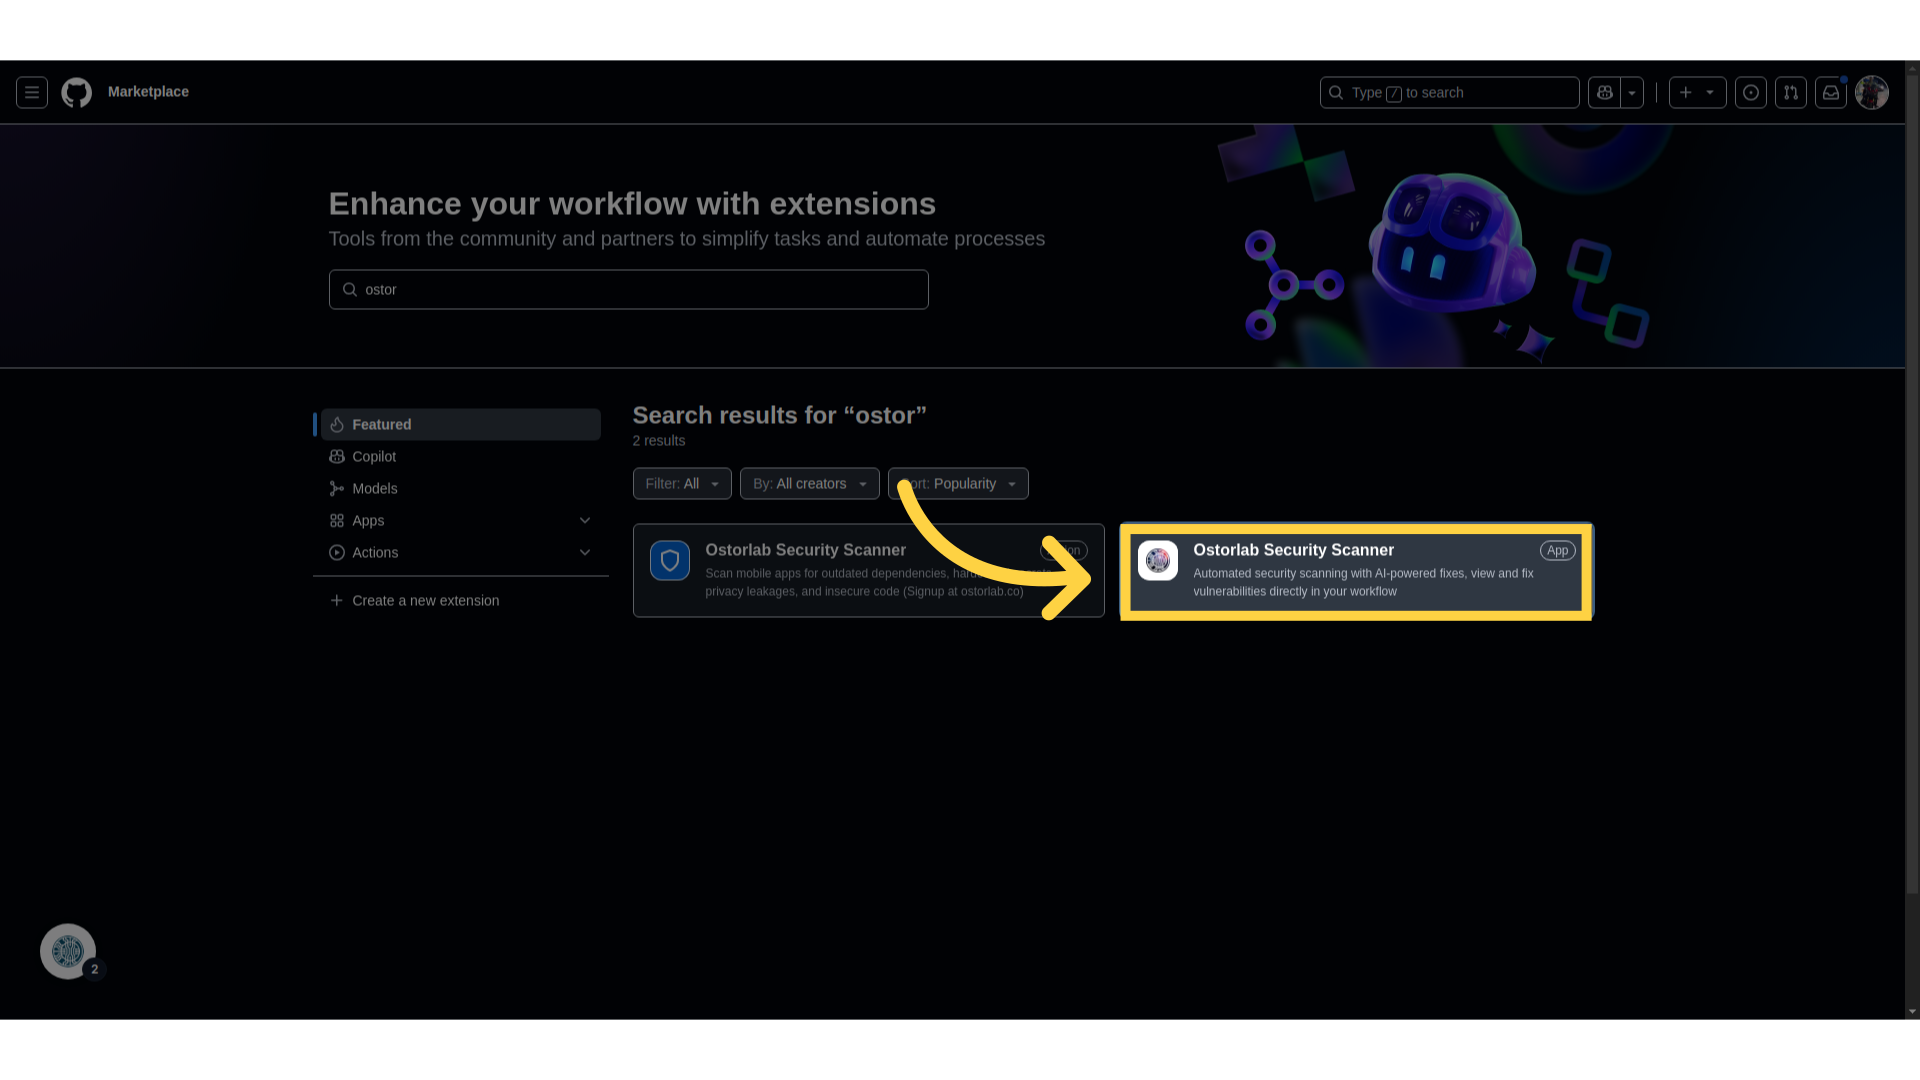
- Click Add.

- Choose the account where you’d like to install the app.
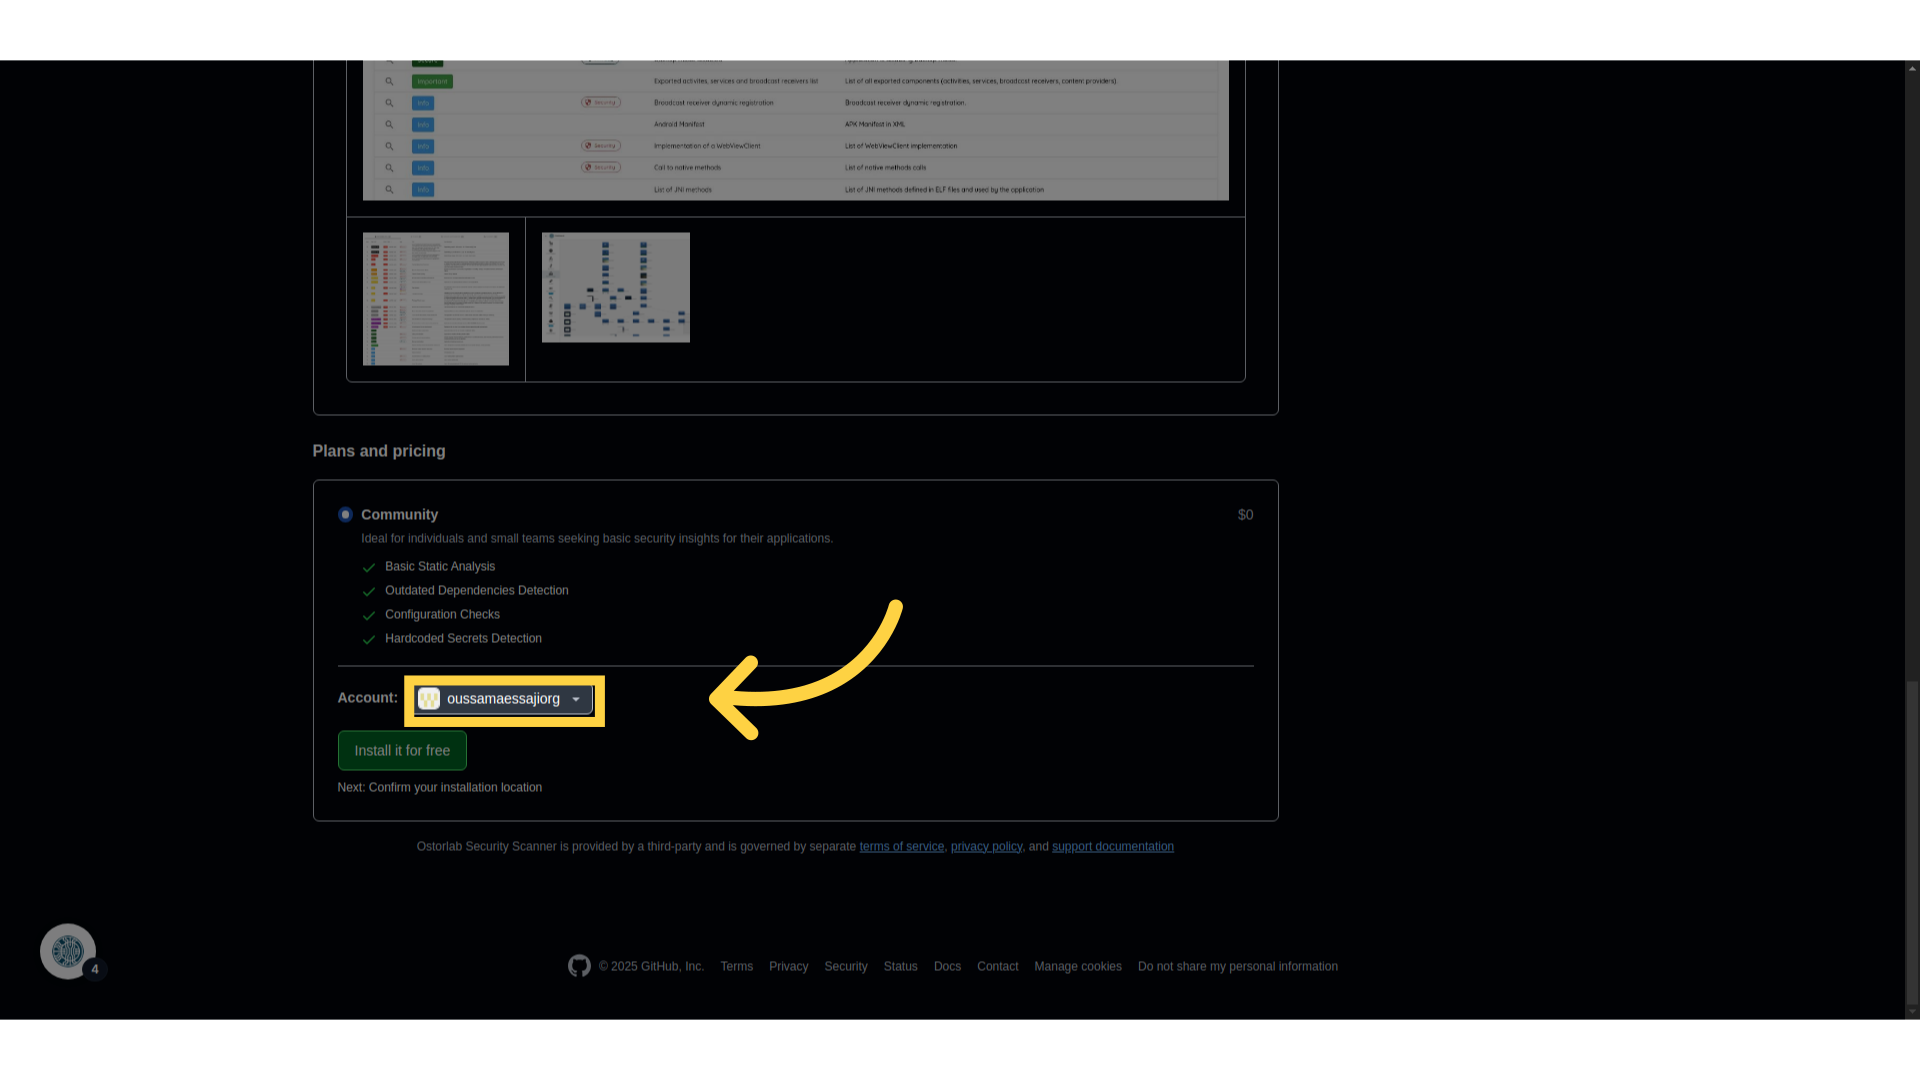
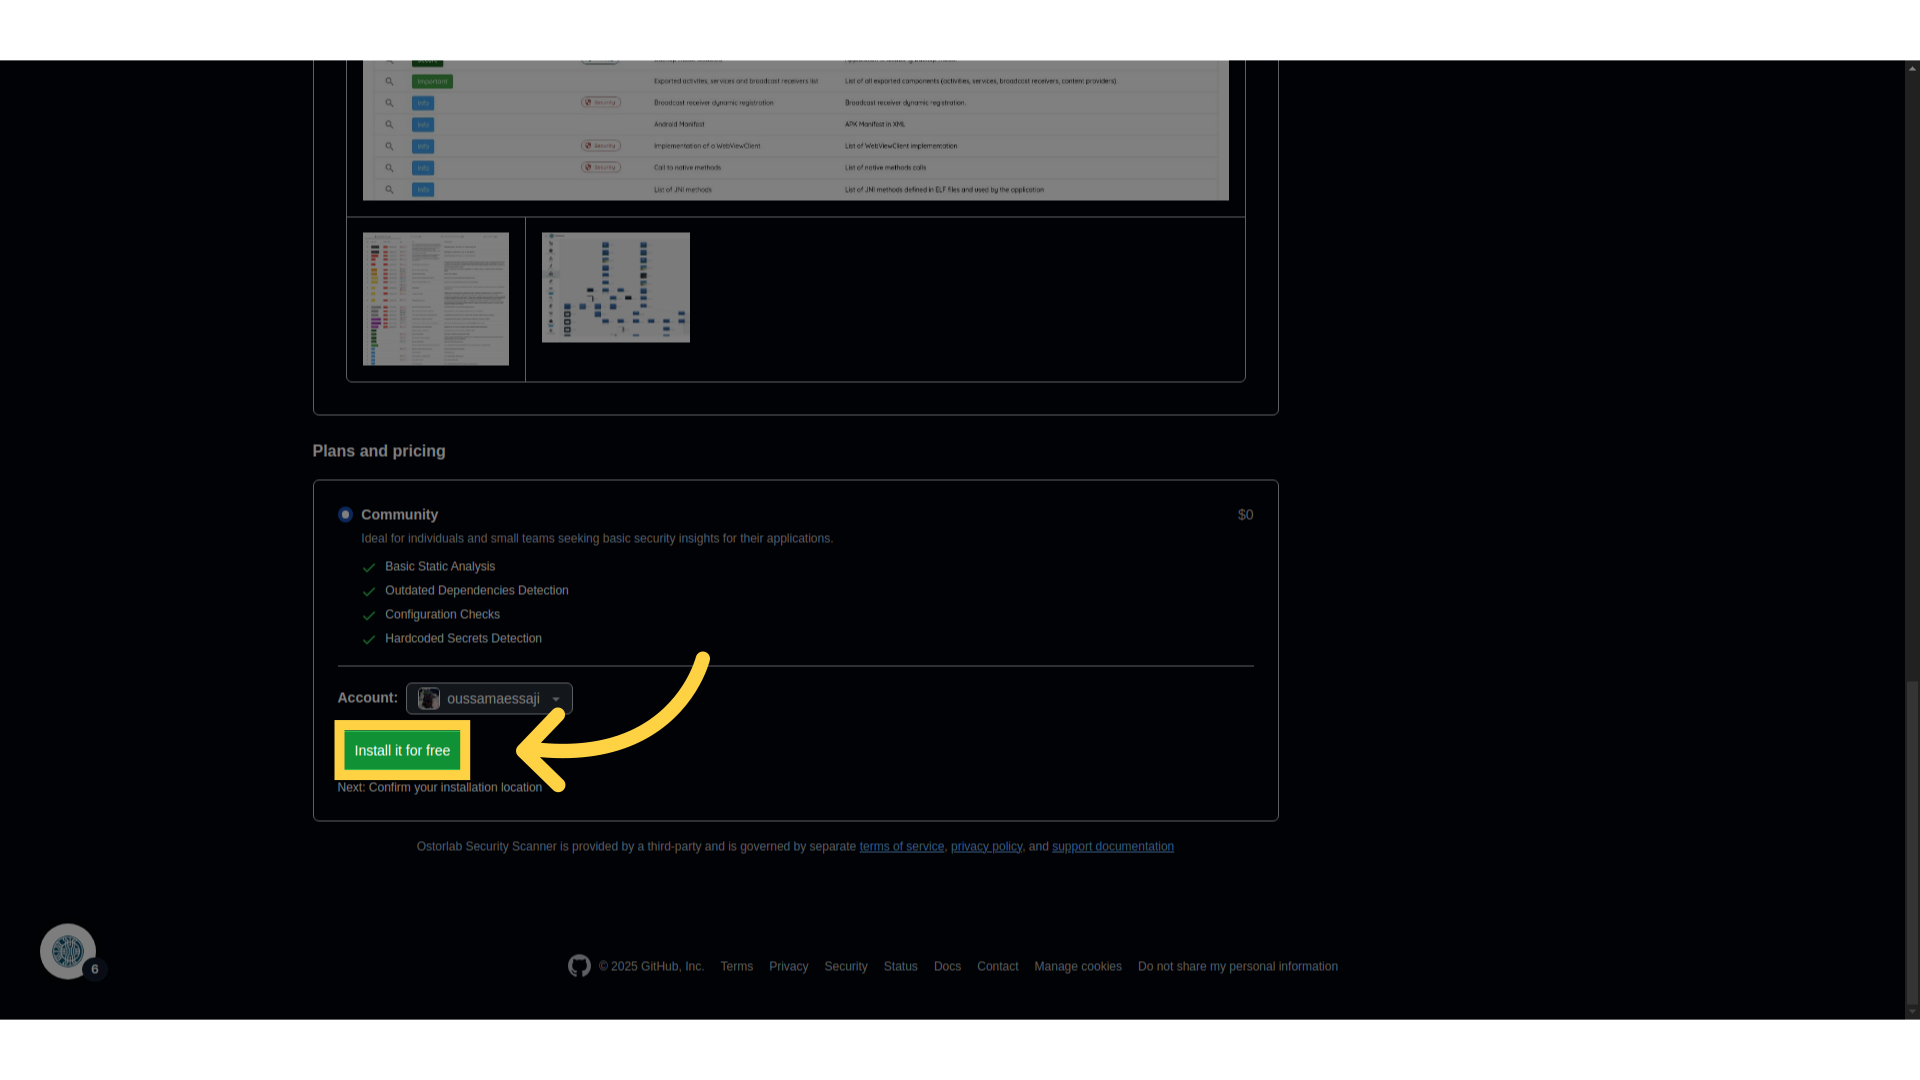
- Click Install for free.
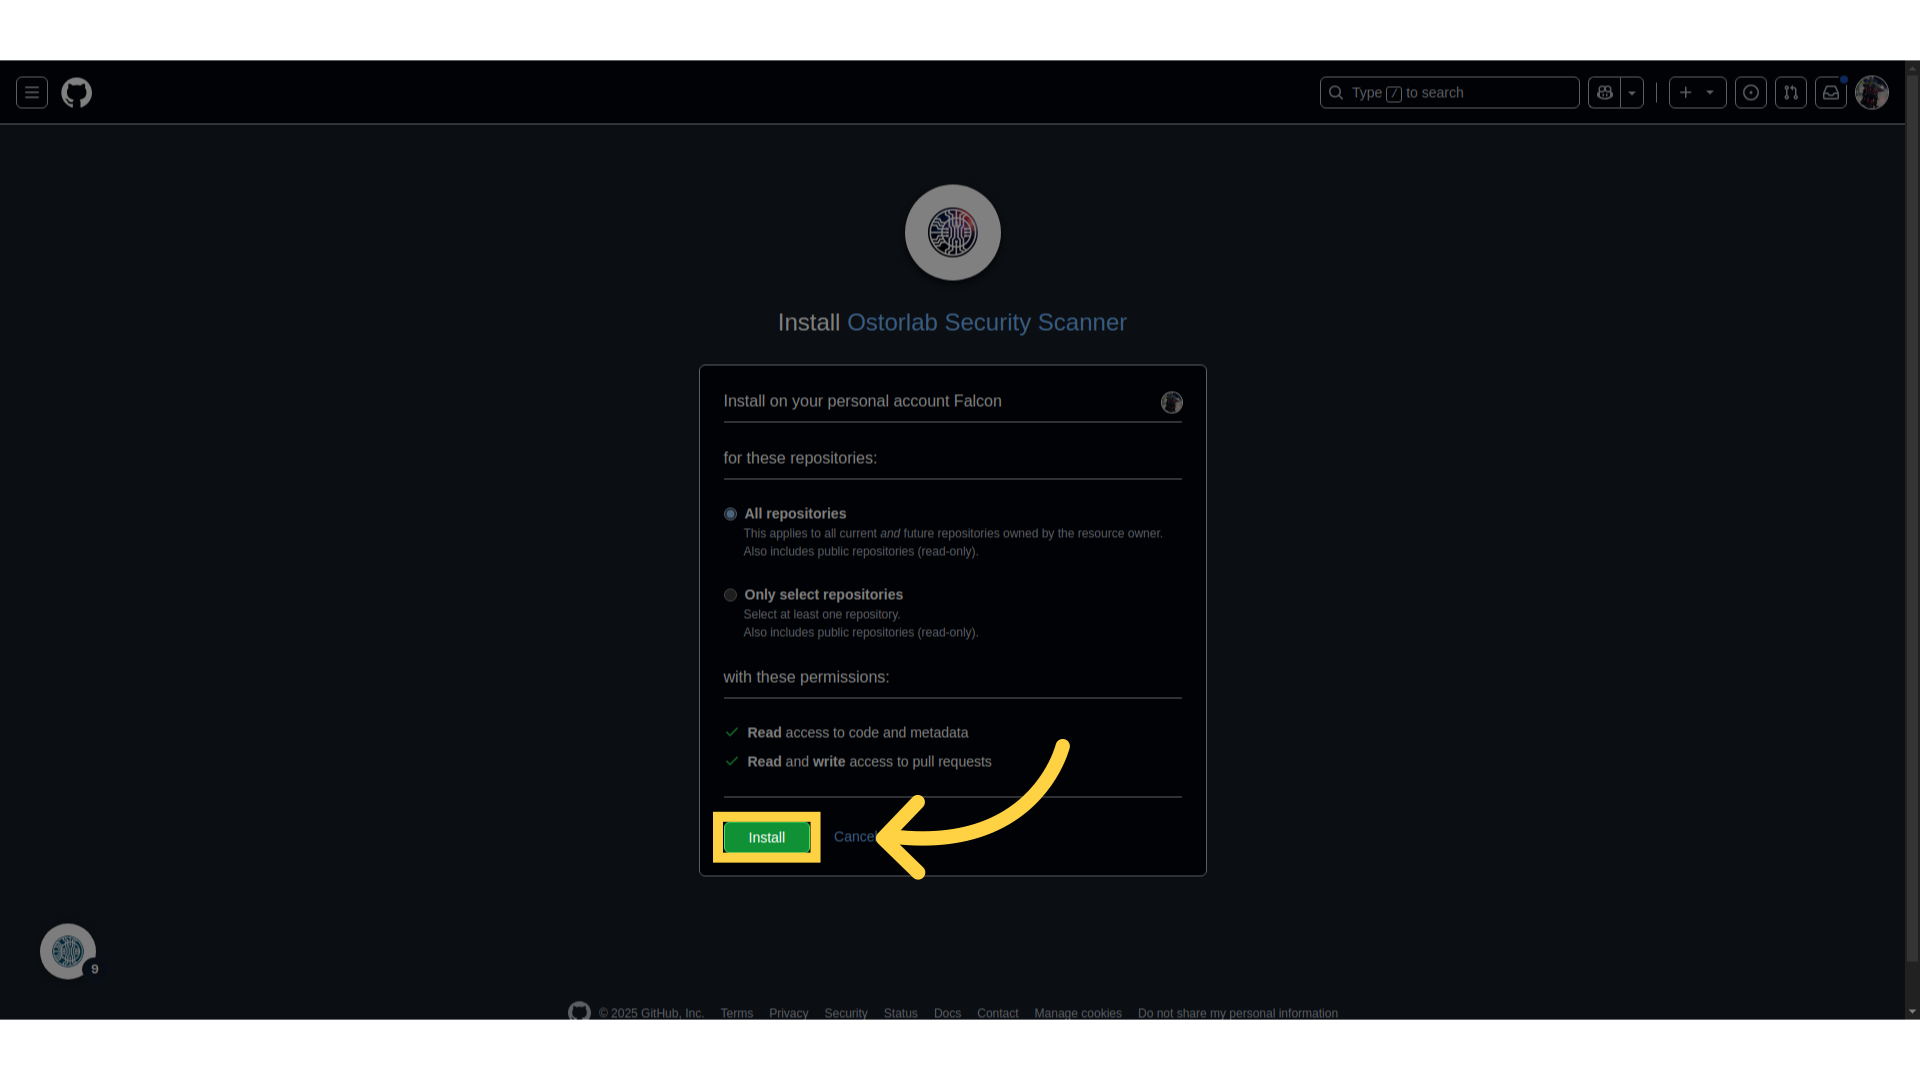
- Provide the necessary permissions:
- Read & Write access to pull requests.
- Metadata access for the repository.
-
Click Install to finalize the setup.
-
How to Use:
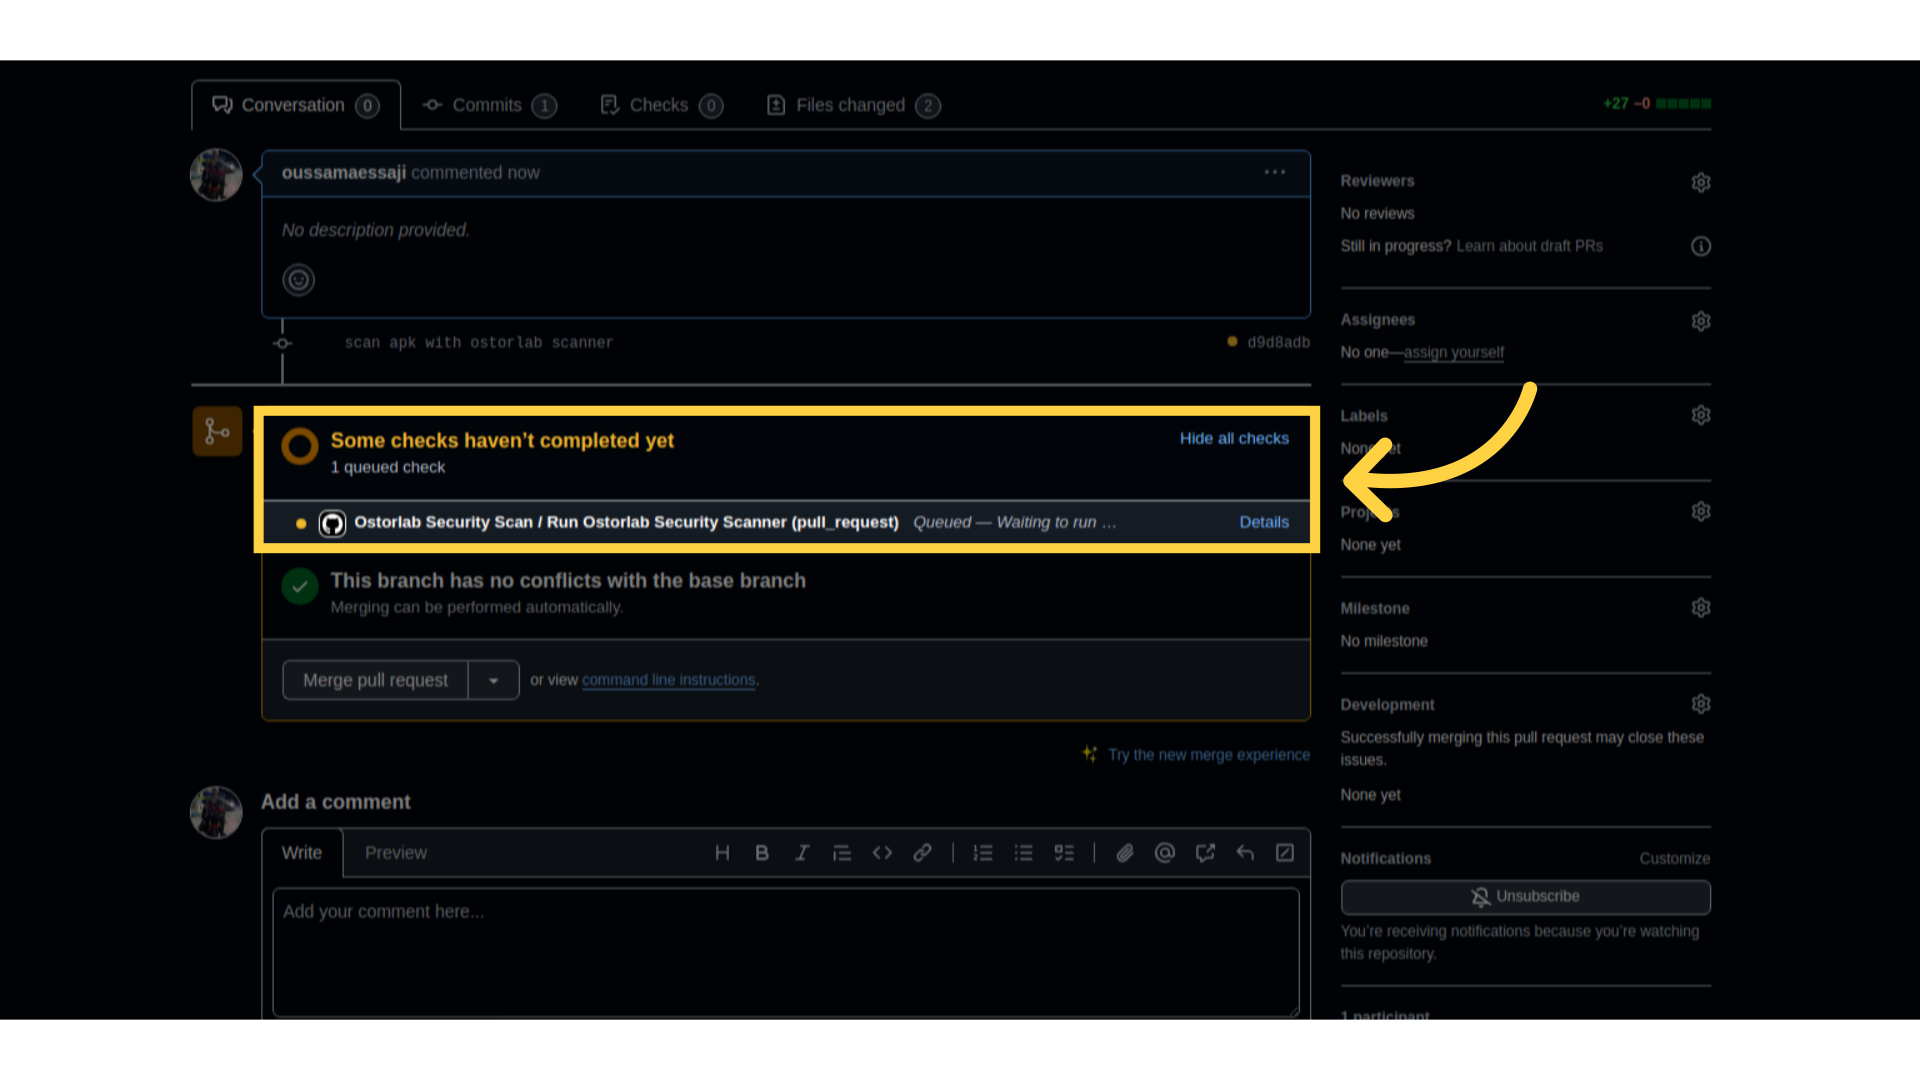
- The next step is to update your workflow to add an Ostorlab step to trigger the scan as described in steps 1 and 2.

- Create a pull request incorporating the updated workflow with Ostorlab.
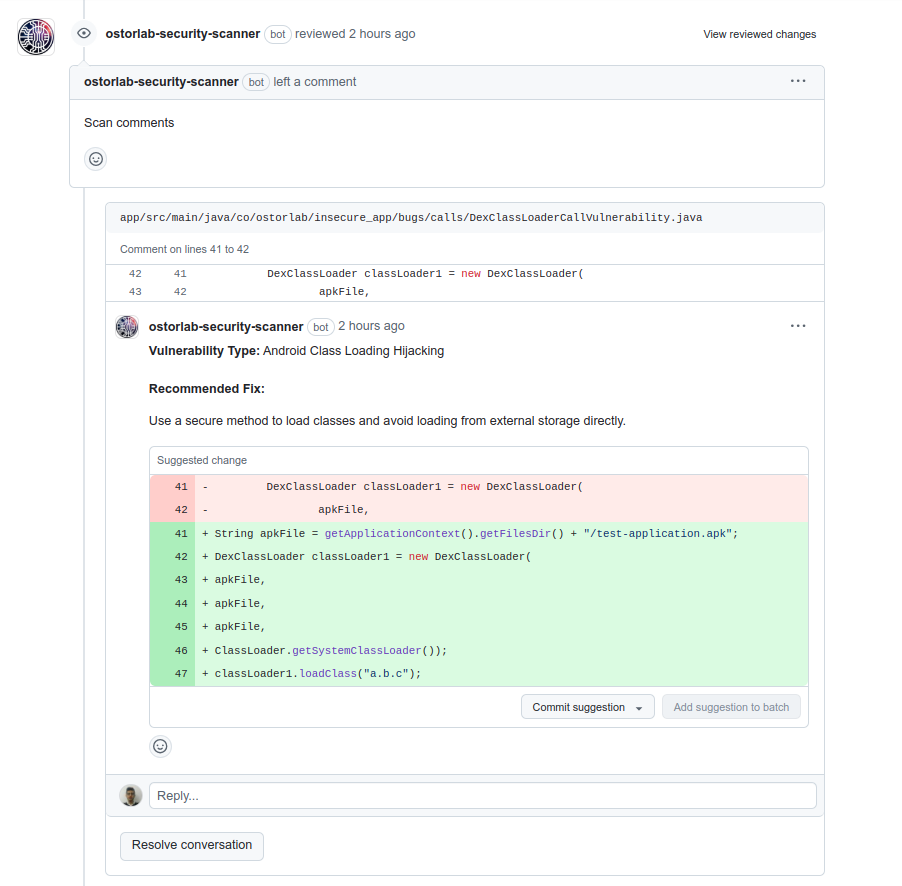
 After the scan completes, the Ostorlab Security Scanner will automatically comment on your pull request, pinpointing extactly where the vulnerability was introduced & provide code snippets of the fix.
This guide outlined the necessary steps to successfully utilize the Ostorlab GitHub Action and the Ostorlab Security Scanner App, including generating a new API key, exploring various action inputs, installing the app, and viewing the results.