Source Code Scanning
Source Code Scanning helps you identify security vulnerabilities directly in your source code before they reach production. By connecting your source code repository to Ostorlab, you can scan your projects for common security issues, review actionable findings, and prioritize remediation early in the development lifecycle.
This guide walks you through configuring a source code integration and launching your first scan.
⚙️ Configure a Source Code Integration
Before you can scan a repository, you need to connect your source code provider to Ostorlab.
- Open the Ostorlab Dashboard.
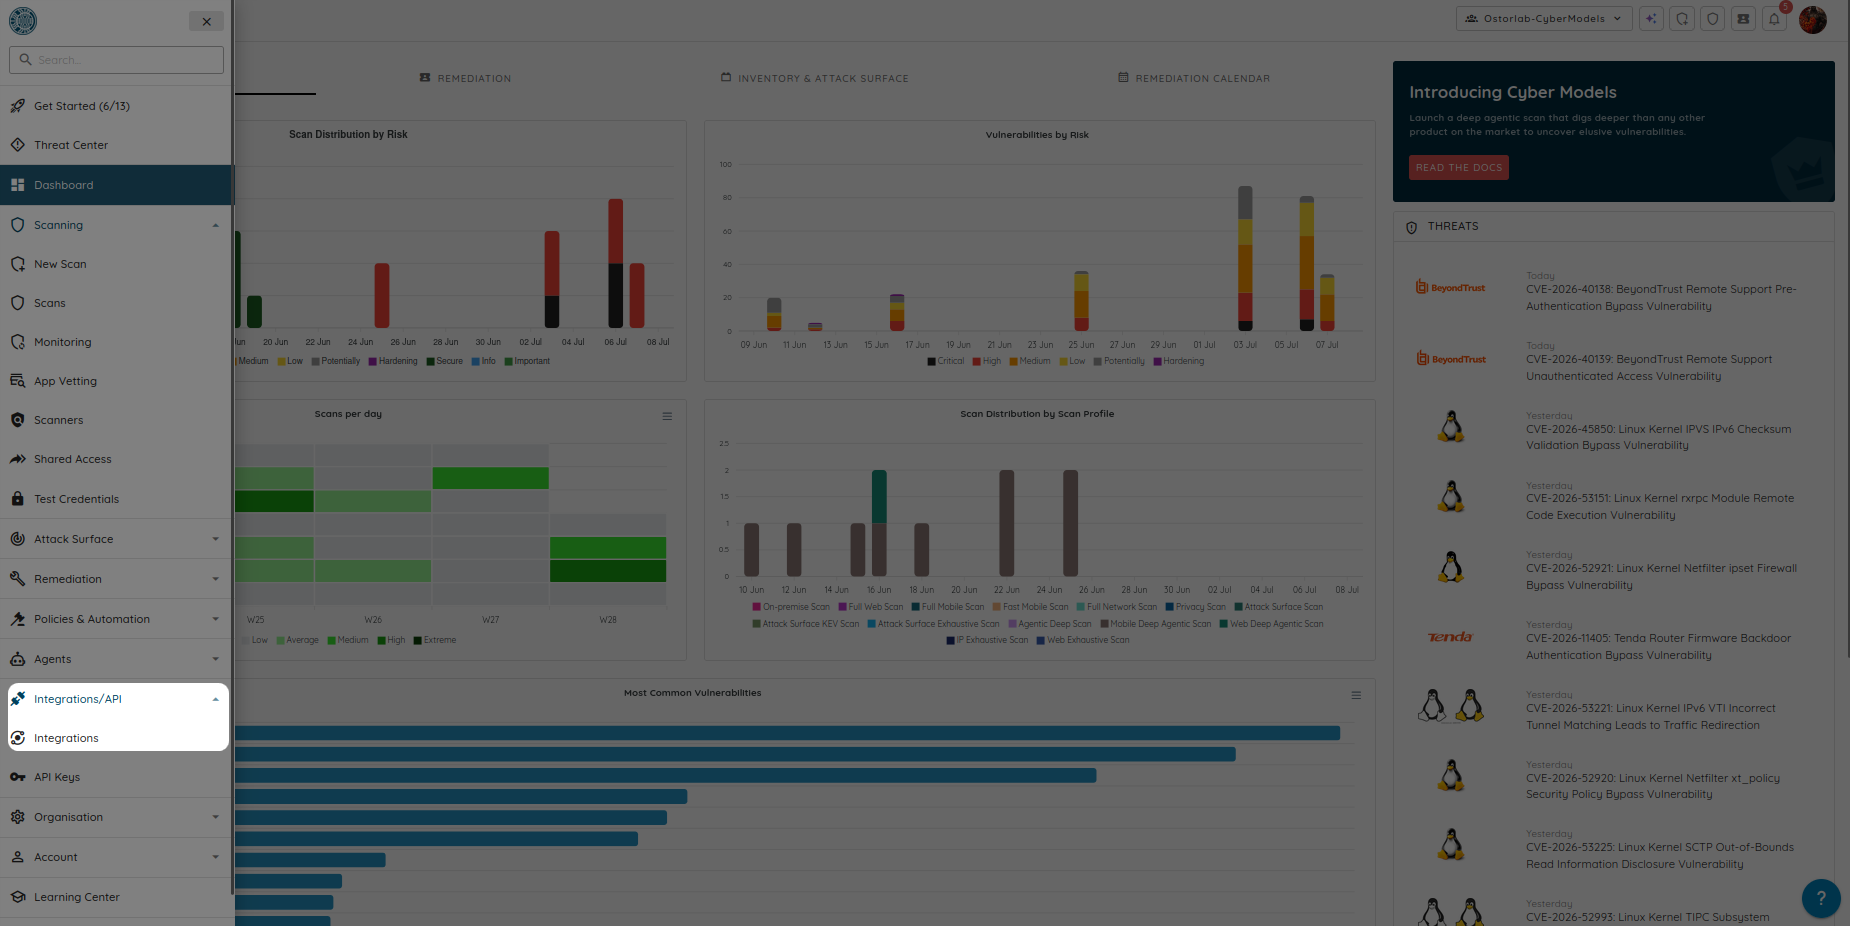
- Click the Hamburger Menu in the upper-left corner.
- Navigate to Integrations.
- Select the Source Code category.
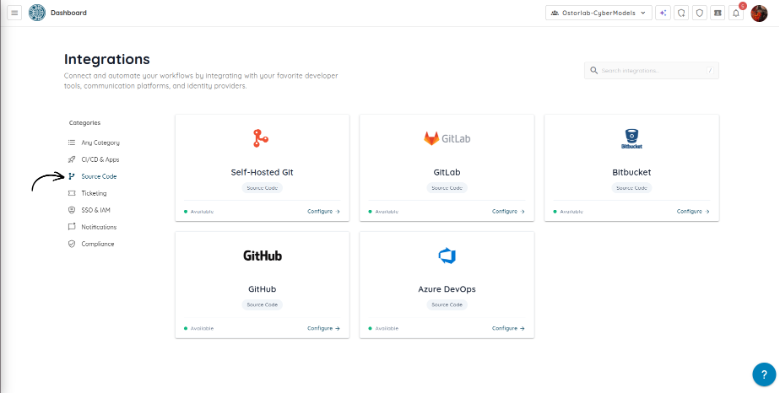
- Choose the source code provider you want to connect (GitHub, GitLab, Bitbucket, Azure DevOps, or Self-Hosted Git).
- Follow the provider-specific configuration steps to authorize access to your repositories.
Once the integration is complete, your repositories will be available when creating a Source Code Scan.
🚀 Create a New Source Code Scan
Step 1: Run a New Scan
After configuring your integration:
- Open the Ostorlab Dashboard.
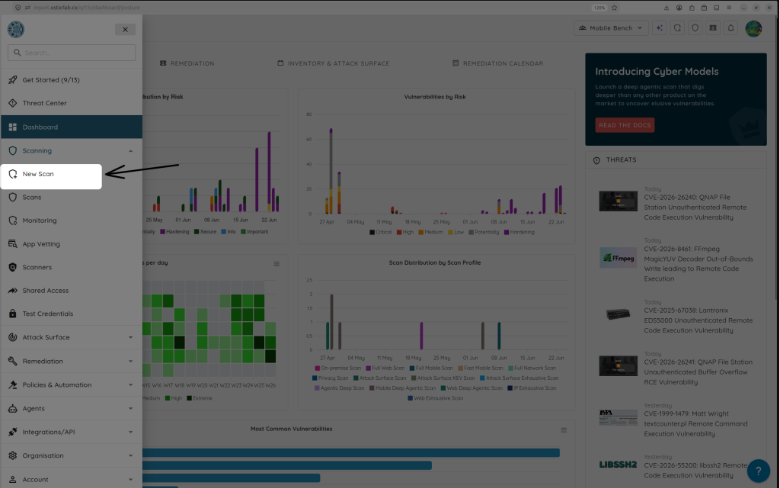
- Click the Hamburger Menu icon in the sidebar and select Scanning -> New Scan.
- (Optional) Provide a descriptive title for your security audit.
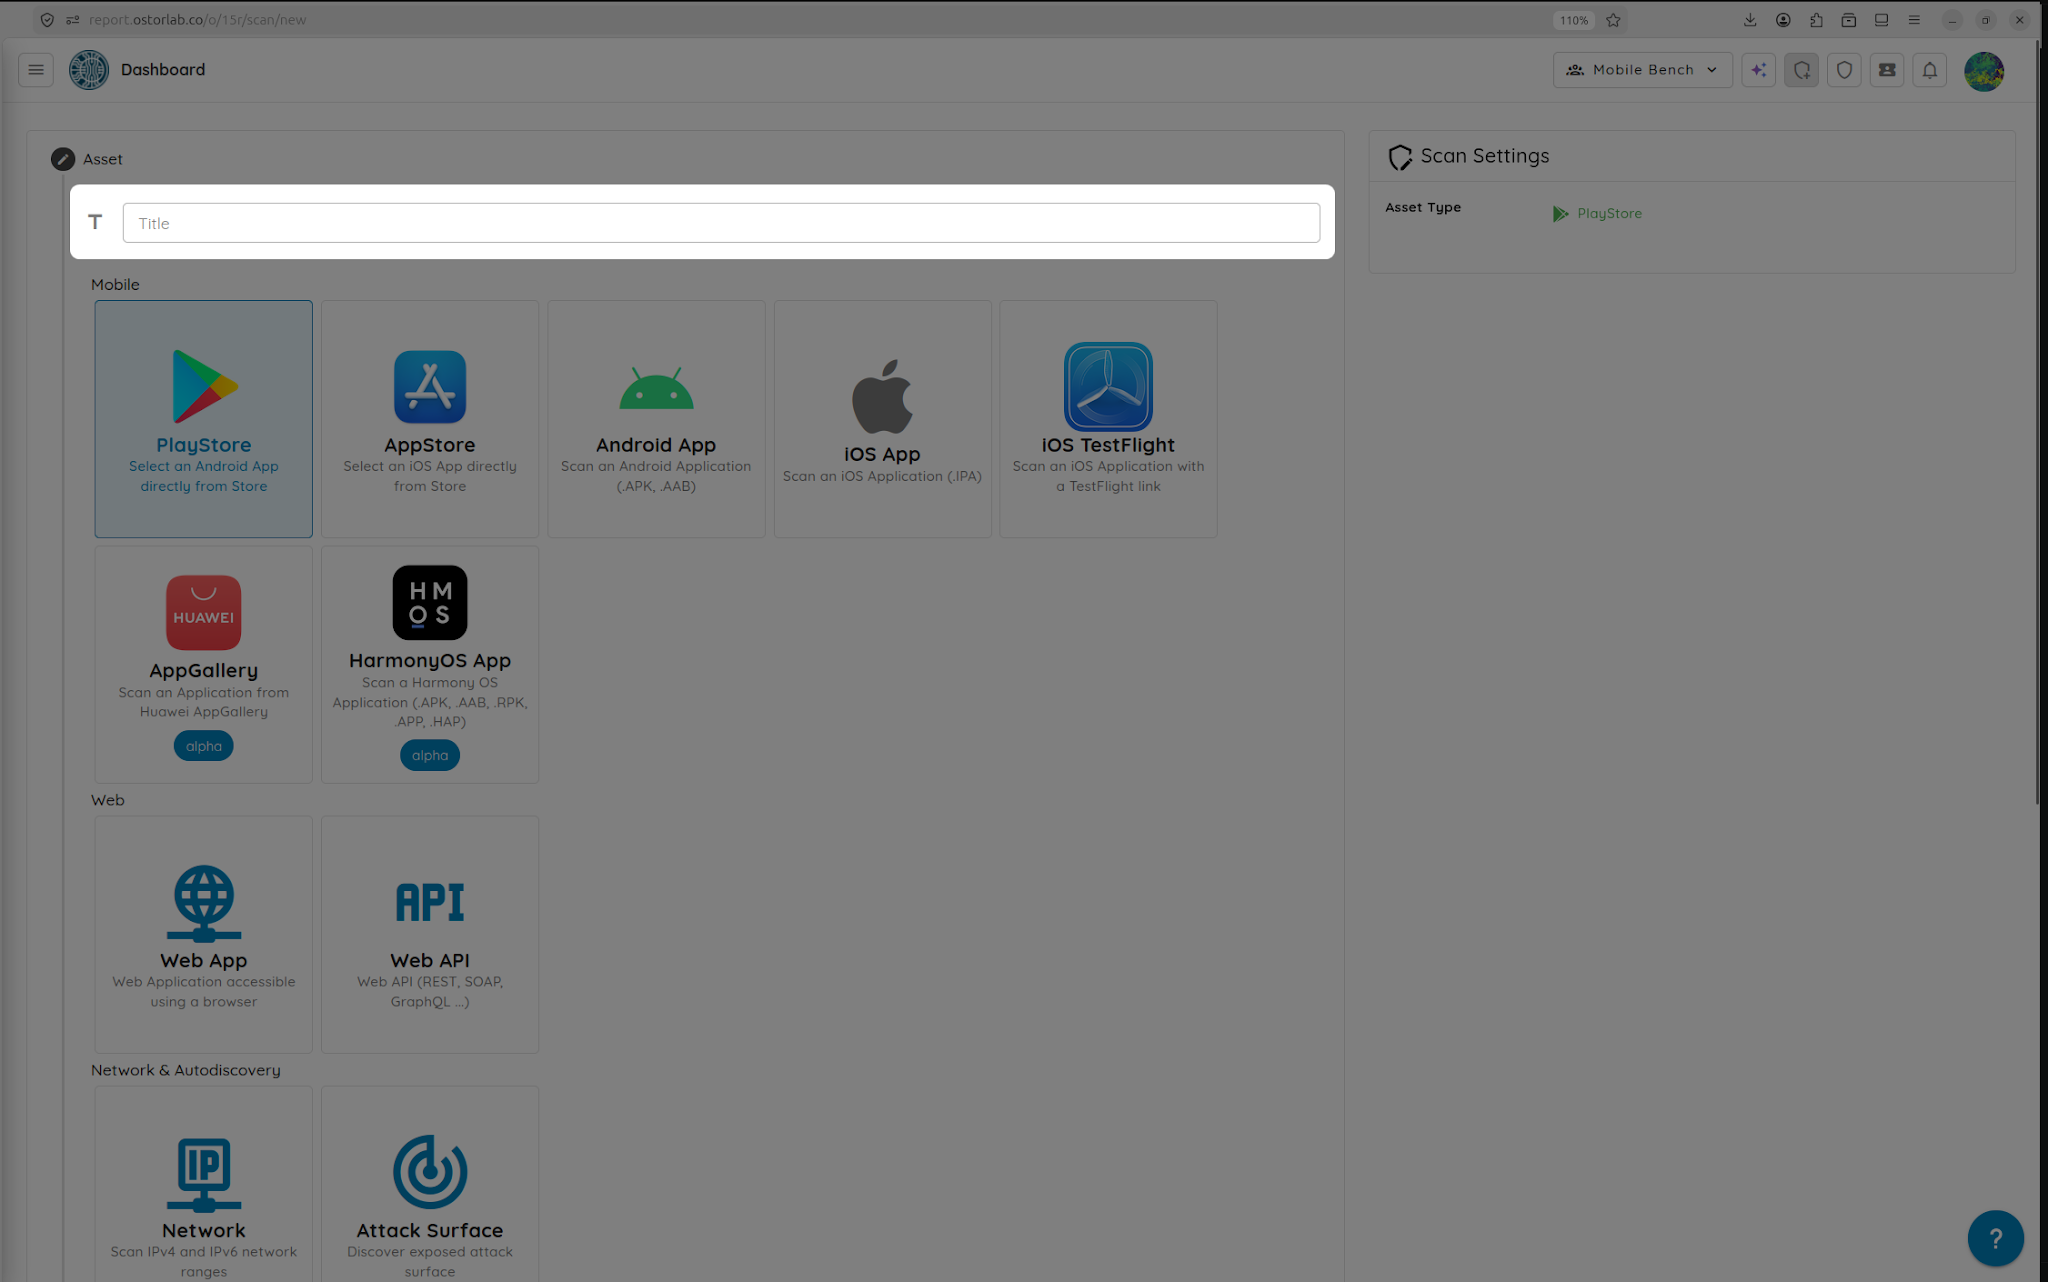
Step 2: Select the Scan Asset
When creating a new scan:
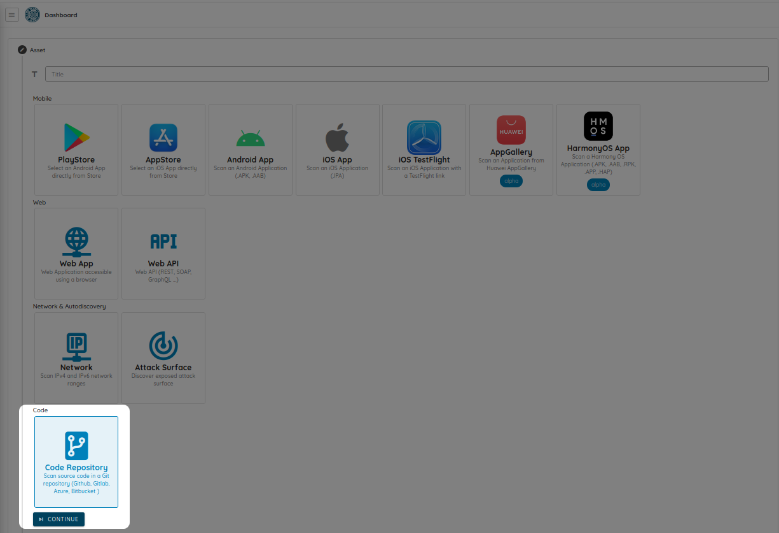
- Select Code Repository as the scan asset.
- Choose the repository you want to scan.
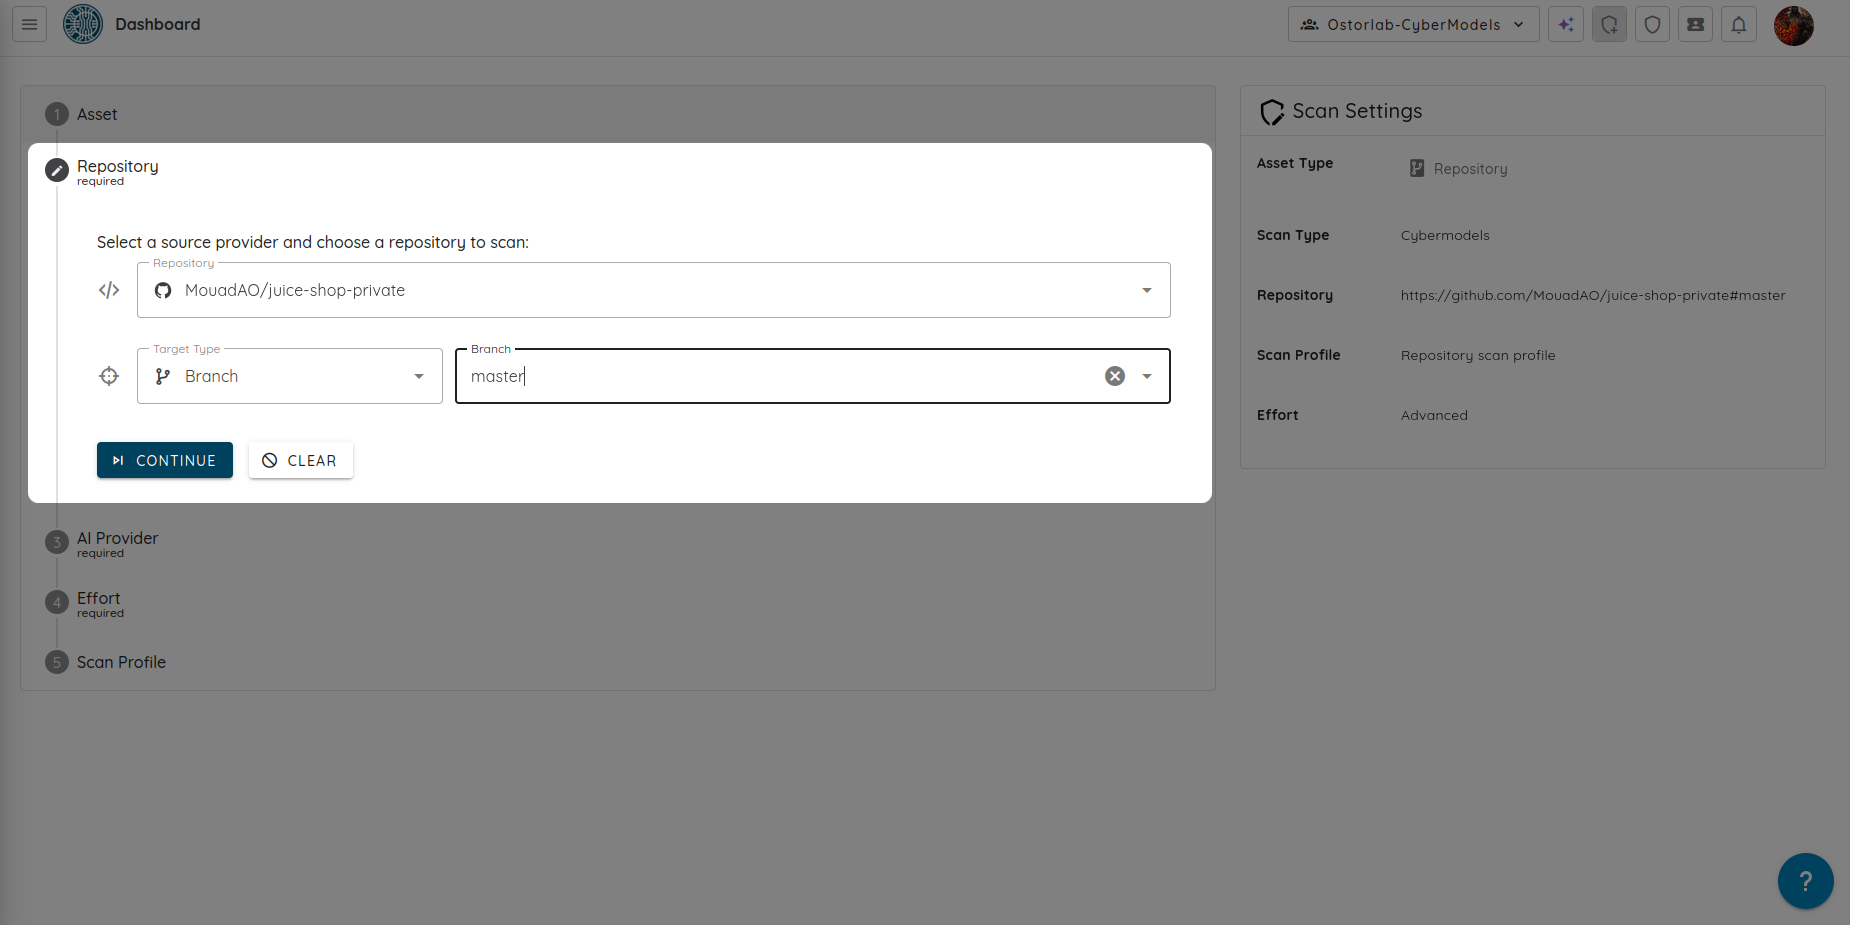
- Select the appropriate Target Type.
- Click Continue.
Step 3: Configure the AI Provider
The Source Code Scan is an agentic, AI-driven scan that can run using Ostorlab’s Cybermodels or your custom API key via Bring Your Own Key (BYOK).
-
Select the AI provider you want to use for the scan, either Cybermodels or BYOK.
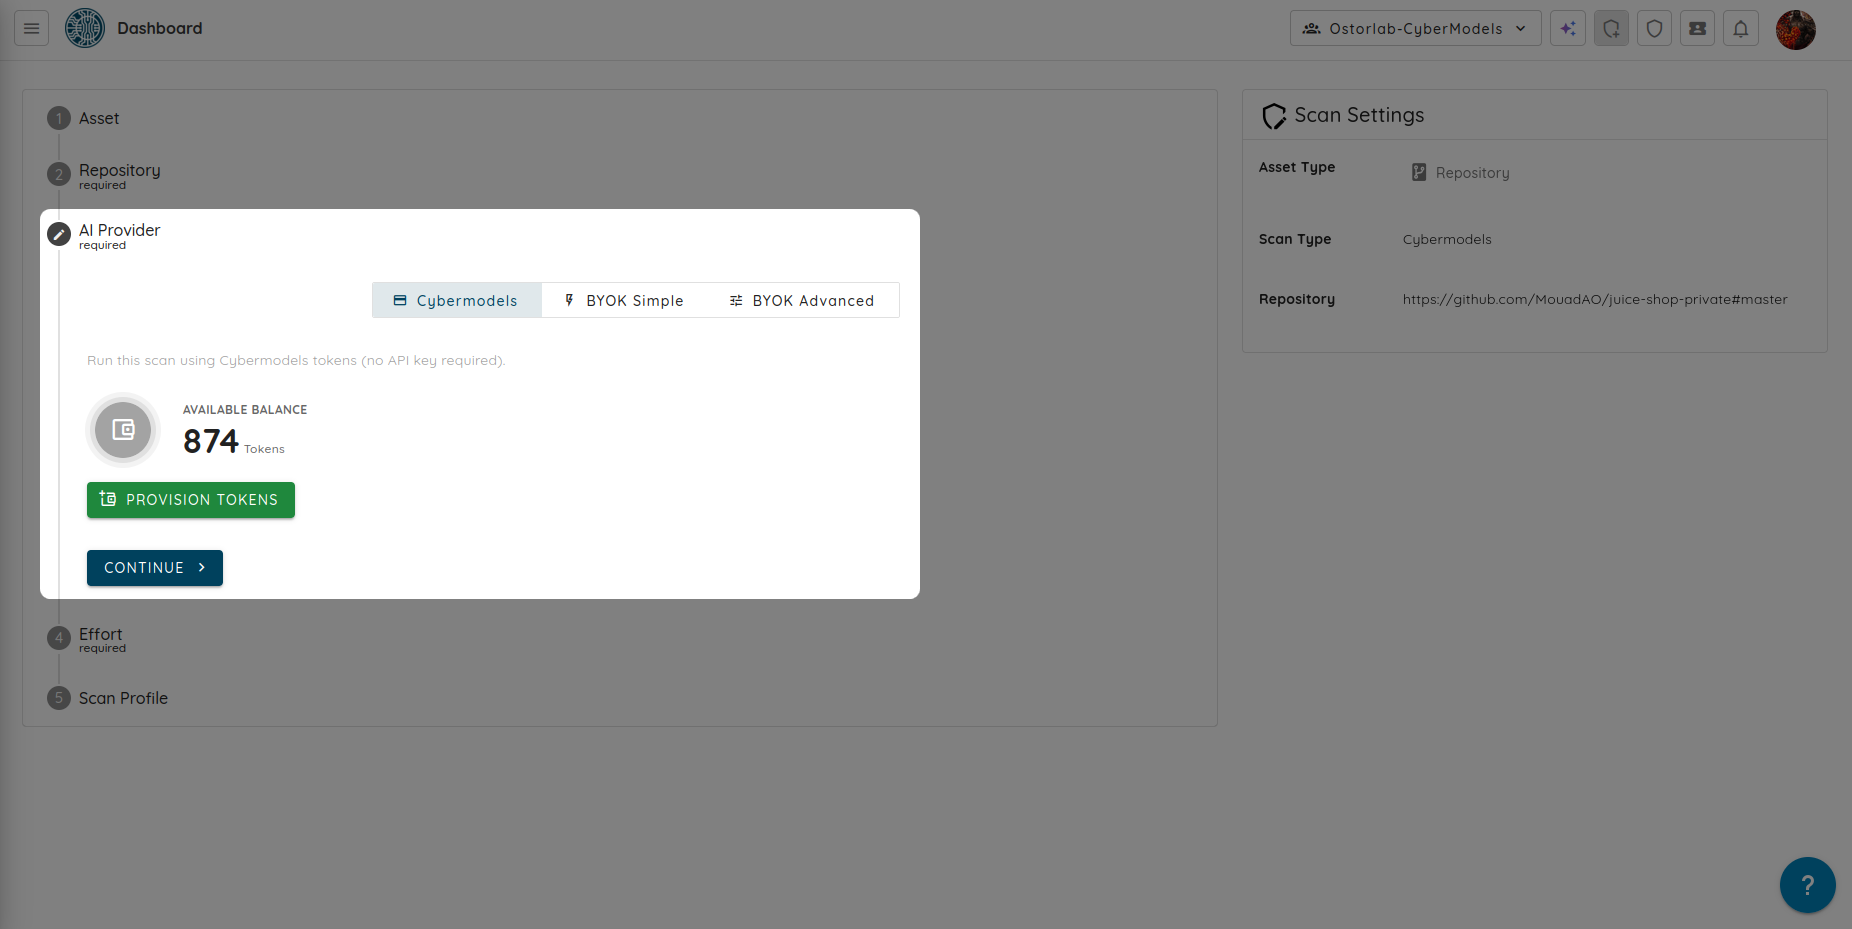
To use your own API key, select BYOK as the AI provider.
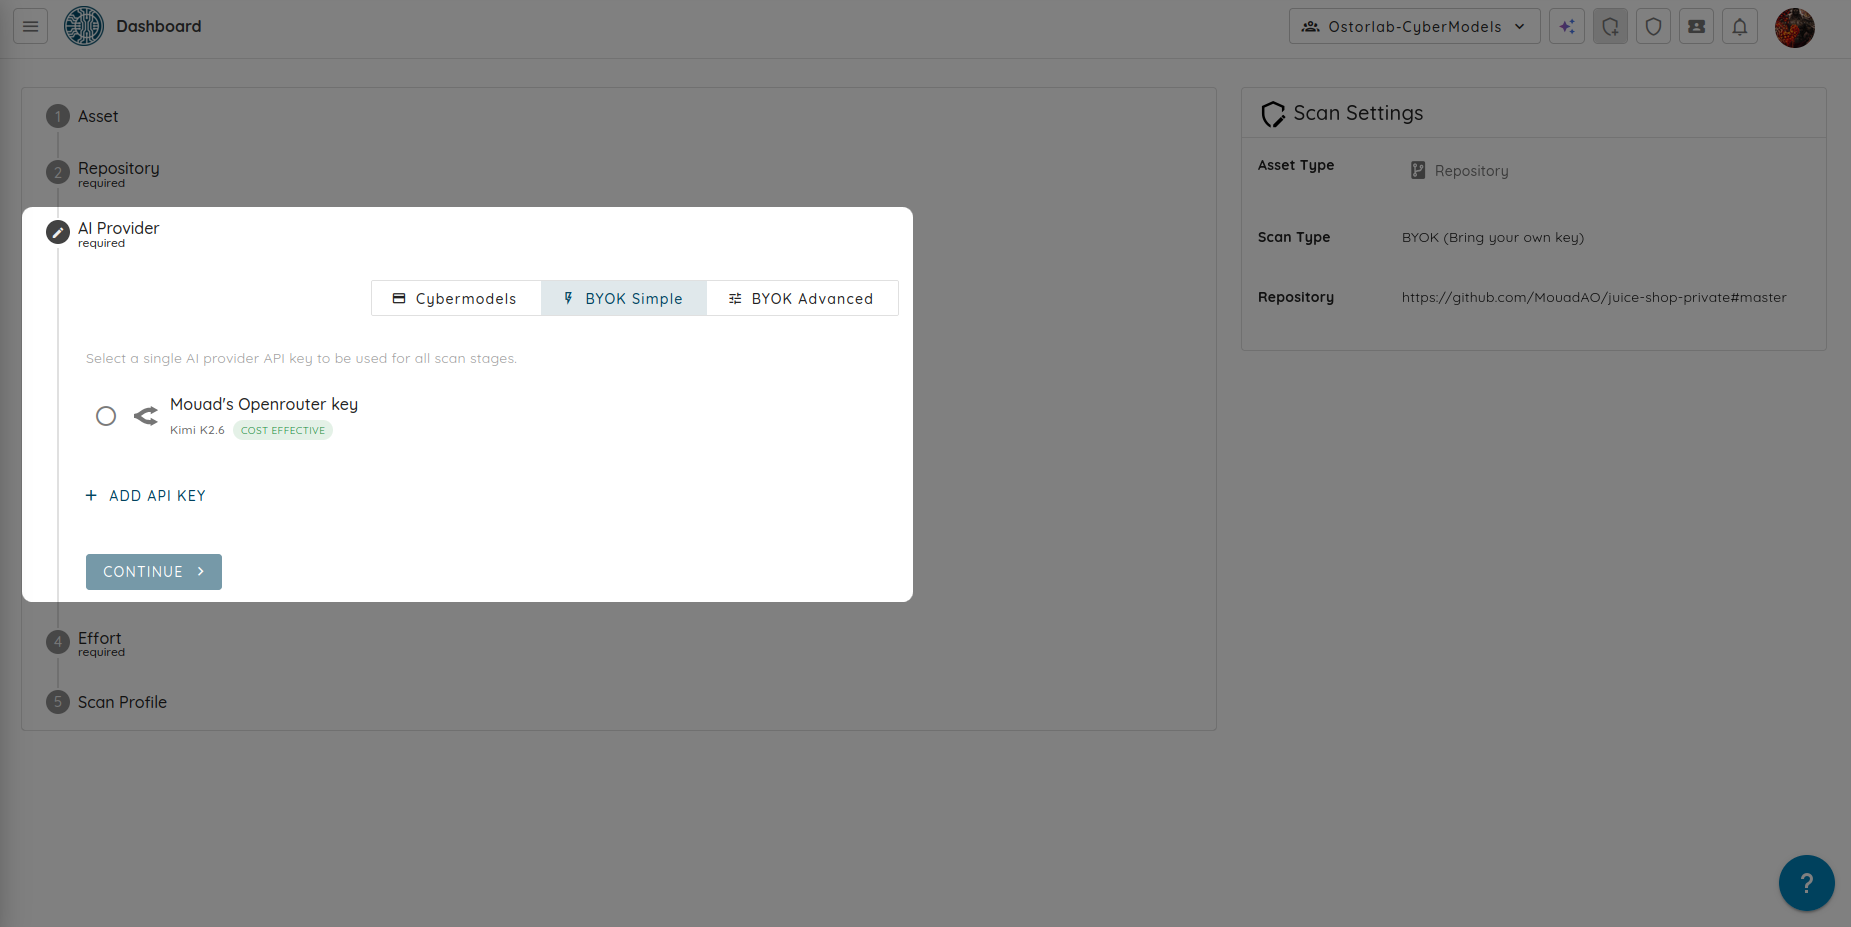
Step 4: Configure the Effort Level
The effort level determines how extensively Ostorlab analyzes your repository. Higher effort levels provide broader code coverage and more in-depth analysis, but may increase scan duration and AI token consumption.
- Choose the effort level that best fits your repository and security requirements:
- Core (50 tokens): Performs a fast baseline analysis, making it ideal for quick security checks during development.
- Advanced (200 tokens): Provides a deeper analysis with broader code coverage to identify a wider range of security issues.
- Elite (400 tokens): Performs the most comprehensive analysis, maximizing coverage to detect complex and difficult-to-find vulnerabilities.
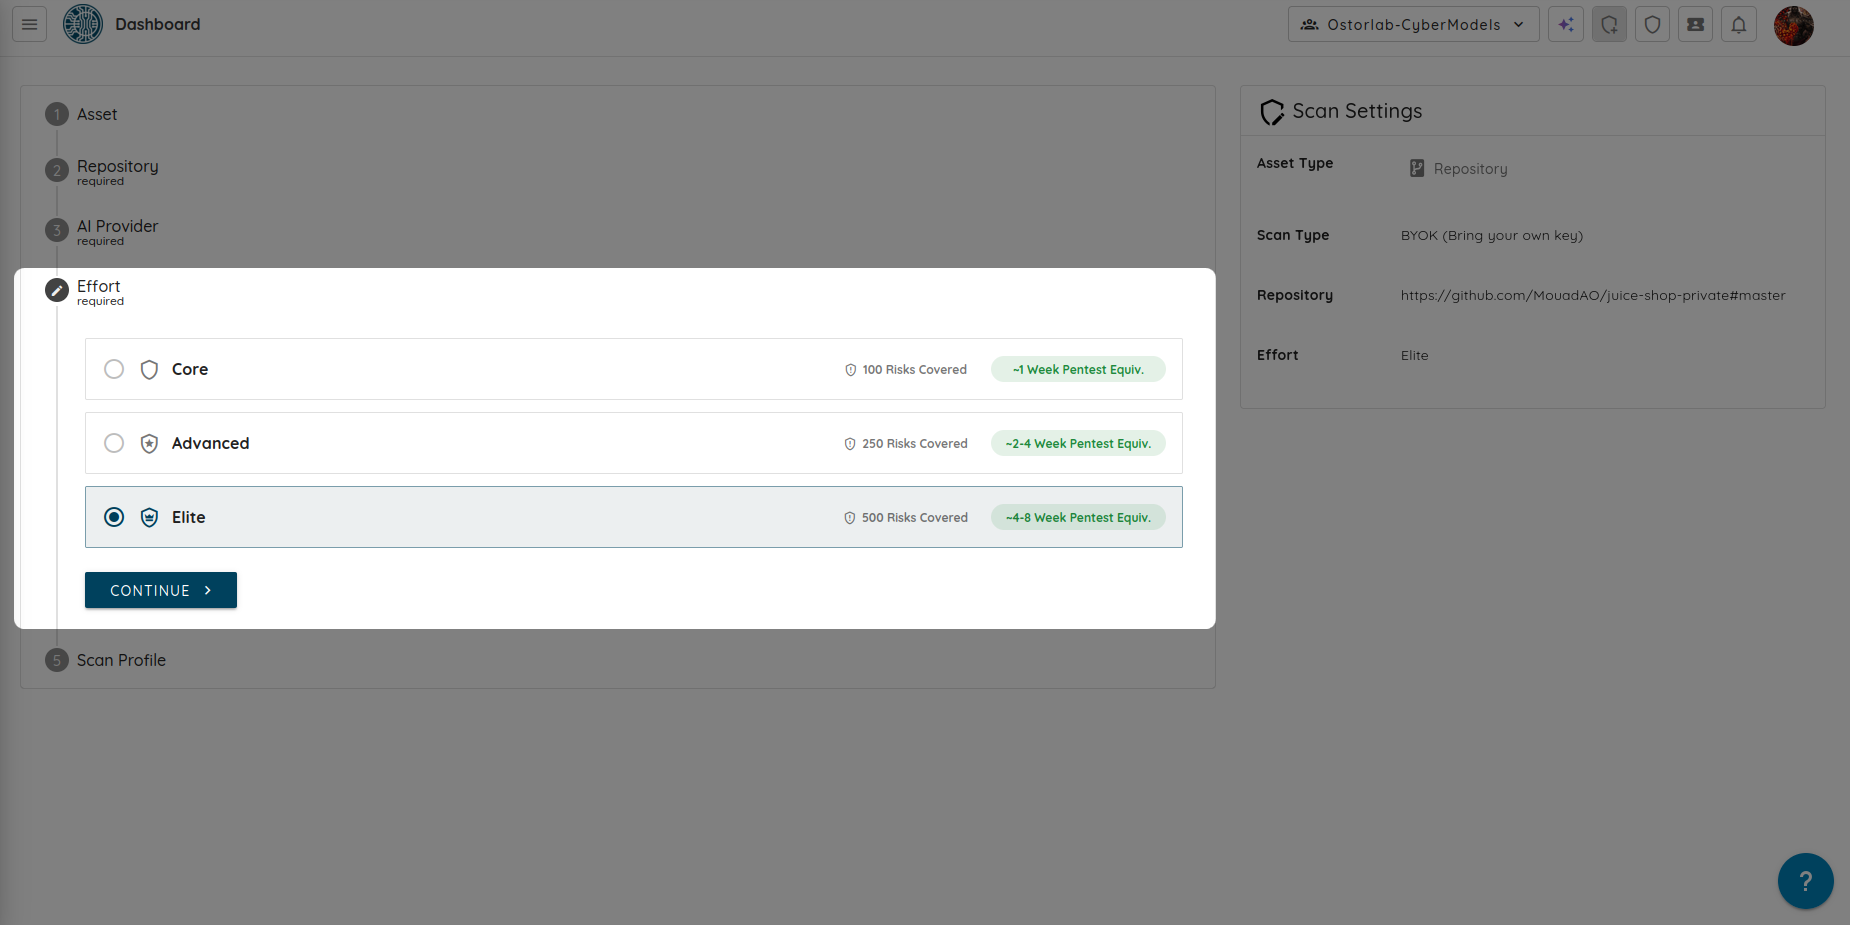
- Click Continue.
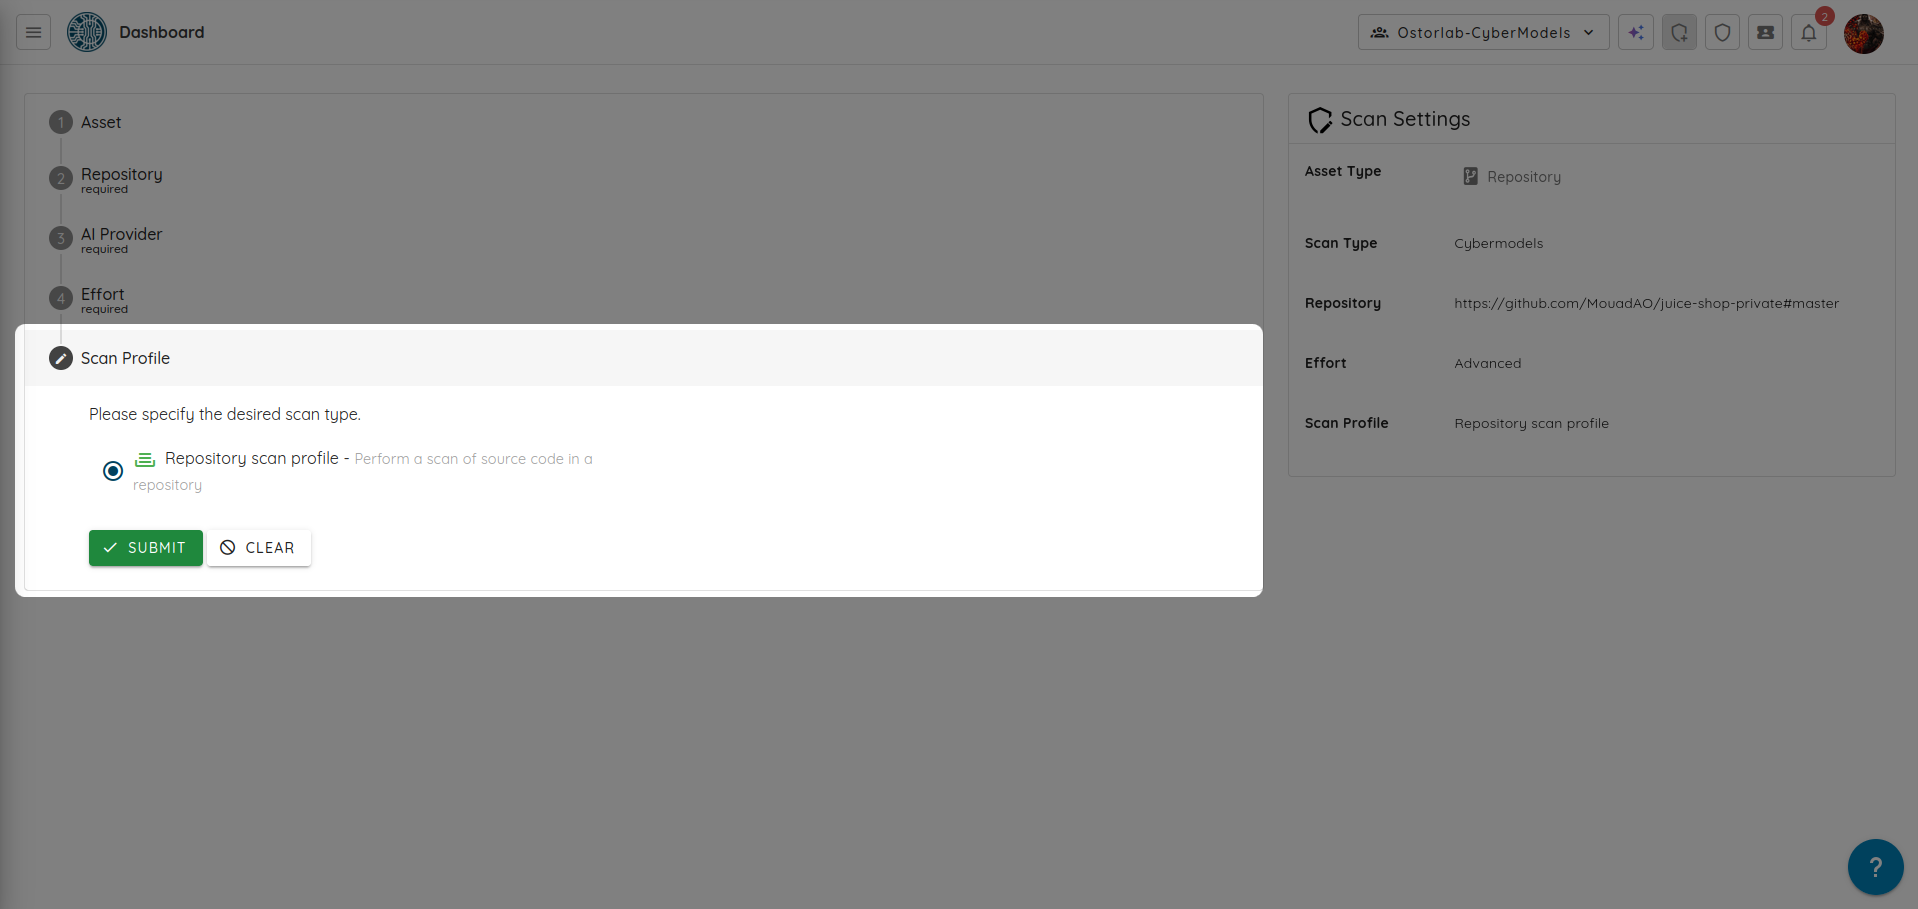
Step 5: Select a Scan Profile
Select Repository Scan Profile, then click Submit to start the scan.
Step 6: Review the Results
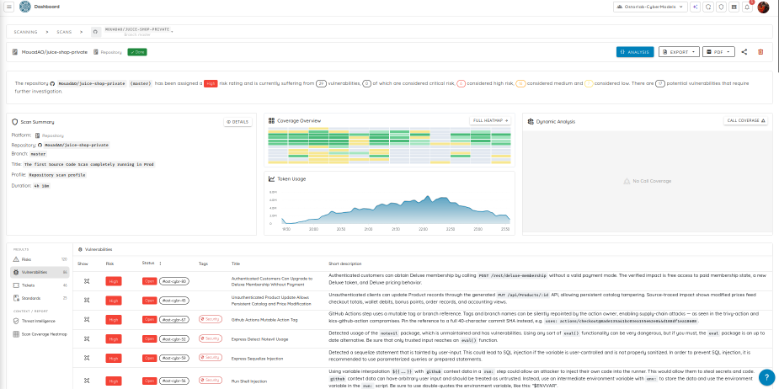
Once the scan is complete, you can review the detected findings in the Ostorlab Dashboard.
Each finding includes its severity, affected files, and remediation guidance to help you prioritize and resolve security issues.
🌍 Supported Languages
The level of depth and analysis technique differs based on whether a repository is scanned with Fast Scan (deterministic SAST, secrets, and SCA) or Deep Agentic Scan (AI-driven autonomous reasoning, cross-file data flows, and logic flaw validation).
| Language / Framework | Fast Scan | Deep Agentic Scan | Scope & Analyzers |
|---|---|---|---|
| Python | Supported | Supported | SAST rules, OSV lockfiles (requirements.txt, Pipfile.lock, poetry.lock), AI context tracing, logic flaw discovery |
| JavaScript / TypeScript | Supported | Supported | SAST rules, OSV (package-lock.json, yarn.lock, pnpm-lock.yaml), TruffleHog, AI taint analysis, prototype pollution |
| Java | Supported | Supported | SAST rules, OSV (pom.xml, build.gradle), Spring Security audit, AI exploit chaining |
| Kotlin | Supported | Supported | SAST rules, OSV (build.gradle.kts), Android and backend security logic |
| Go (Golang) | Supported | Supported | SAST rules, OSV (go.sum, go.mod), concurrency issues, memory/goroutine patterns, AI logic analysis |
| C / C++ | Supported | Supported | SAST pattern checks, memory safety misuses, buffer handling, AI semantic evaluation |
| C# / .NET | Supported | Supported | SAST rules, OSV (packages.lock.json), ASP.NET security architecture, deserialization |
| PHP | Supported | Supported | SAST rules, OSV (composer.lock), SQL injection, object injection, AI auth flows |
| Ruby | Supported | Supported | SAST rules, OSV (Gemfile.lock), Rails security patterns, mass assignment |
| Rust | Supported | Supported | SAST rules, OSV (Cargo.lock), unsafe block audits, panic patterns |
| Scala | Supported | Supported | SAST rules, OSV (build.sbt), functional pattern security |
| Swift / Objective-C | Supported | Supported | SAST rules, OSV (Package.resolved, Podfile.lock), iOS secure storage & IPC |
| Dart / Flutter | Supported | Supported | OSV (pubspec.lock), secret detection, mobile logic exploration |
| Solidity / Smart Contracts | Secrets & Static | Supported | Reentrancy, access control bypasses, oracle manipulation, AI reasoning |
| Terraform / IaC / Docker | Supported | Supported | IaC misconfigurations, container privilege escalation, secret exposures |
| Other Languages (Elixir, Erlang, Haskell, Julia, Lua, Perl, COBOL, Fortran, etc.) | Secrets & SCA | Supported | TruffleHog secret scanning, lockfile SCA (via OSV), and generalized LLM code reasoning |