Harness Integration Guide
Easily integrate Ostorlab automated security scanning for Android mobile applications into your Harness CI pipeline.
Generate an Ostorlab API key
- Go to the API keys menu
- Click the New button to generate a new key
- Copy the API key (You can add a name and an expiry date to your key)
- Click the Save button to save your key

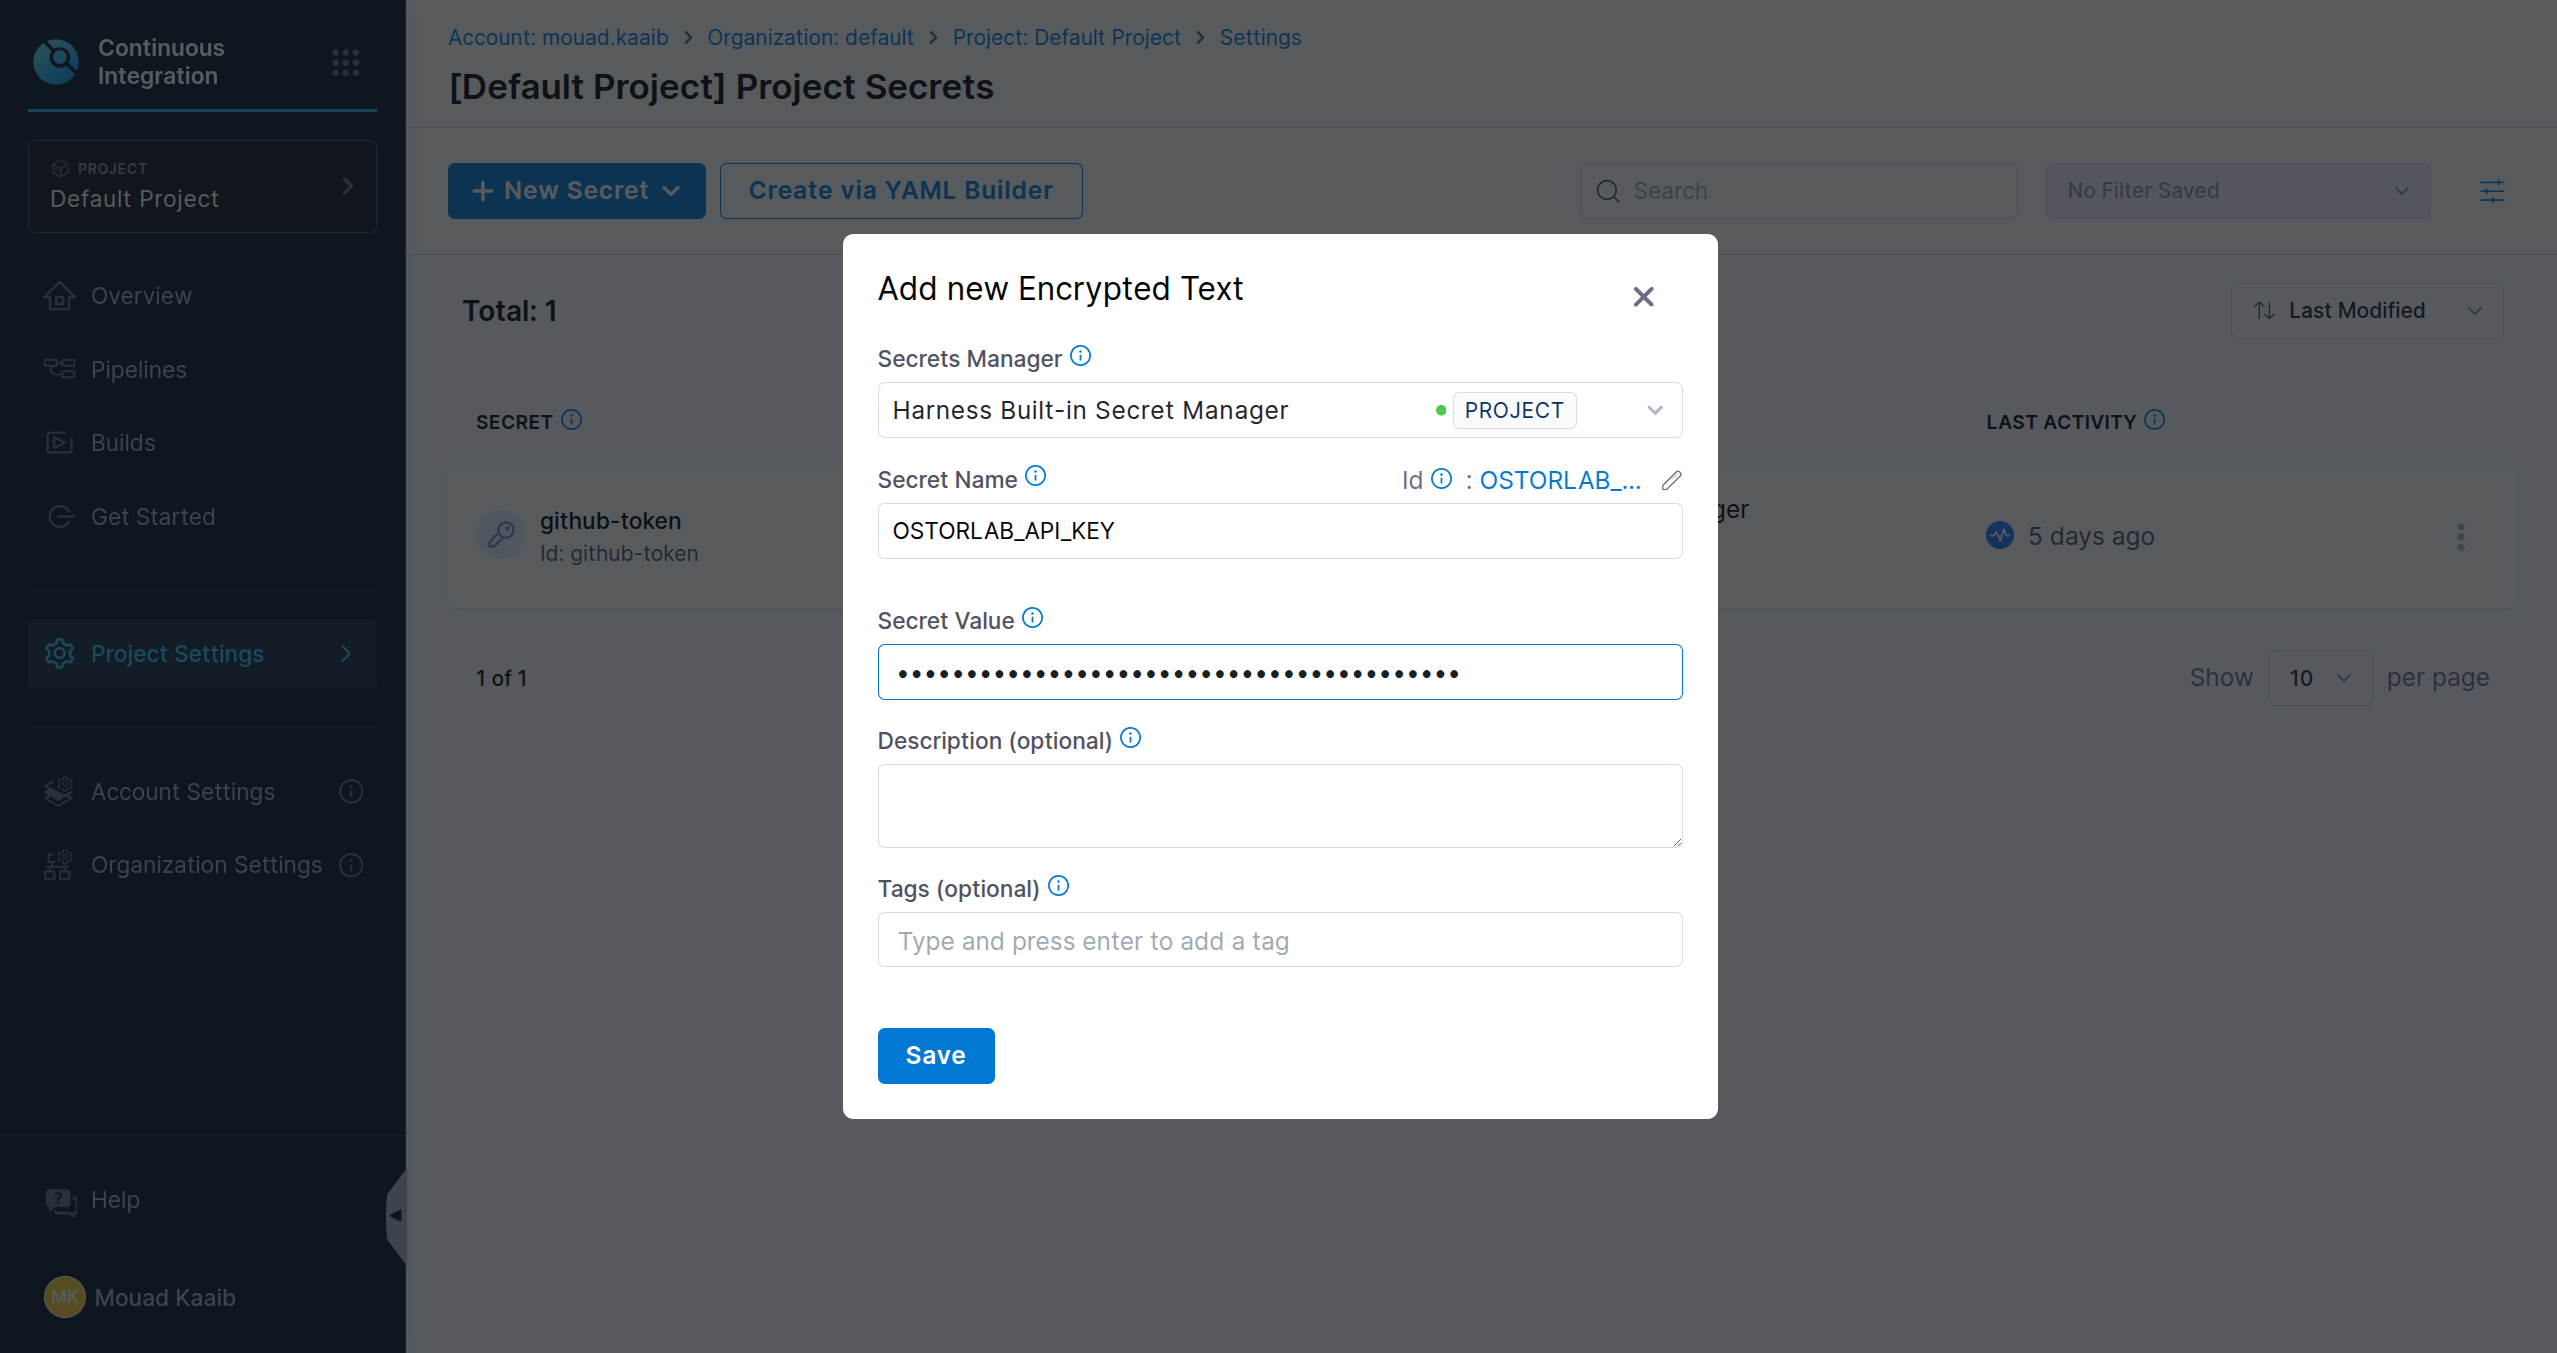
Add the API key as a Secret
- Navigate to Projects settings
- Go to Secrets
- Add and save the ostorlab api key as a secret
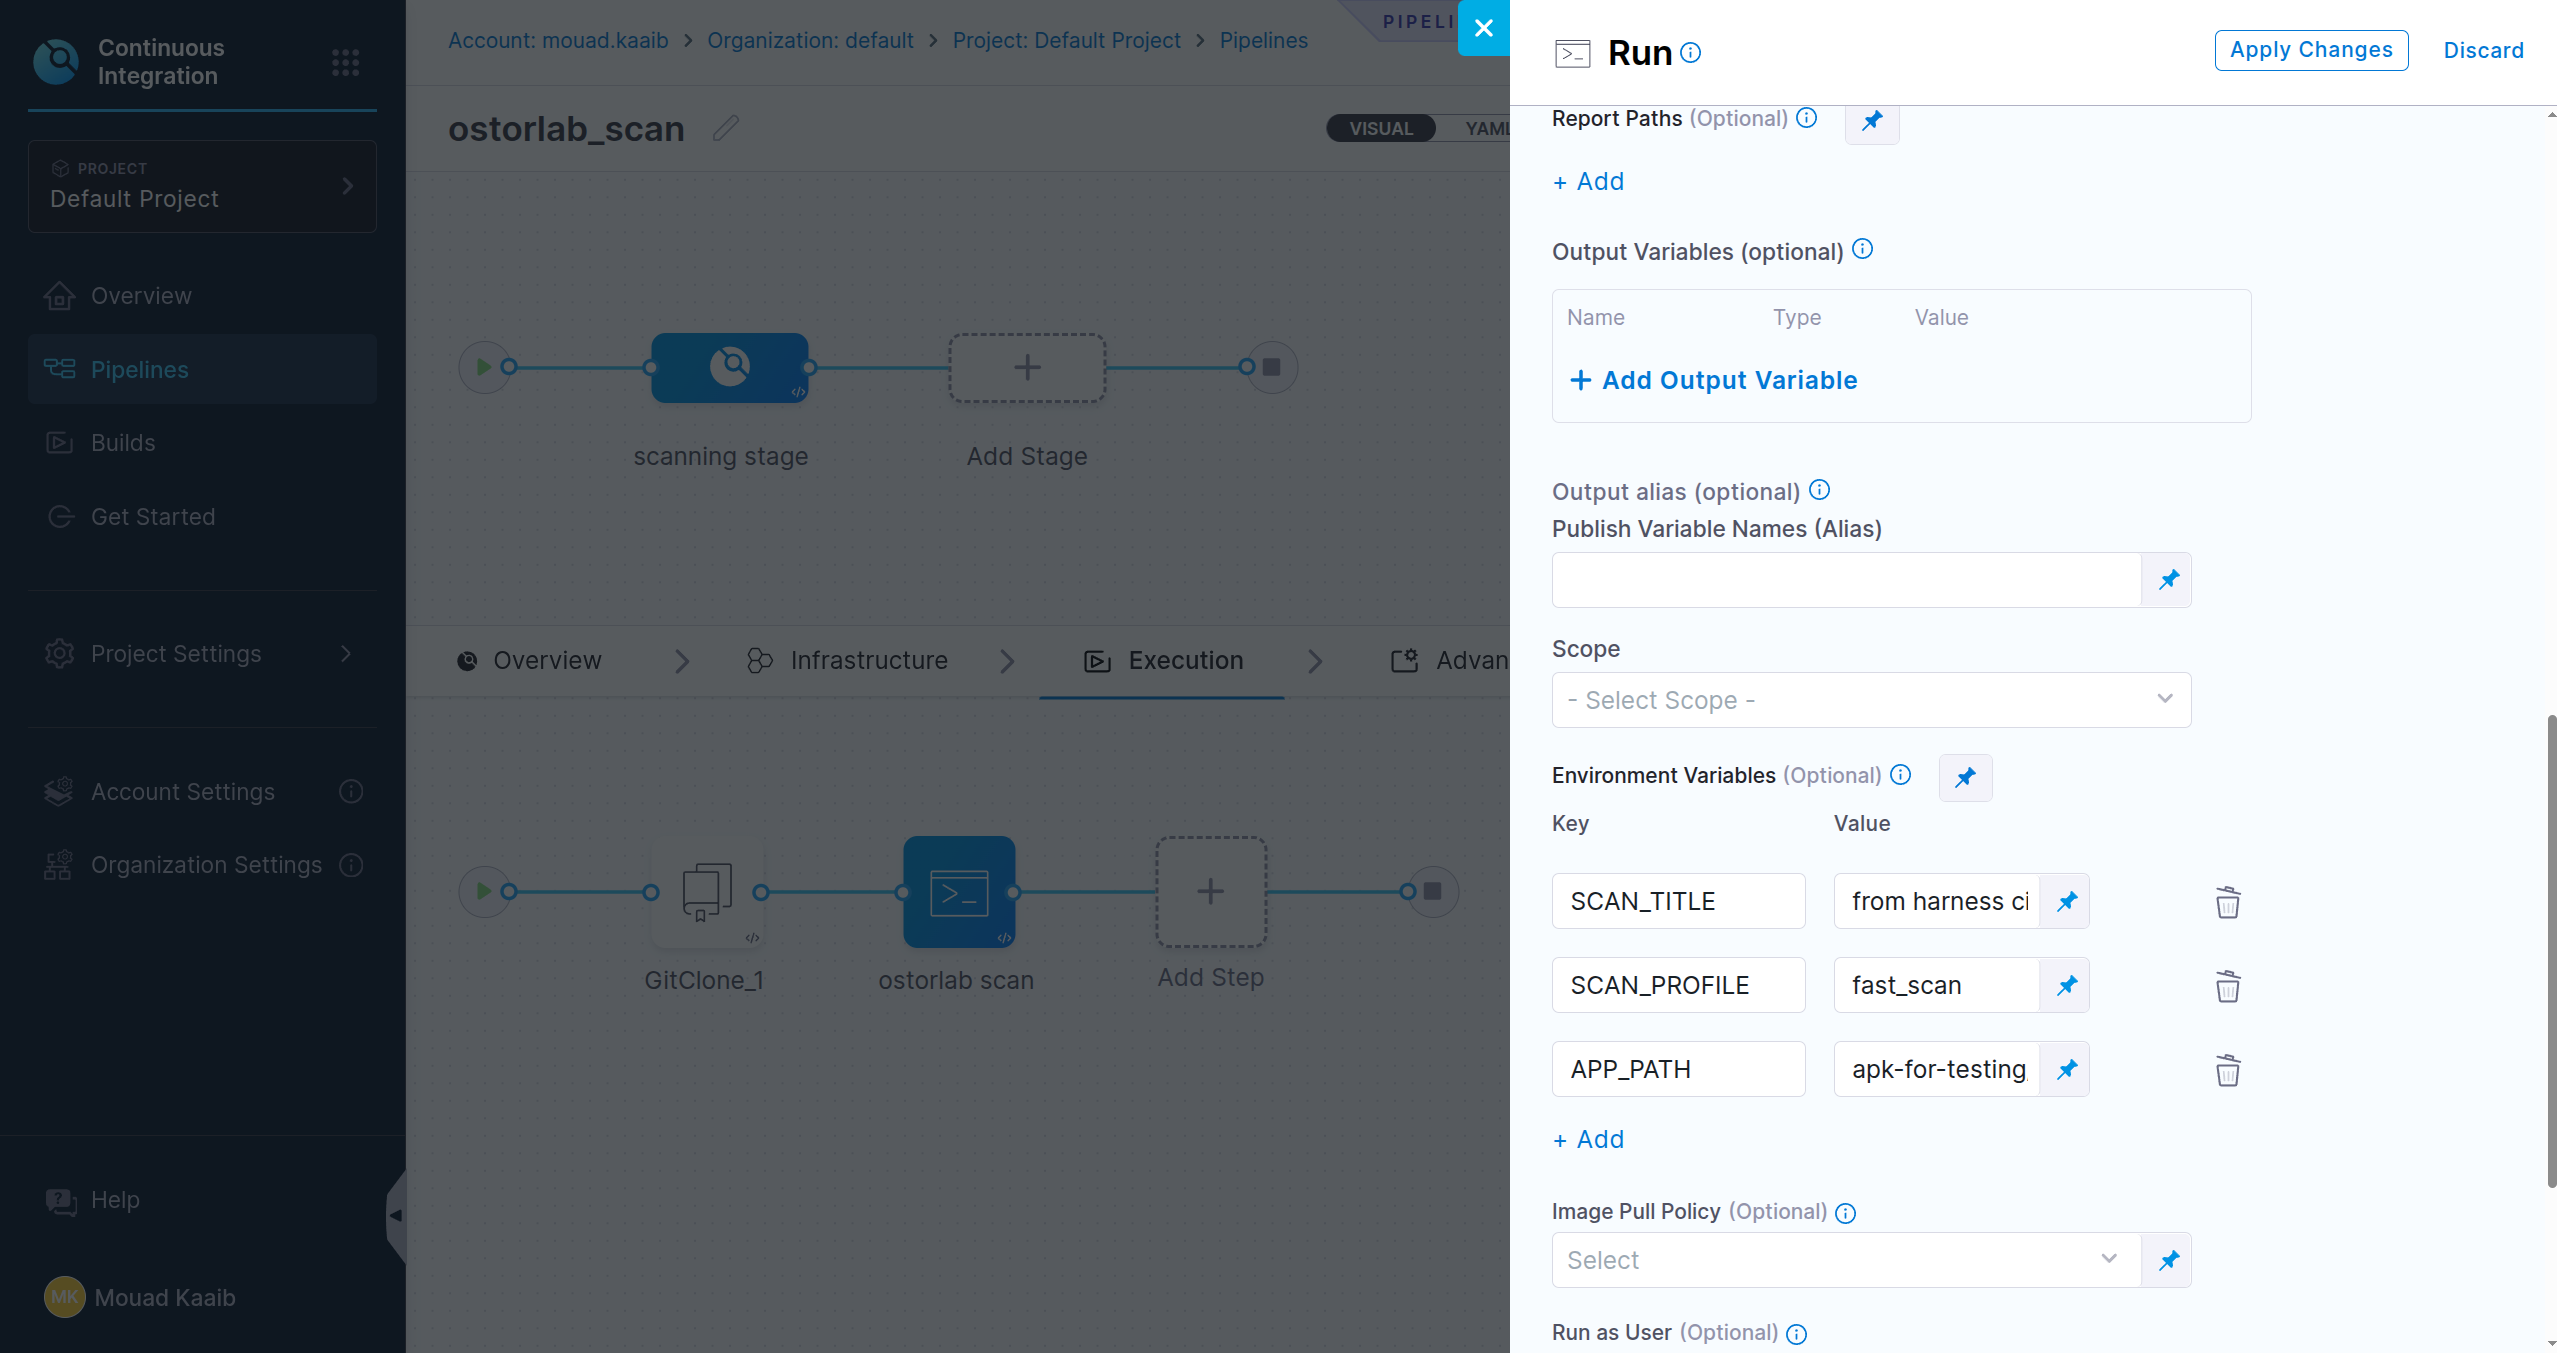
Add a run step in your Harness CI pipeline
- Navigate to your pipeline
- Add a build Stage if you don't have one already
- Add new run step and insert the script in the command section
python3 -m venv $HARNESS_WORKSPACE/venv

$HARNESS_WORKSPACE/venv/bin/pip install ostorlab

$HARNESS_WORKSPACE/venv/bin/ostorlab \
  --api-key=<+secrets.getValue("OSTORLAB_API_KEY")> \
  ci-scan run \
  --title="SCAN_TITLE" \
  --scan-profile="$SCAN_PROFILE" \
  android-apk $HARNESS_WORKSPACE/$APP_PATH

In Optional Configurations in your run step settings you can add environment variables to configure the scan
Add the step in yaml
Instead of manually adding the step in the Harness UI, you can also add it in yaml as follows:
- step:
    type: Run
    name: ostorlab scan
    identifier: Run_1
    spec:
      shell: Bash
      command: |-
        python3 -m venv $HARNESS_WORKSPACE/venv
        $HARNESS_WORKSPACE/venv/bin/pip install ostorlab
        $HARNESS_WORKSPACE/venv/bin/ostorlab \
          --api-key=<+secrets.getValue("OSTORLAB_API_KEY")> \
          ci-scan run \
          --title="$SCAN_TITLE" \
          --scan-profile="$SCAN_PROFILE" \
          android-apk $HARNESS_WORKSPACE/$APP_PATH
      envVariables:
        SCAN_TITLE: from harness ci
        SCAN_PROFILE: fast_scan
        APP_PATH: app.apk
Additional options
The following is the full list of options for the `ostorlab ci-scan run` command:
ostorlab --api-key ci-scan run --option <asset-type> <target>
-
--api-key: Ostorlab generated API key.
-
--title: Scan title
-
--scan-profile: Type of the scan. Possible options are:
- `fast`: Only runs the static analysis;
- `full`: Runs static, dynamic, and backend analysis.
-
Test credentials: Automatic authentication in the dynamic analysis full scan:
- --test-credentials-login: Username to be used in log-in fields;
- --test-credentials-password: Password to be used in password fields;
- --test-credentials-role: Optional role field;
- Custom/Generic test credentials:
- --test-credentials-name: Custom name of the field;
- --test-credentials-value: Custom value of the field
-
2FA Credentials:
- SMS 2FA:
- --sms-2fa-sender: Learn more about SMS 2FA
- Email 2FA:
- --email-2fa-sender-email-address, --email-2fa-email-address, --email-2fa-password: Learn more about Email 2FA
- TOTP 2FA:
- --totp-2fa-seed: Learn more about TOTP 2FA
- SMS 2FA:
-
--sbom: Path to the sbom file. The sbom file should also be mounted as specified in step 3.
-
--ui-prompt-name: Name of the UI prompt to be passed to Ostorlab CLI.
-
--ui-prompt-action: Action of the UI prompt to be passed to Ostorlab CLI. UI prompts are a powerful feature that allows you to use natural language to tell the scanner how to navigate the app. You can add multiple prompts by adding the arguments multiple times, for example:
--ui-prompt-name accept-terms --ui-prompt-action "Scroll down and tap the 'Accept Terms' checkbox." --ui-prompt-name submit --ui-prompt-action "Tap the 'Submit' button to complete the login process." -
--ui-prompt-id: List of existing UI prompt IDs to be passed to Ostorlab CLI. This allows you to reuse previously defined UI prompt flows by their IDs. You can add multiple prompt IDs by adding the argument multiple times, for example:
--ui-prompt-id 123 --ui-prompt-id 456 -
asset-type: Type of the asset to scan. Possible values:
- `android-aab`: Scan an android `.AAB` package file;
- `android-apk`: Scan an android `.APK` package file;
- `ios-ipa`: Scan an iOS `.IPA` package file;
-
target: Path to the target application. The Application should be mounted as specified in step 3.