API
Info
Ostorlab added support for Universal Binary JSON encoding. UBJSON provides several performance benefits and adds support for binary data types. For more information about the format and available libraries, check out the following link UBJSON Spec. Support for JSON is still available and either can be specified using the content type header.
In this guide, we will walk you through the steps to using Ostorlab API. Using the API you can perform all types of tasks, from creating scan, access scans progress to listing vulnerabilities. The next section will describe how to use the API, how to experiment and test it.
Access
There are multiple ways to access the API. You can either use the GraphiQL web application to experiment with the API or utilize the scripts, as their typical usage is for automation in deployment pipelines or for automating the creation and monitoring of a large number of scans.
1. Sandbox
GraphiQL is accessible the following URL https://api.ostorlab.co/apis/graphql
The API is accessible to authenticated users only. Make sure you are authenticated at https://api.ostorlab.co/portal/login
Examples
To provide you with an idea on how to use the API, here are some examples of common queries:
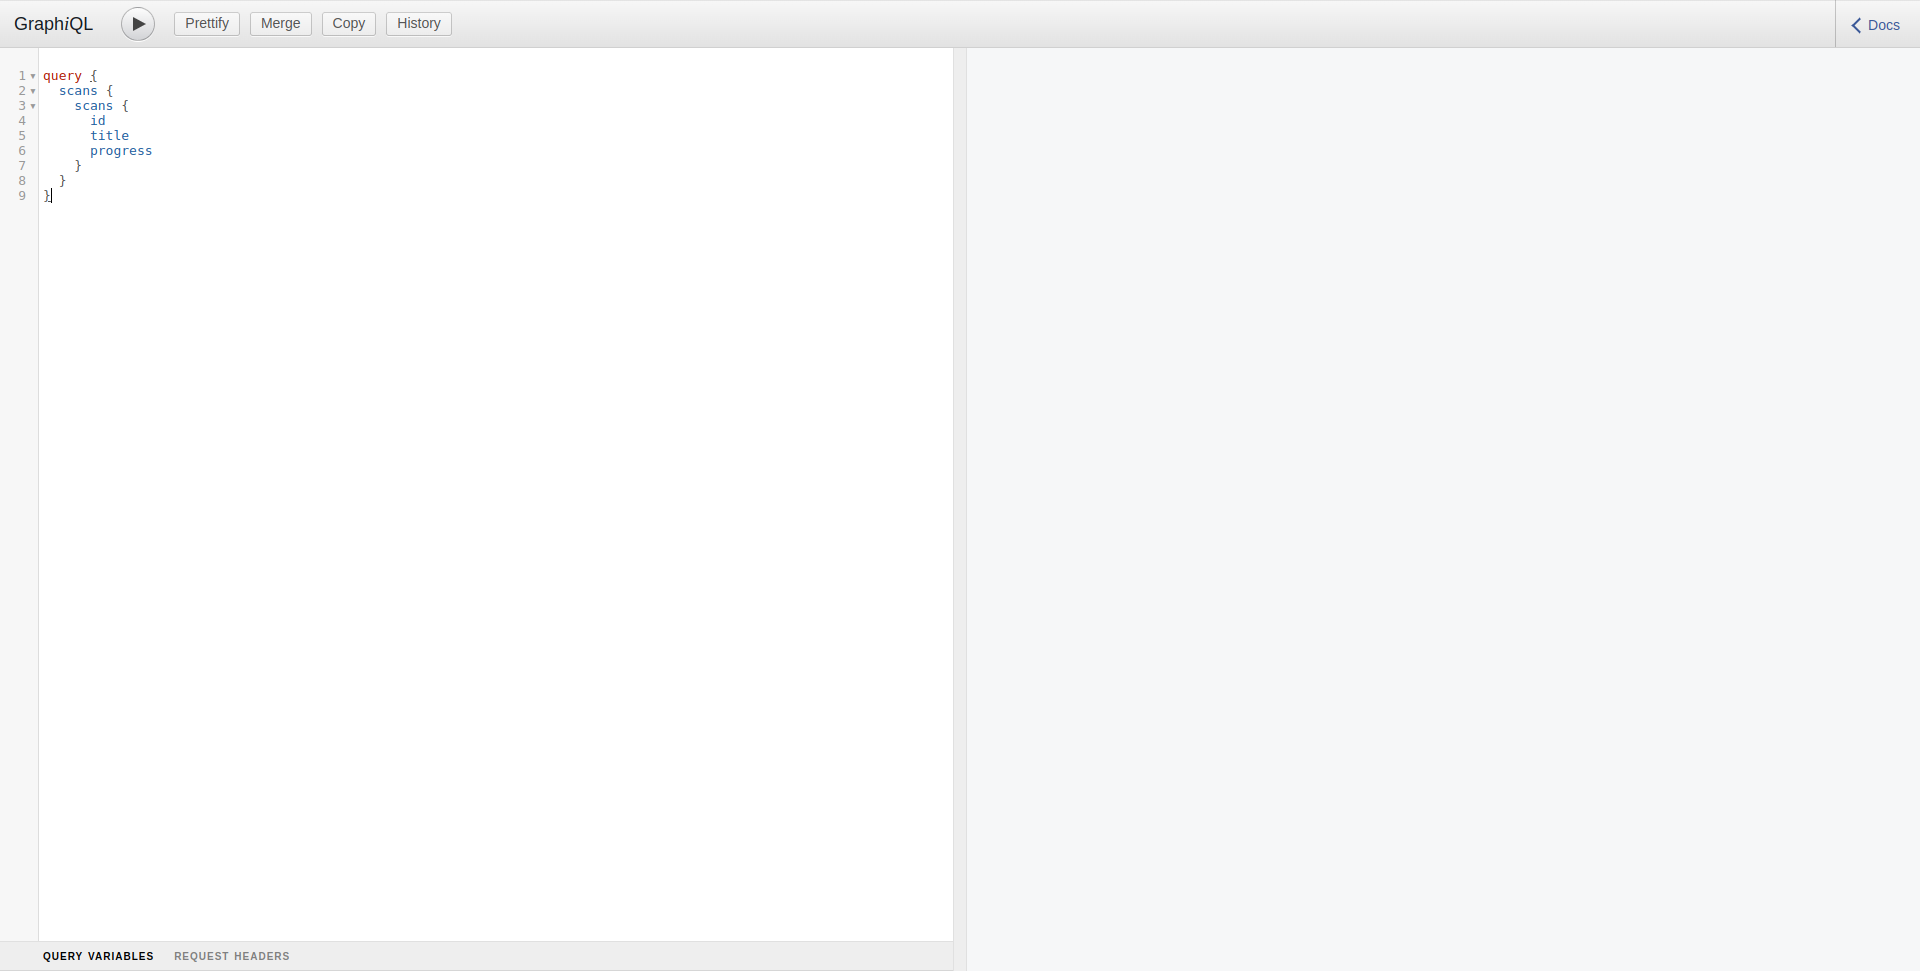
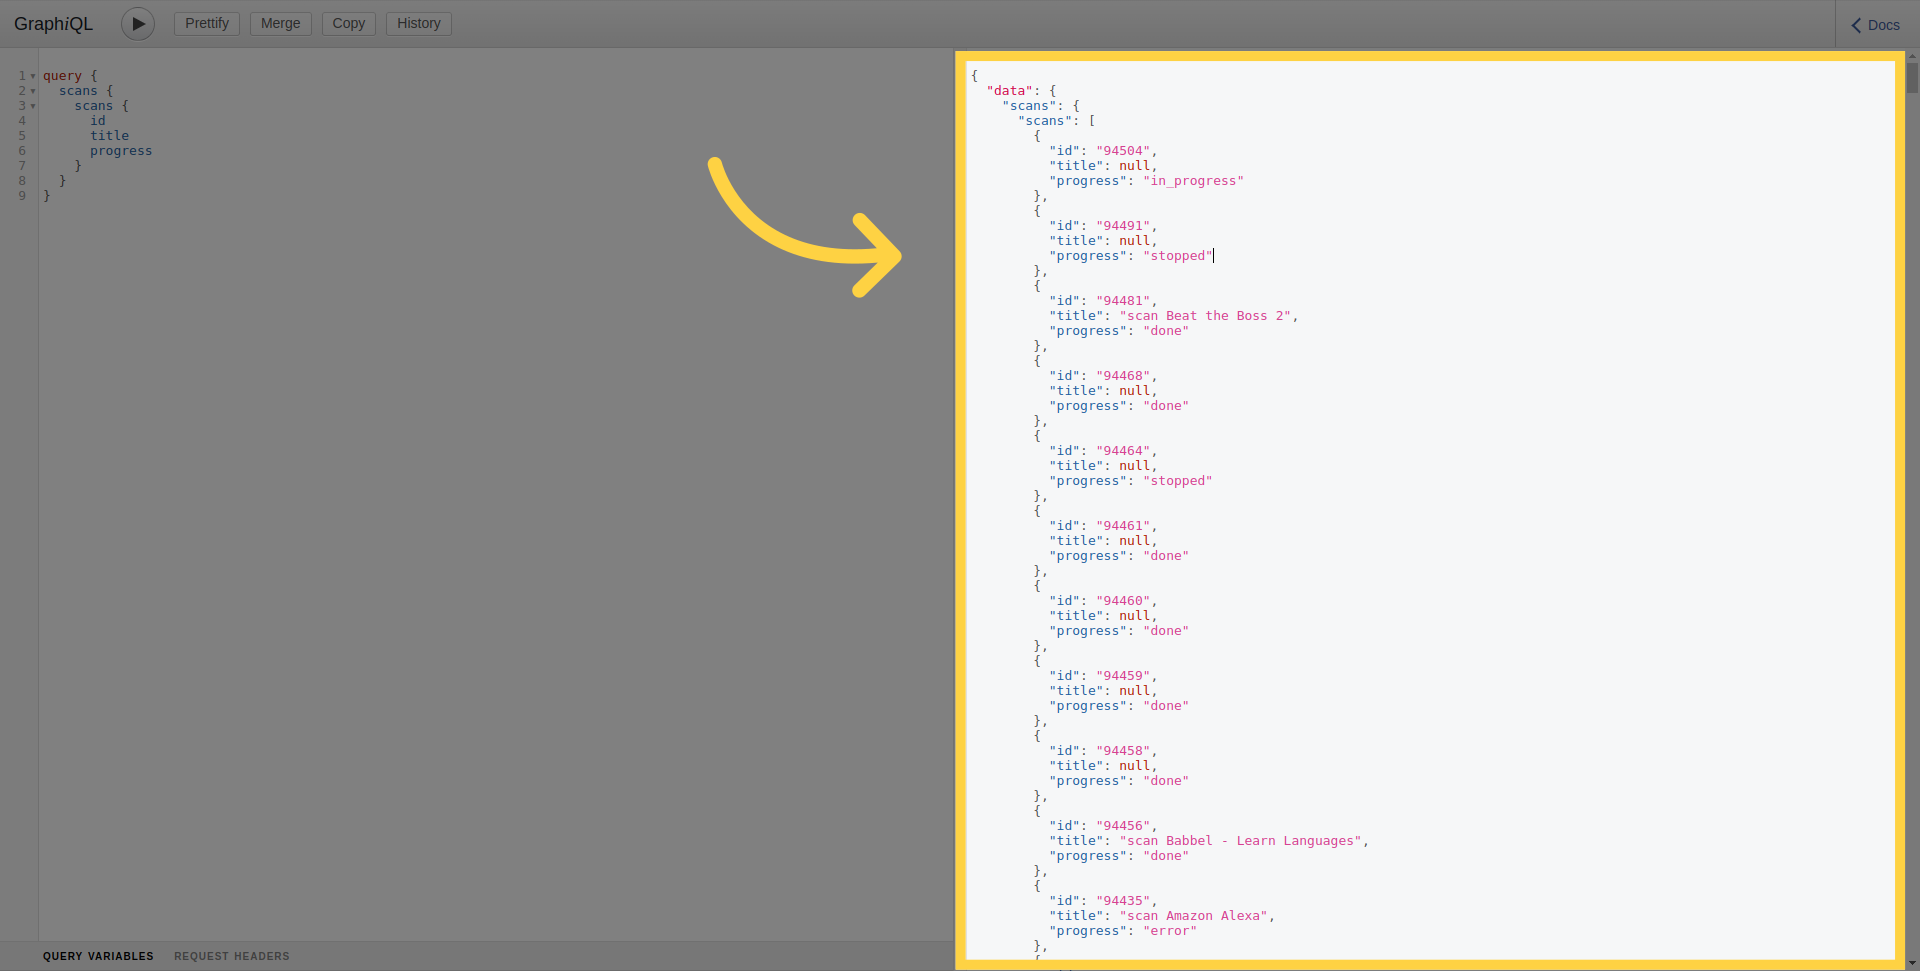
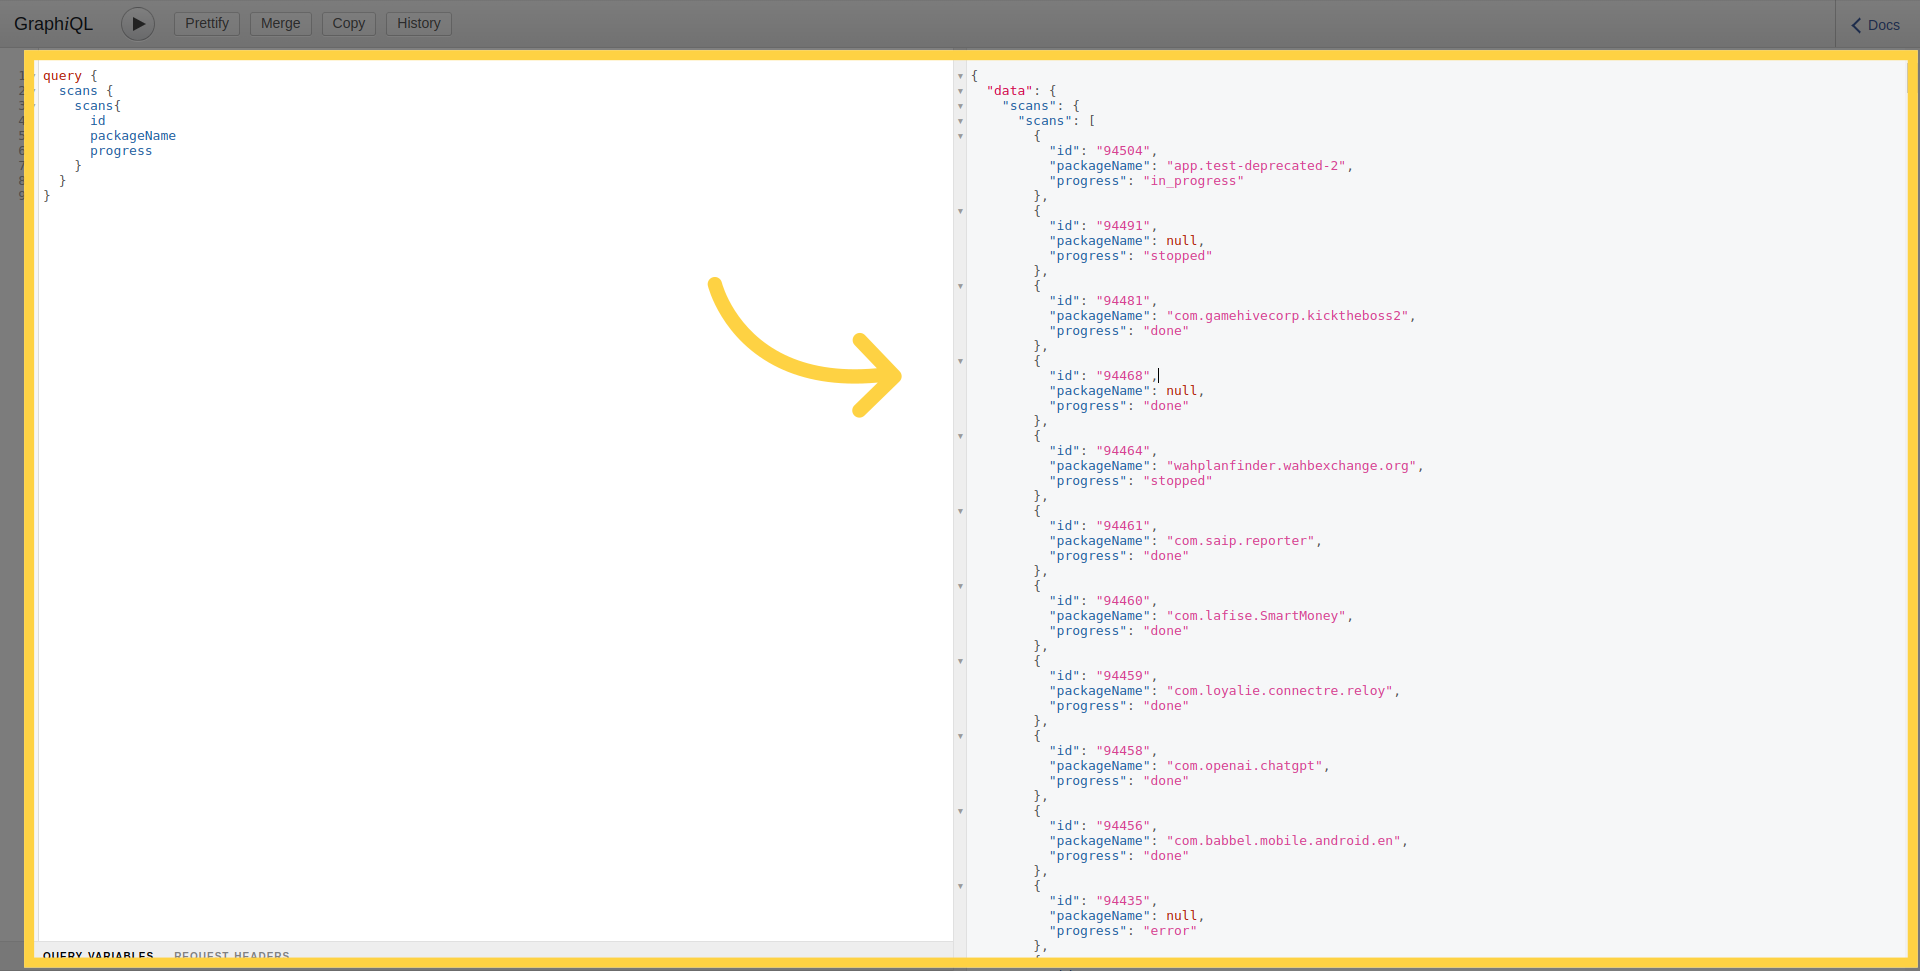
List Scans
To list all the scans owned by the organisation of the current user:
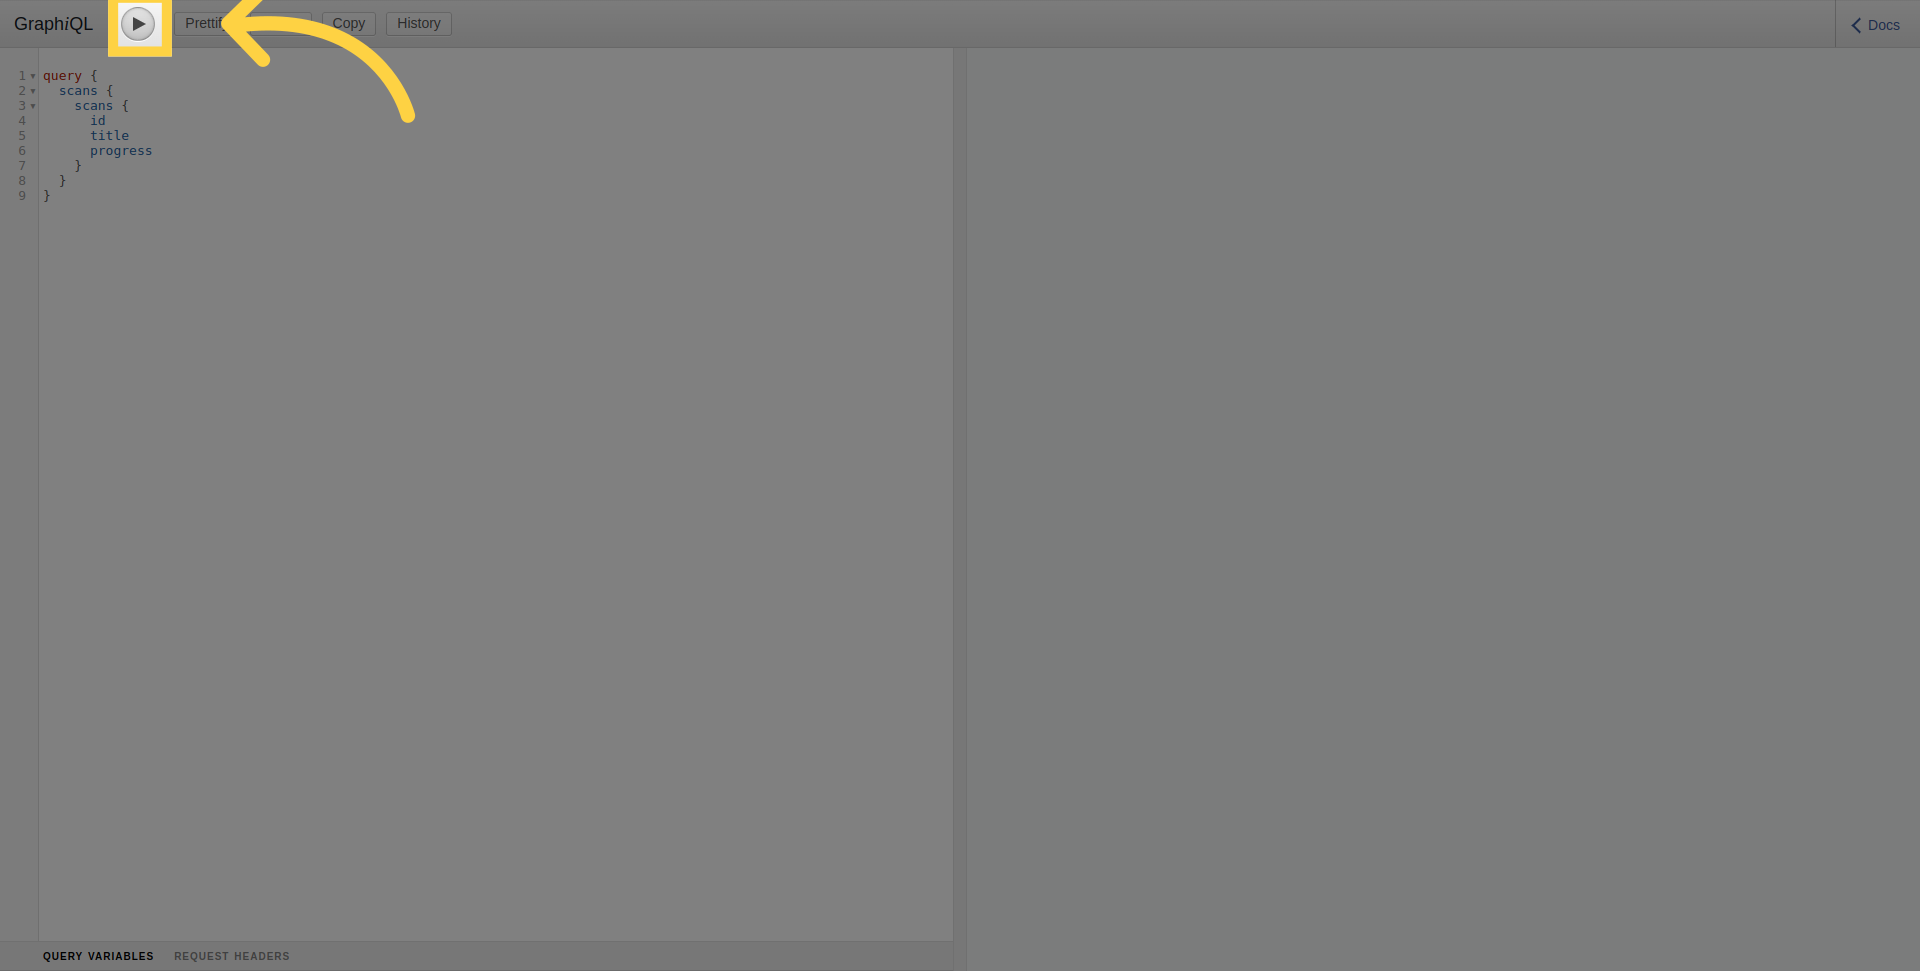
 In order to execute the query, click on the run button.
In the right section, you can see the result of the executed query.
List Scans by Filter
To list scans for a particular Mobile Application, use the target argument to specify the application package name or bundle ID.
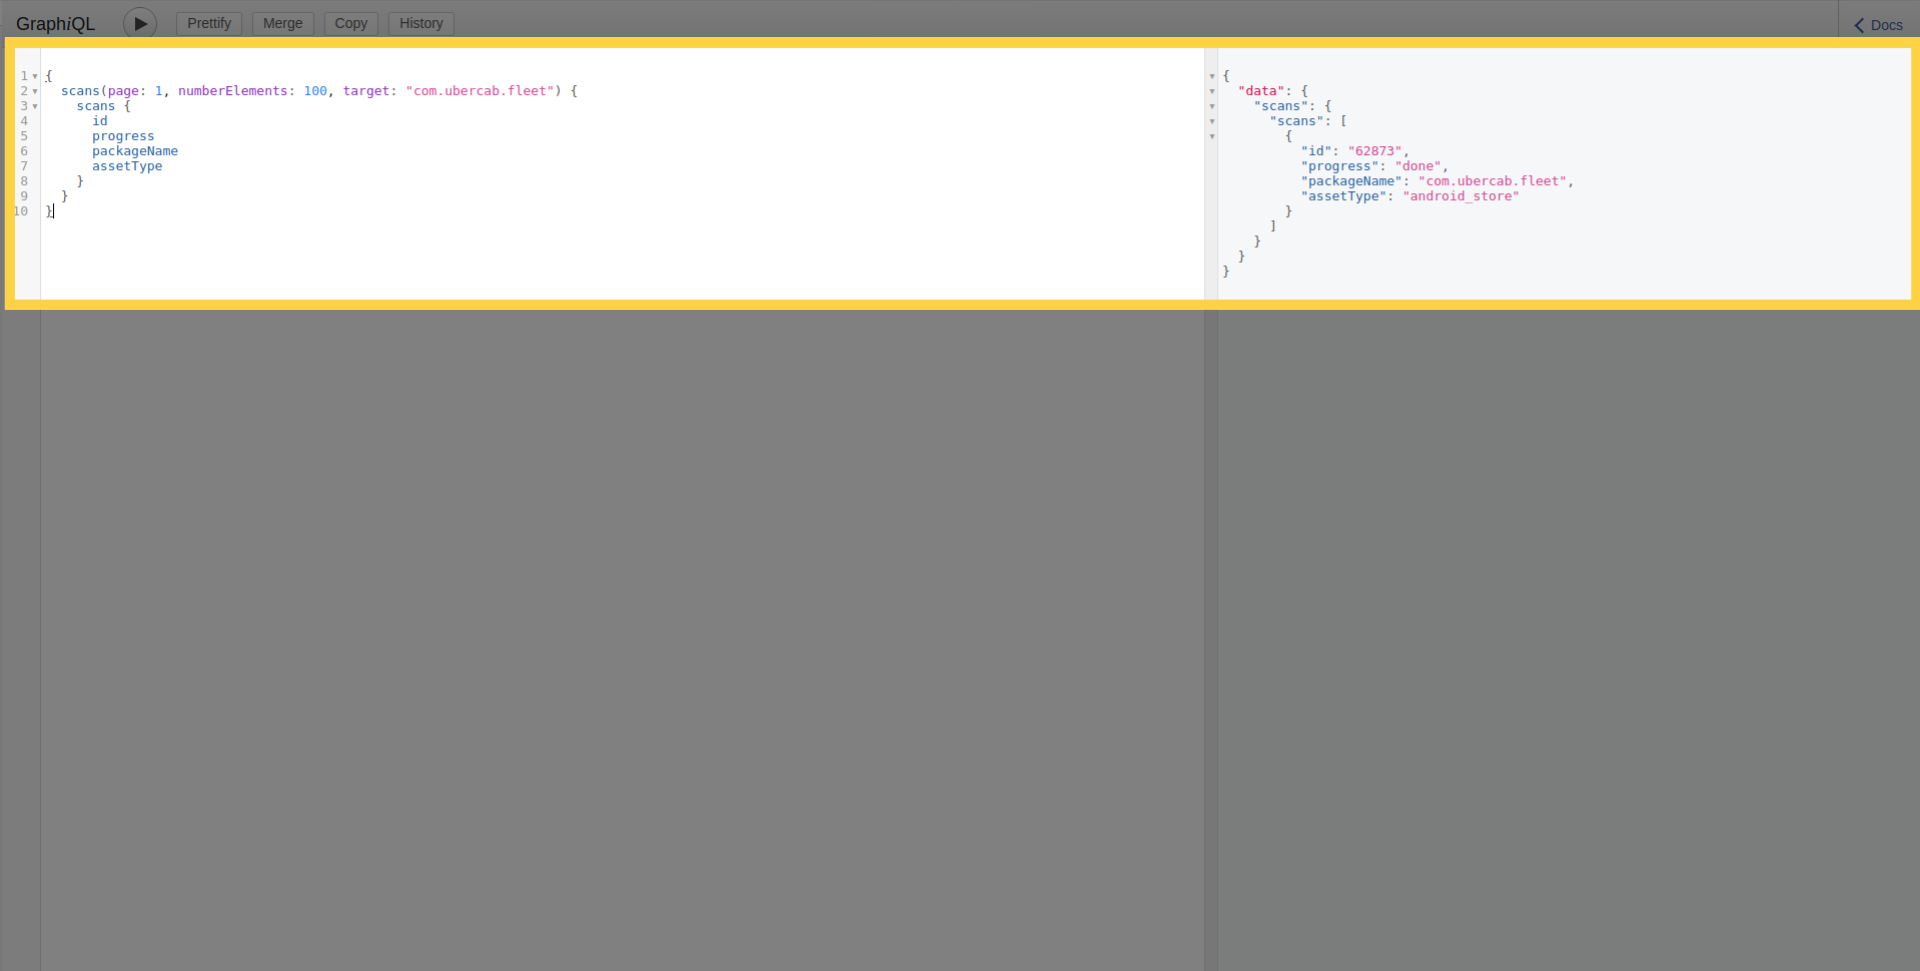
The scans API supports other filters like targetAssetTypes, riskRatings, progress and can be ordered and sorted using orderBy and sort arguments.
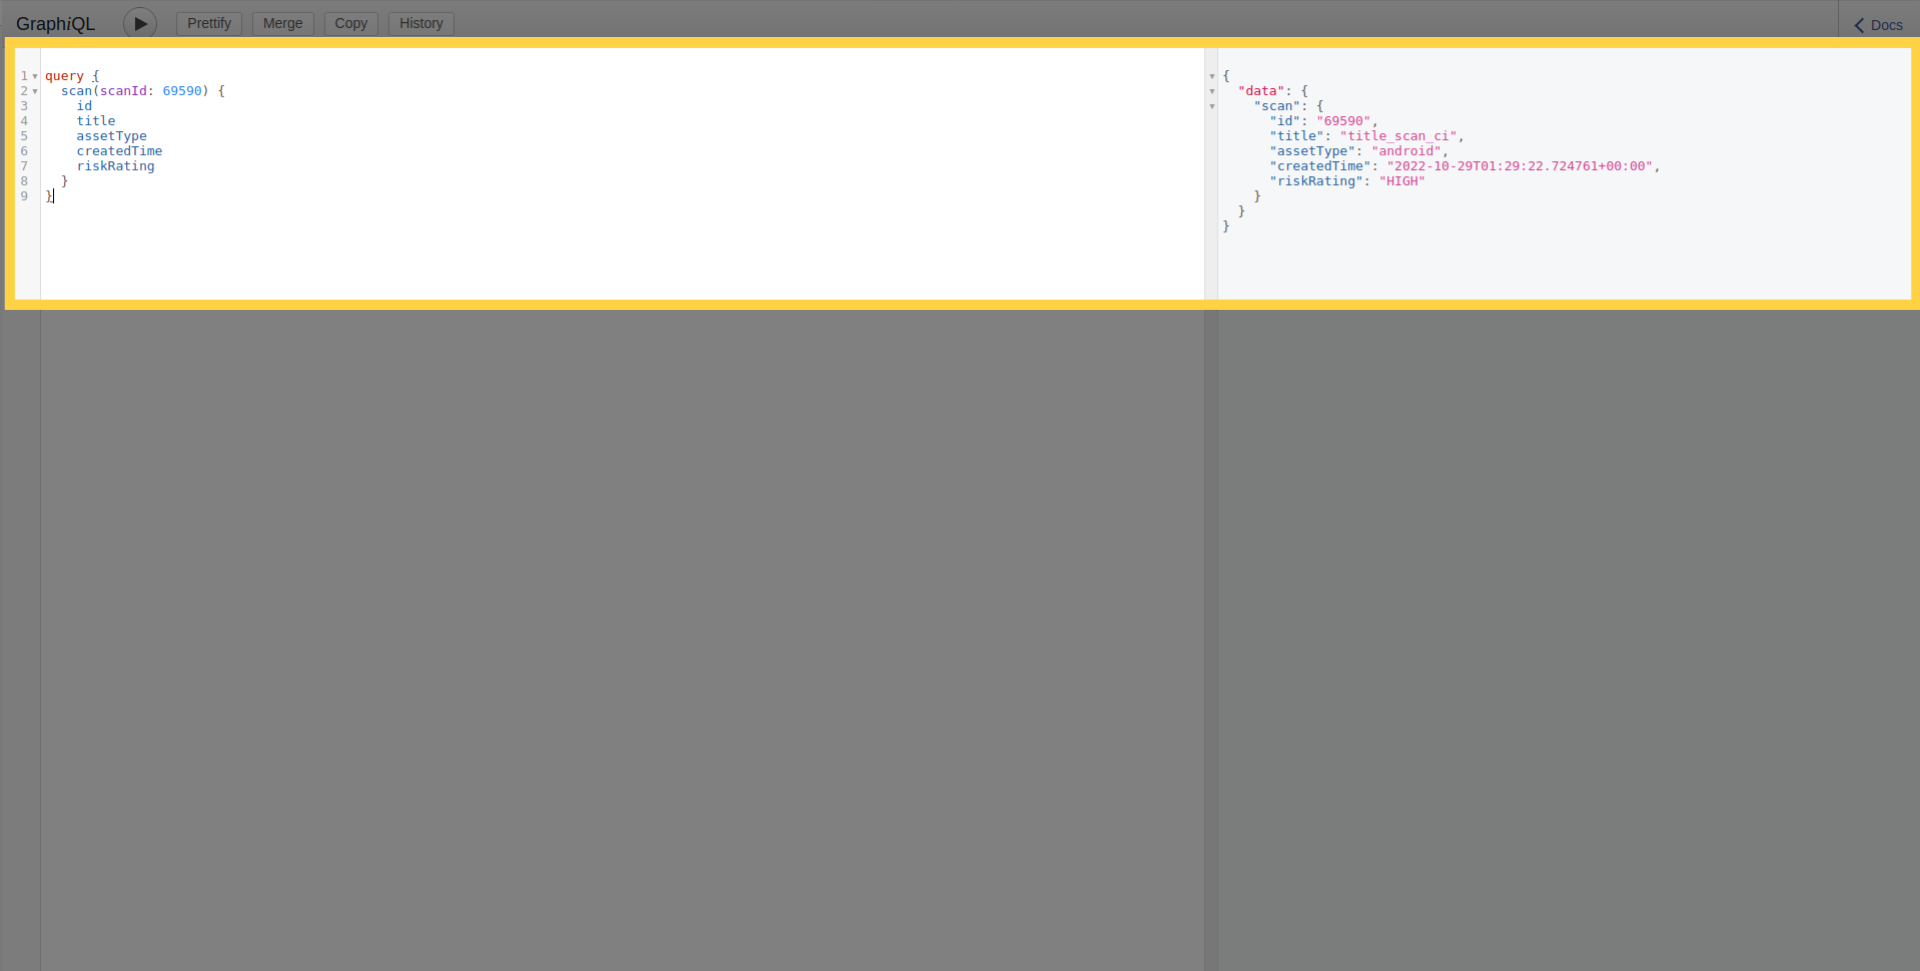
Scan Details
You can also retrieve the details of a single scan using its ID as following:
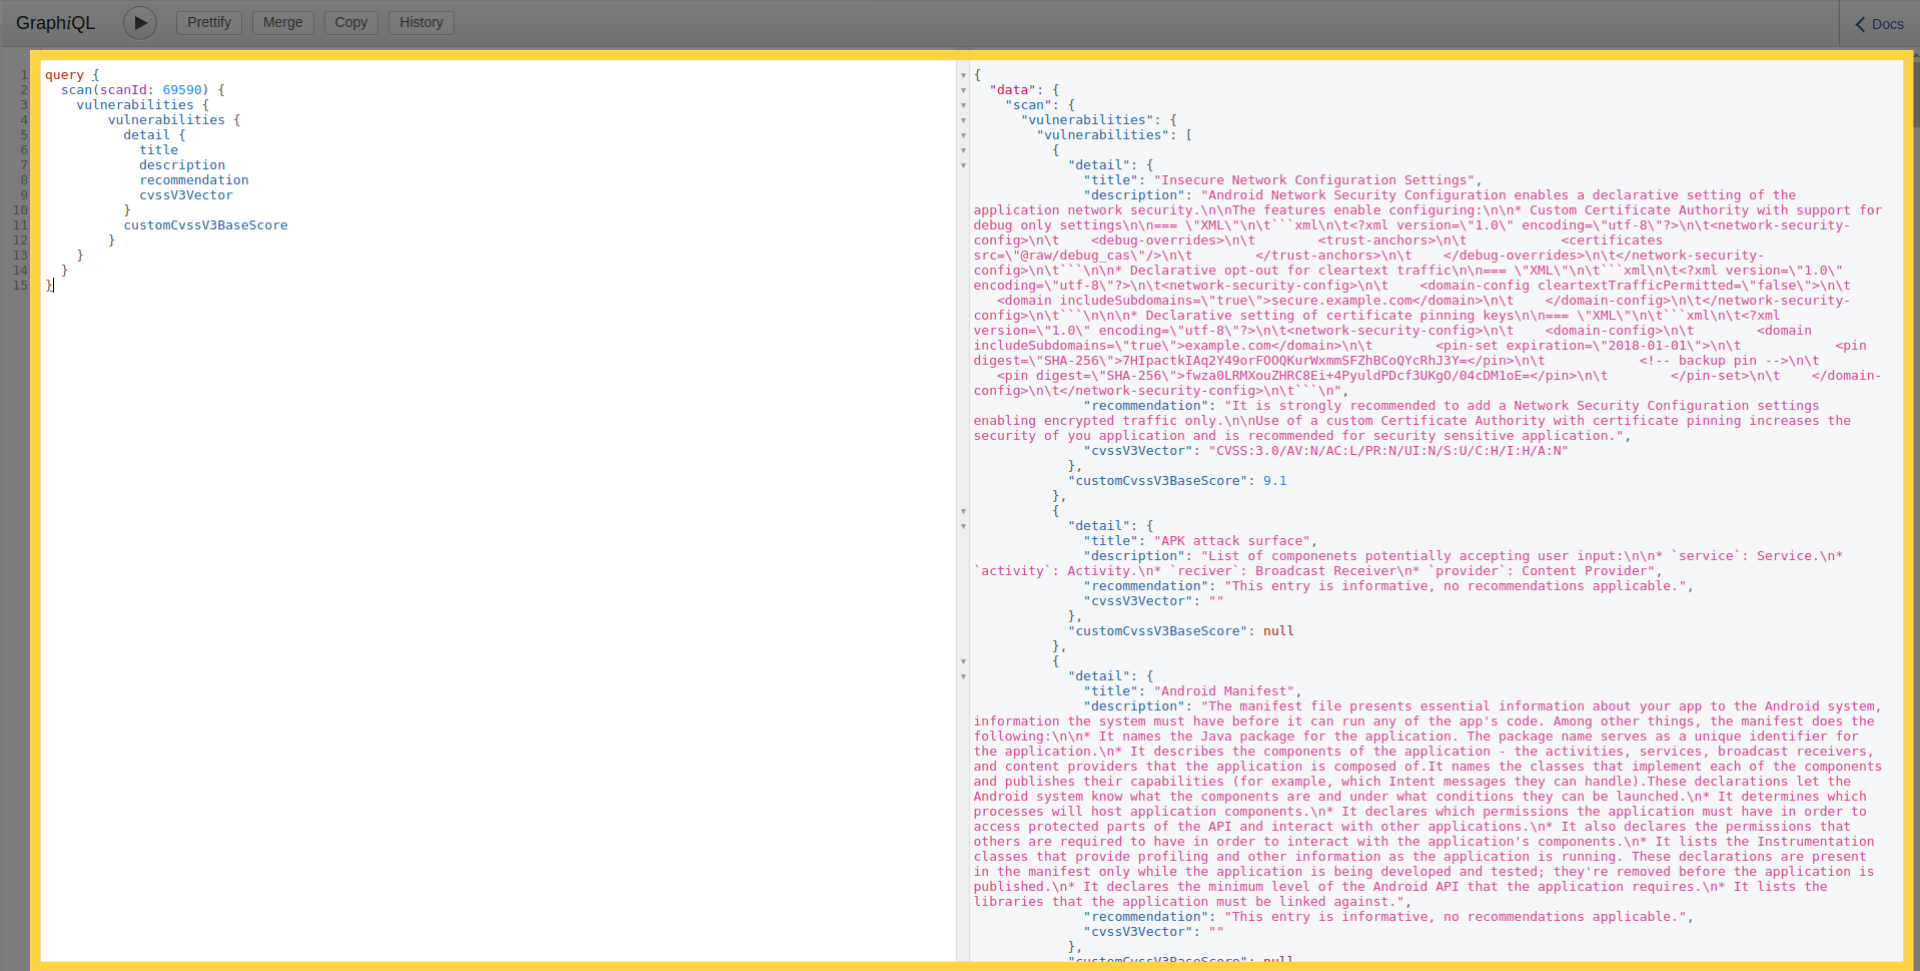
Vulnerability Details
Furthermore, this query allows you to retrieve the list and details of vulnerabilities of a scan:
Scan Progress
As well as that, to determine scan current progress stage you can use the following query:
Create New Scan
To create a scan, files are uploaded as a multipart http request.
mutation newMobileScan($title: String!, $assetType: String!, $application: Upload!, $scanProfile: String!) {
      createMobileScan(title: $title, assetType:$assetType, application: $application, scanProfile: $scanProfile) {
        scan {
            id
        }
      }
    }
Create a new scan with authentication
Creating a scan with a credentials is a two-step process. First, credentials are added to the credentials store and a credential id is returned, and then a scan creation request is sent specifying the ids of the credentials to use in that scan.
For instance to create a simple login password credential. You can use the following:
mutation newTestCredential {
  createTestCredentials(testCredentials: {loginPassword: {login: "login1", password: "password1"}}) {
    testCredentials {
      __typename
      ... on LoginPasswordTestCredentials {
        id
      }
    }
  }
}
Which will return the ID as the following:
{
  "data": {
    "createTestCredentials": {
      "testCredentials": {
        "__typename": "LoginPasswordTestCredentials",
        "id": "901"
      }
    }
  }
}
To pass the credential Id, you must add the argument credentialIds with the list of Ids:
mutation newMobileScan($title: String!, $assetType: String!, $application: Upload!, $scanProfile: String!) {
  createMobileScan(title: $title, assetType: $assetType, application: $application, scanProfile: $scanProfile, credentialIds: [901]) {
    scan {
      id
    }
  }
}
Discovered Assets
You can retrieve the list of discovered assets (Domains, Mobile Applications, IPs ...) using the following query. This allows to explore assets that have been identified by the attack surface discovery platform. The query supports filters such as asset type, ownership, and depth of related nodes.
query NodesEdges($depth: Int, $limit: Int, $filterExcluded: Boolean, $assets: [NGAssetIdInputType], $ownerIds: [Int], $nodeKeys: [String], $nodeTypes: [String]) {
  nodesEdges(
    depth: $depth
    limit: $limit
    filterExcluded: $filterExcluded
    assets: $assets
    ownerIds: $ownerIds
    nodeKeys: $nodeKeys
    nodeTypes: $nodeTypes
  ) {
    nodes {
      type
      assetType
      assetId
      key
      ownershipType
      customColor
      attributes {
        name
        value
      }
    }
    edges {
      fromType
      fromKey
      toType
      toKey
      attributes {
        name
        value
      }
    }
  }
}
Example Variables:
{
  "depth": 1,
  "limit": 10,
  "ownerIds": [],
  "nodeKeys": [],
  "nodeTypes": [
    "androidApp"
  ]
}
2. Scripts
As mentioned before, GraphiQL is not the only way to access the API, as you can use it through scripts also. It's typical usage is for automation around deployment pipelines or automating the creation and monitoring of a large number of scans. For the authentication process, you have two options:Token based authentication and API Key authentication.
Token based authentication
The token can be retrieved from the following URL https://api.ostorlab.co/apis/token by submitting the username and password. A token linked to the user will be created. The token is then set in an Authorization header with the value Token {value} to authenticate subsequent requests to https://api.ostorlab.co/apis/graphql_token.
API Key authentication
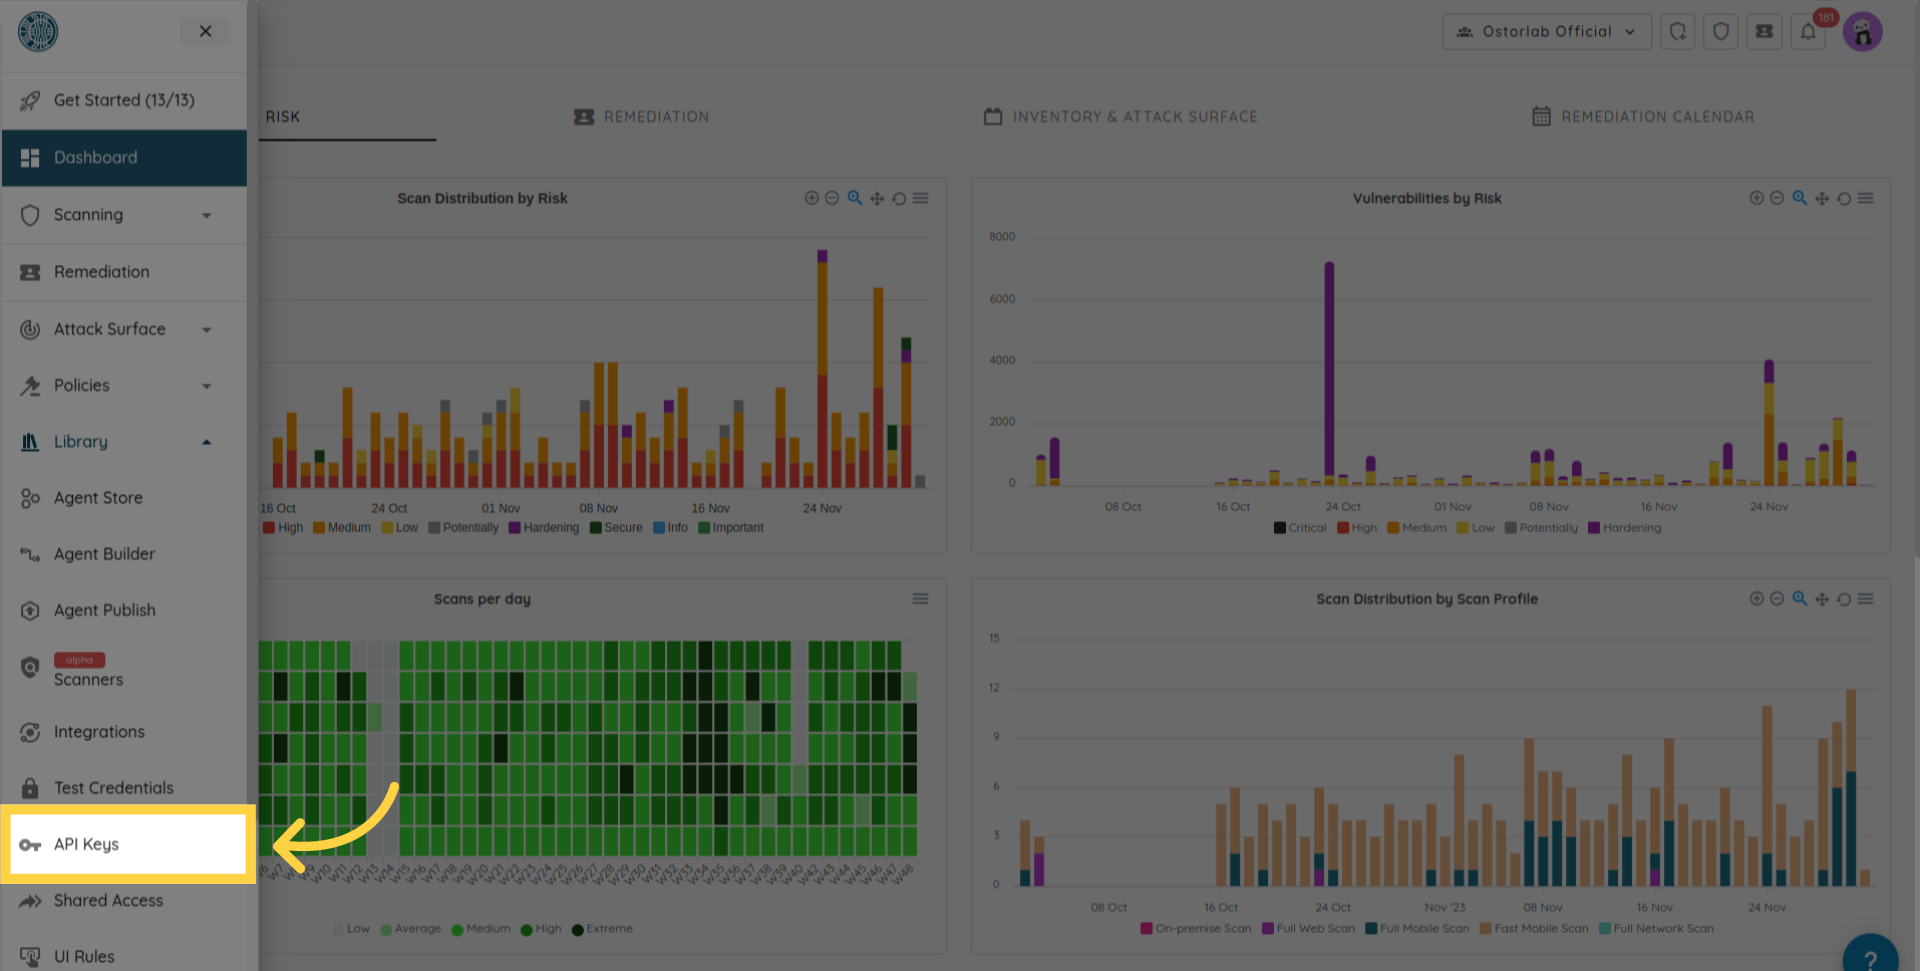
The API key can be retrieved from your dashboard https://report.ostorlab.co. You need to click on Library:

Then API keys menu.
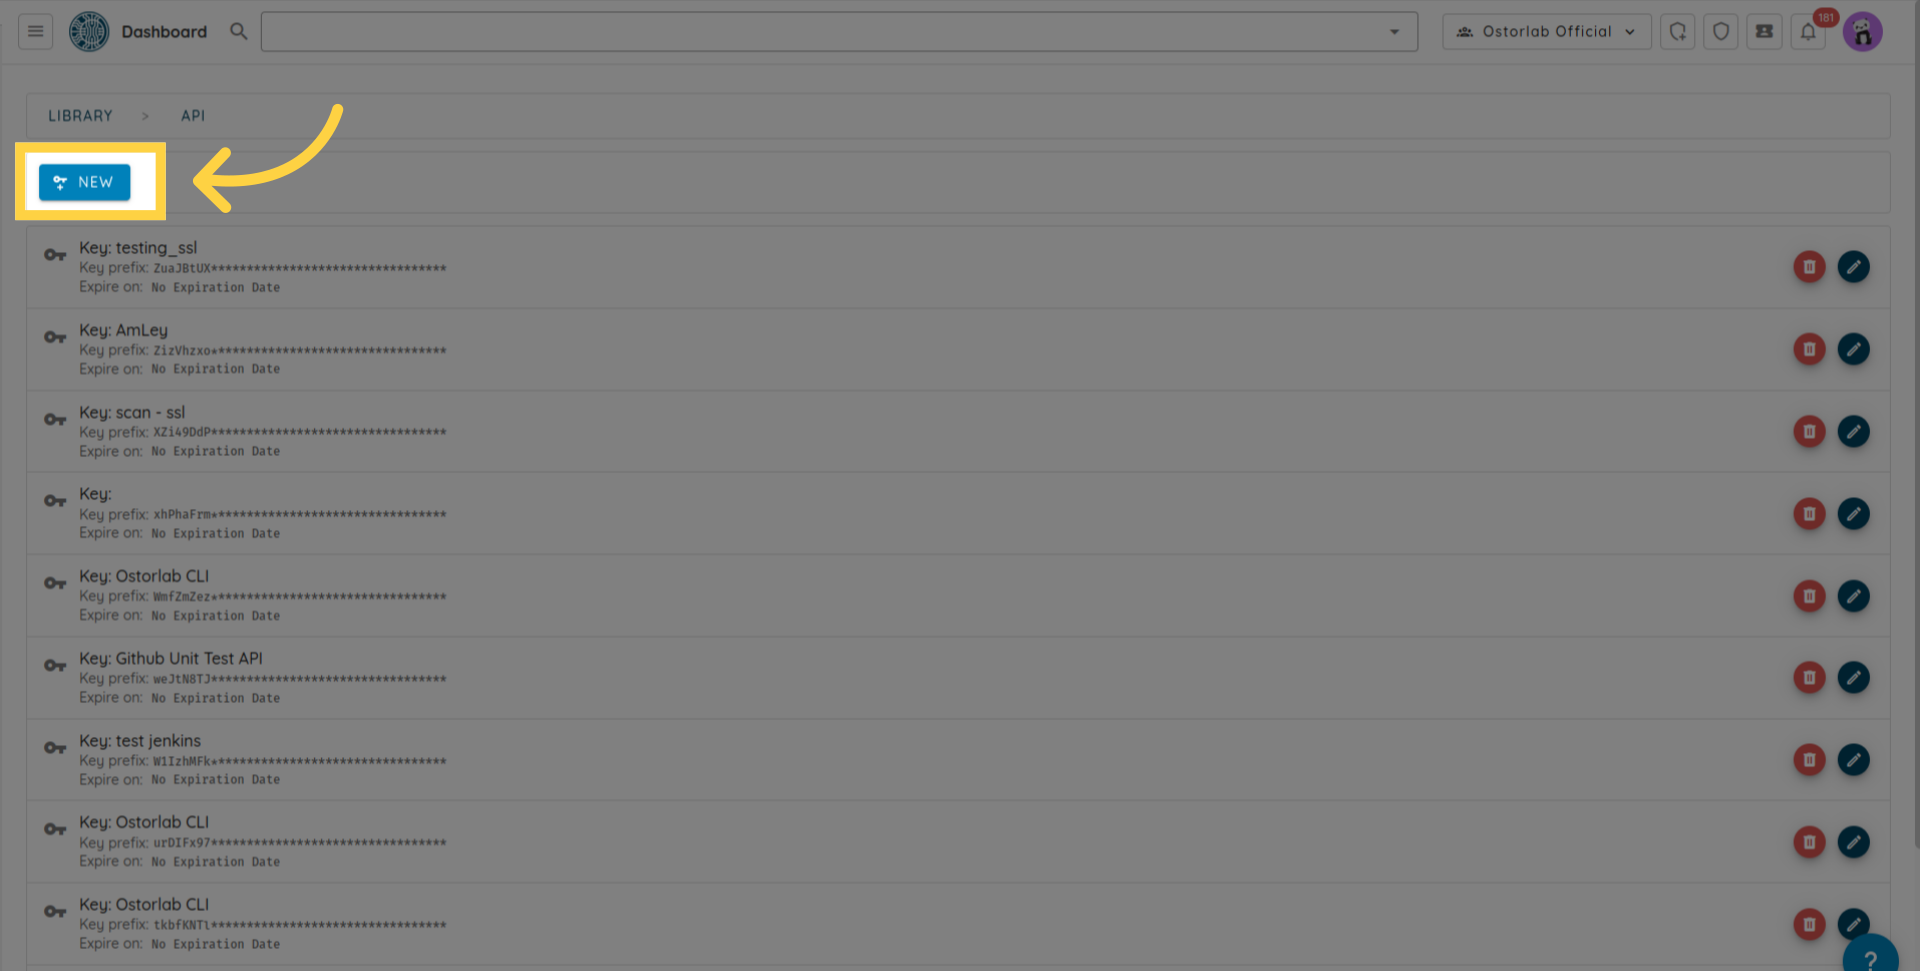
Click the new button to generate a new key
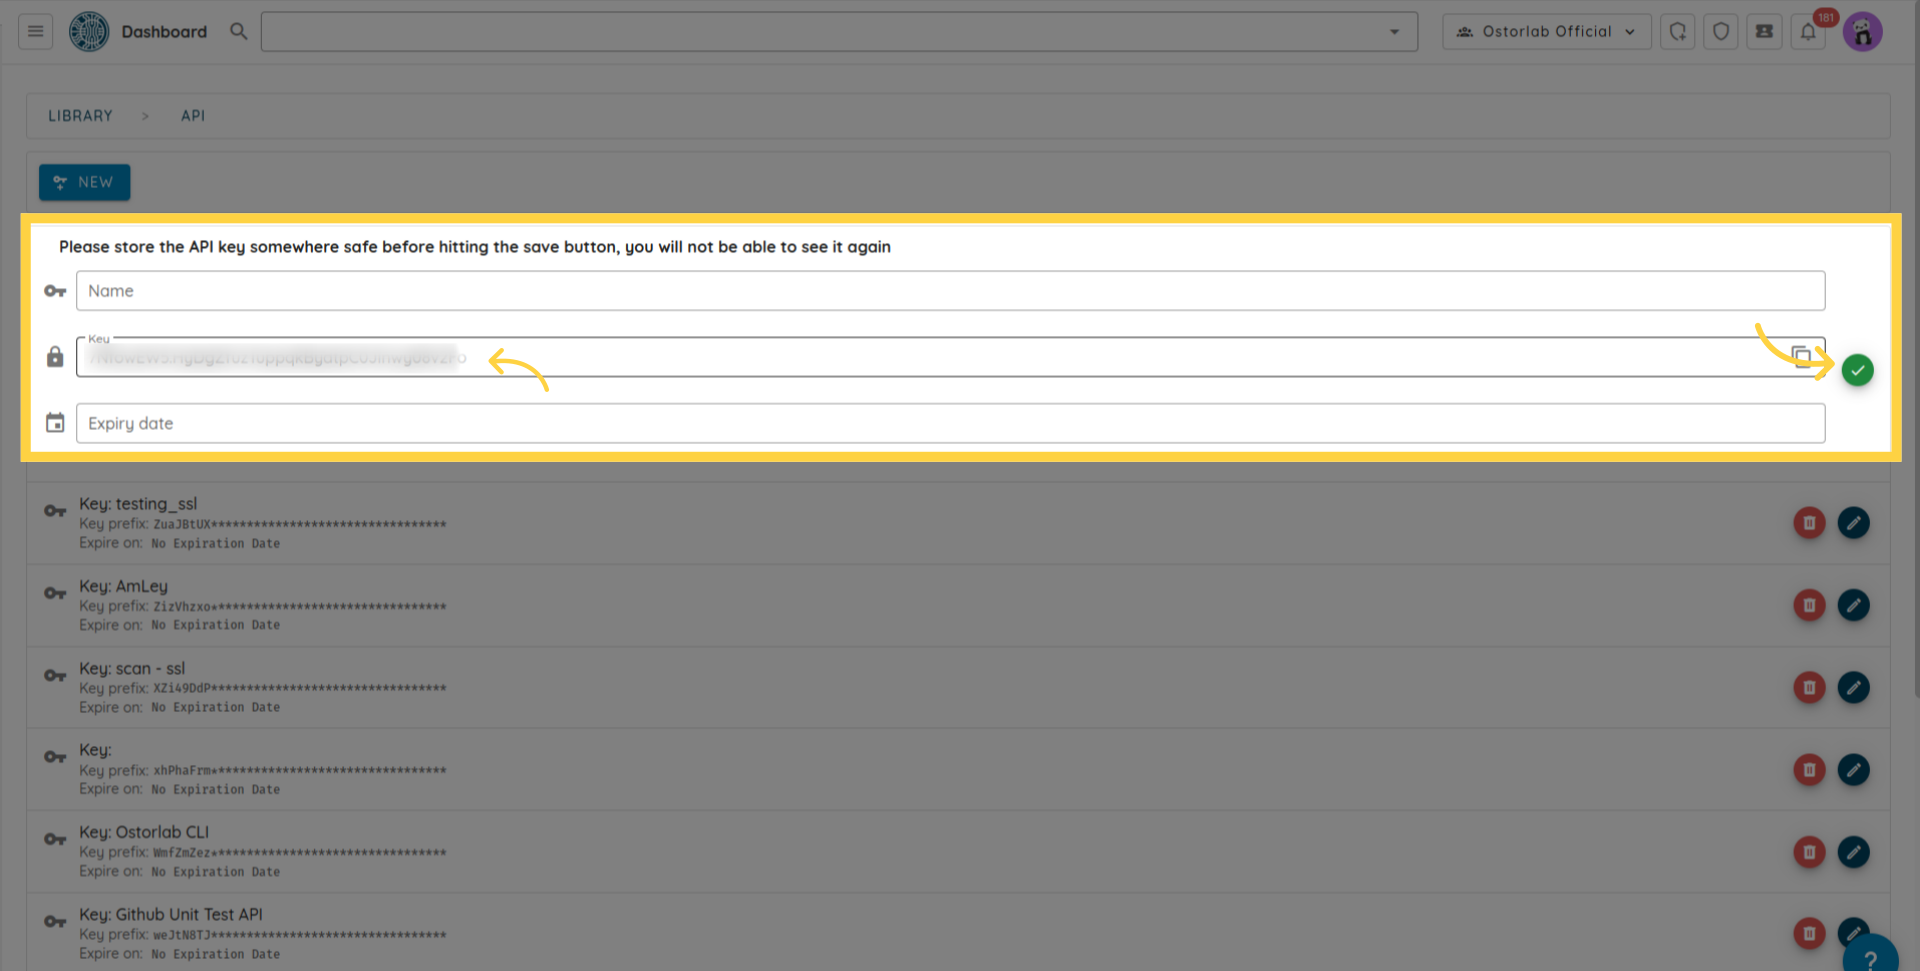
And copy the API key (You can add a name and an expiry date to your key), and finally do not forget to click the save button to save your key.
The API key is used as the value of the header's key the key X-Api-Key to authenticate subsequent requests to https://api.ostorlab.co/apis/graphql_token.
Create a scan
import json
import requests

query = '''
mutation MobileScan($title: String!, $assetType: String!, $application: Upload!, $sboms: [Upload], $scanProfile: String!, $credentialIds: [Int]) {
  createMobileScan(title: $title, assetType: $assetType, application: $application, sboms: $sboms, scanProfile: $scanProfile, credentialIds: $credentialIds) {
    scan {
      id
    }
  }
}
'''

# Set api key in Authorization header.
api_key = "XXXXXXXXXXX"
headers = {"X-Api-Key": f"{api_key}"}
# variables
title = "scan_title"
asset_type = "android"
scan_profile = "Fast Scan"
data = {"operations": json.dumps({"query":query,"variables": {"title":title,"assetType":asset_type,"application": None,"scanProfile":can_profile,},}), "map": json.dumps({"0": ["variables.application"]}),}
path_to_file = "my_full_path"
# Post query request.
with open(path_to_file, "rb") as f:
    request = requests.post(url='https://api.ostorlab.co/apis/graphql_token/',
                          data=data,
                          files={"0": f.read()}
                          headers=headers)
    print(request.json())
curl -v -X POST https://api.ostorlab.co/apis/graphql \
--header "X-Api-Key: $API_KEY" \
-F 'operations={"query": "mutation newMobileScan($title: String!, $assetType: String!, \
$application: Upload!, $scanProfile: String!) { createMobileScan(title: $title, assetType:$assetType, \
application: $application, scanProfile: $scanProfile) {scan {id }  }}", "variables": \
{"title": "test_title", "assetType": "android", "application": null, "scanProfile": "$SCAN_PROFILE"}}' \
-F 'map={"0": ["variables.application"]}' -F "0=@$PATH_APPLICATION"
Extract the scan progress
import requests

query = '''
query {
  scans {
    scans {
      id
      title
      progress
    }
  }
}
'''

# Set api key in Authorization header.
api_key = "XXXXXXXXXXX"
headers = {"X-Api-Key": f"{api_key}"}
# Post query request.
request = requests.post(url='https://api.ostorlab.co/apis/graphql_token/',
                      json={"query": query},
                      headers=headers)
print(request.json())
curl -v -X POST https://api.ostorlab.co/apis/graphql \
--header 'Content-Type: application/json' \
--header "X-Api-Key: $API_KEY" \
--data '{"query": "query {scans { scans { id title  progress }}}"}'
Extract the scan tickets
import requests

query = '''
query tickets($scanId: Int) {
    tickets(scanId: $scanId) {
    tickets{
      id
      withinSlo
      status
      priority
      }
    }
  }
'''

# variables
scan_id = XXXXX
# Set api key in Authorization header.
api_key = "XXXXXXXXXXX"
headers = {"X-Api-Key": f"{api_key}"}
# Post query request.
request = requests.post(url='https://api.ostorlab.co/apis/graphql_token/',
                      json={"query": query, "variables": {"scanId": scan_id}},
                      headers=headers)
print(request.json())
curl -v -X POST https://api.ostorlab.co/apis/graphql \
--header 'Content-Type: application/json' \
--header "X-Api-Key: $API_KEY" \
--data '{"query": "query tickets($scanId: Int) { tickets(scanId: $scanId) { tickets { id withinSlo status priority } } }", "variables": {"scanId": $SCAN_ID}}'
Create a scan with SBOM
import json
import requests
import pathlib

query = '''
mutation MobileScan($title: String!, $assetType: String!, $application: Upload!, $sboms: [Upload], $scanProfile: String!) {
  createMobileScan(title: $title, assetType: $assetType, application: $application, sboms: $sboms, scanProfile: $scanProfile) {
    scan {
      id
    }
  }
}
'''

# Set API key in Authorization header.
api_key = "XXXXXXXXXXX"
headers = {"X-Api-Key": f"{api_key}"}

# Variables
title = "scan_with_sbom"
asset_type = "android"
scan_profile = "Fast Scan"
path_to_apk = "your_apk.apk"
path_to_sboms = ["gradle.lockfile"]

# Data
data = {
    "operations": json.dumps({
        "query": query,
        "variables": {
            "title": title,
            "assetType": asset_type,
            "application": None,
            "sboms": [None],  # Only one item
            "scanProfile": scan_profile
        }
    }),
    "map": json.dumps({
        "0": ["variables.application"],
        "1": ["variables.sboms.0"]
    })
}

# Post query request
apk_content = pathlib.Path(path_to_apk).read_bytes()
sbom_content = pathlib.Path(path_to_sboms[0]).read_bytes()
response = requests.post(
    url='https://api.ostorlab.co/apis/graphql_token/',
    data=data,
    files={
        "0": apk_content,
        "1": sbom_content
    },
    headers=headers
)
print(response.json())
curl -v -X POST https://api.ostorlab.co/apis/graphql \
--header "X-Api-Key: $API_KEY" \
-F 'operations={"query": "mutation MobileScan($title: String!, $assetType: String!, $application: Upload!, $sboms: [Upload], $scanProfile: String!) { createMobileScan(title: $title, assetType: $assetType, application: $application, sboms: $sboms, scanProfile: $scanProfile) { scan { id } } }", "variables": {"title": "scan_with_sbom", "assetType": "android", "application": null, "sboms": [null], "scanProfile": "Fast Scan"}}' \
-F 'map={"0": ["variables.application"], "1": ["variables.sboms.0"]}' \
-F "0=@$PATH_APK" \
-F "1=@$PATH_SBOM"
Create a scan with test credentials
Create the test credentials
Example of creating a simple login password credential:
import json
import requests

query = '''
    mutation CreateTestCredentials($credentials: TestCredentialsInput!) {
          createTestCredentials(testCredentials: $credentials) {
            testCredentials {
              ... on LoginPasswordTestCredentials {
                id
                credentialName
                login
                password
                type
                url
              }
            }
          }
        }
'''


# Set API key in Authorization header
api_key = "XXXXXXXXXX"
headers = {"X-Api-Key": f"{api_key}"}

# Variables
variables = {
    "credentials": {
        "credentialName": "login_creds",
        "loginPassword": {
            "login": "fake_login",
            "password": "fake_password",
            "url": "fake_url"
        },
    }
}

# Data
data = {
    "query": query,
    "variables": variables
}

# Post query request
response = requests.post(
    url='https://api.ostorlab.co/apis/graphql_token/',
    json=data,
    headers=headers
)
print(response.json())
curl -X POST https://api.ostorlab.co/apis/graphql_token/ -H "X-Api-Key: $API_KEY" -H "Content-Type: application/json" -d '{
  "query": "mutation CreateTestCredentials($credentials: TestCredentialsInput!) { createTestCredentials(testCredentials: $credentials) { testCredentials { ... on LoginPasswordTestCredentials { id credentialName login password type url } } } }",
  "variables": {
    "credentials": {
      "credentialName": "login_creds",
      "loginPassword": {
        "login": "fake_login",
        "password": "fake_password",
        "url": "fake_url"
      }
    }
  }
}'
Example of creating custom test credential:
import json
import requests

query = '''
    mutation CreateTestCredentials($credentials: TestCredentialsInput!) {
      createTestCredentials(testCredentials: $credentials) {
        testCredentials {
          ... on CustomTestCredentials {
            id
            credentialName
            credentials {
              name
              value
            }
          }
        }
      }
    }
'''


# Set API key in Authorization header
api_key = "XXXXXXXXXXXXX"
headers = {"X-Api-Key": f"{api_key}"}

# Variables
variables = {
        "credentials": {
            "credentialName": "testCustomCredentials",
            "custom": {
                "credentials": [
                    {"name": "a", "value": "b"},
                    {"name": "a2", "value": "b2"},
                ],
            },
        }
    }

# Data
data = {
    "query": query,
    "variables": variables
}

# Post query request
response = requests.post(
    url='https://api.ostorlab.co/apis/graphql_token/',
    json=data,
    headers=headers
)
print(response.json())
curl -X POST https://api.ostorlab.co/apis/graphql_token/ \
-H "X-Api-Key: $API_KEY" \
-H "Content-Type: application/json" \
-d '{
  "query": "mutation CreateTestCredentials($credentials: TestCredentialsInput!) { createTestCredentials(testCredentials: $credentials) { testCredentials { ... on CustomTestCredentials { id credentialName credentials { name value } } } } }",
  "variables": {
    "credentials": {
      "credentialName": "testCustomCredentials",
      "custom": {
        "credentials": [
          { "name": "a", "value": "b" },
          { "name": "a2", "value": "b2" }
        ]
      }
    }
  }
}'
Query the test credentials
import requests

query = '''
    query {
      testsCredentials(page: 1, numberElements: 10) {
        pageInfo {
          count
          numPages
        }
        testsCredentials {
          __typename
          ... on LoginPasswordTestCredentials {
            credentialName
            id
            login
            password
            role
            url
          }
          ... on CreditCardTestCredentials {
            id
            credentialName
            creditCardNumber
            expirationDate
            name
            cvv
          }
          ... on AddressTestCredentials {
            id
            credentialName
            addressLine
            city
            zipCode
            country
          }
          ... on EmailTestCredentials {
            id
            credentialName
            email
          }
          ... on PhoneNumberTestCredentials {
            id
            credentialName
            phoneNumber
          }
          ... on ScriptTestCredentials {
            id
            credentialName
            script
          }
          ... on TlsCertificateTestCredentials {
            id
            credentialName
            tlsCertificate
          }
          ... on CustomTestCredentials {
            id
            credentialName
            credentials {
              name
              value
            }
          }
          ... on TestHeaders {
            id
            credentialName
            testHeaders {
              name
              value
            }
          }
          ... on BasicTestCredentials {
            id
            credentialName
            login
            password
          }
        }
      }
    }
'''

# Set API key in Authorization header.
api_key = "XXXXXXXXXXX"
headers = {"X-Api-Key": f"{api_key}"}

# Post query request
response = requests.post(
    url='https://api.ostorlab.co/apis/graphql_token/',
    json={"query": query},
    headers=headers
)
print(response.json())
curl -v -X POST https://api.ostorlab.co/apis/graphql \
--header 'Content-Type: application/json' \
--header "X-Api-Key: $API_KEY" \
--data '{"query": "query { testsCredentials(page: 1, numberElements: 10) { pageInfo { count numPages } testsCredentials { __typename ... on LoginPasswordTestCredentials { credentialName id login password role url } ... on CreditCardTestCredentials { id credentialName creditCardNumber expirationDate name cvv } ... on AddressTestCredentials { id credentialName addressLine city zipCode country } ... on EmailTestCredentials { id credentialName email } ... on PhoneNumberTestCredentials { id credentialName phoneNumber } ... on ScriptTestCredentials { id credentialName script } ... on TlsCertificateTestCredentials { id credentialName tlsCertificate } ... on CustomTestCredentials { id credentialName credentials { name value } } ... on TestHeaders { id credentialName testHeaders { name value } } ... on BasicTestCredentials { id credentialName login password } } } }"}'
Create a scan with test credentials
import json
import requests

query = '''
mutation MobileScan($title: String!, $assetType: String!, $application: Upload!, $scanProfile: String!, $credentialIds: [Int]) {
  createMobileScan(title: $title, assetType: $assetType, application: $application, scanProfile: $scanProfile, credentialIds: $credentialIds) {
    scan {
      id
    }
  }
}
'''

# Set API key in Authorization header.
api_key = "XXXXXXXXXXX"
headers = {"X-Api-Key": f"{api_key}"}

# Variables
title = "scan_with_test_credentials"
asset_type = "android"
scan_profile = "Full Scan"
path_to_apk = "your_apk.apk"

# Credential IDs to use in the scan, you can get the credential id from the previous step of creating the test credentials.
credential_ids = [123]

# Data
data = {
    "operations": json.dumps({
        "query": query,
        "variables": {
            "title": title,
            "assetType": asset_type,
            "application": None,
            "scanProfile": scan_profile,
            "credentialIds": credential_ids
        }
    }),
    "map": json.dumps({
        "0": ["variables.application"]
    })
}

# Post query request
apk_content = pathlib.Path(path_to_apk).read_bytes()
response = requests.post(
    url='https://api.ostorlab.co/apis/graphql_token/',
    data=data,
    files={
        "0": apk_content
    },
    headers=headers
)
print(response.json())
curl -v -X POST https://api.ostorlab.co/apis/graphql \
--header "X-Api-Key: $API_KEY" \
-F 'operations={"query": "mutation MobileScan($title: String!, $assetType: String!, $application: Upload!, $scanProfile: String!, $credentialIds: [Int]) { createMobileScan(title: $title, assetType: $assetType, application: $application, scanProfile: $scanProfile, credentialIds: $credentialIds) { scan { id } } }", "variables": {"title": "scan_with_test_credentials", "assetType": "android", "application": null, "scanProfile": "Full Scan", "credentialIds": [123]}}' \
-F 'map={"0": ["variables.application"]}' \
-F "0=@$PATH_APK"
To summarize, this guide was a walk-through of Ostorlab API. We explored various methods of utilizing the API, including the GraphiQL web application and scripts. Additionally, we examined a set of common queries to serve as a reference.