API
Info
Ostorlab 增加了对 Universal Binary JSON 编码的支持。UBJSON 提供了多项性能优势,并增加了对 二进制数据类型的支持。有关格式和可用库的更多信息,请查看以下 链接 UBJSON Spec。 对 JSON 的支持仍然可用,可以使用 content type 标头指定其中任何一个。
本指南将带您了解使用 Ostorlab API 的各个步骤。通过该 API,您可以执行各种类型的任务,从创建扫描、访问扫描进度到列出漏洞。下一节将介绍如何使用 API,以及如何对其进行实验和测试。
访问
访问 API 的方法有多种。您可以利用 GraphiQL Web 应用程序来对 API 进行实验,也可以使用脚本,因为脚本通常用于部署流水线中的自动化,或用于自动化创建和监控大量扫描。
1. 沙箱 (Sandbox)
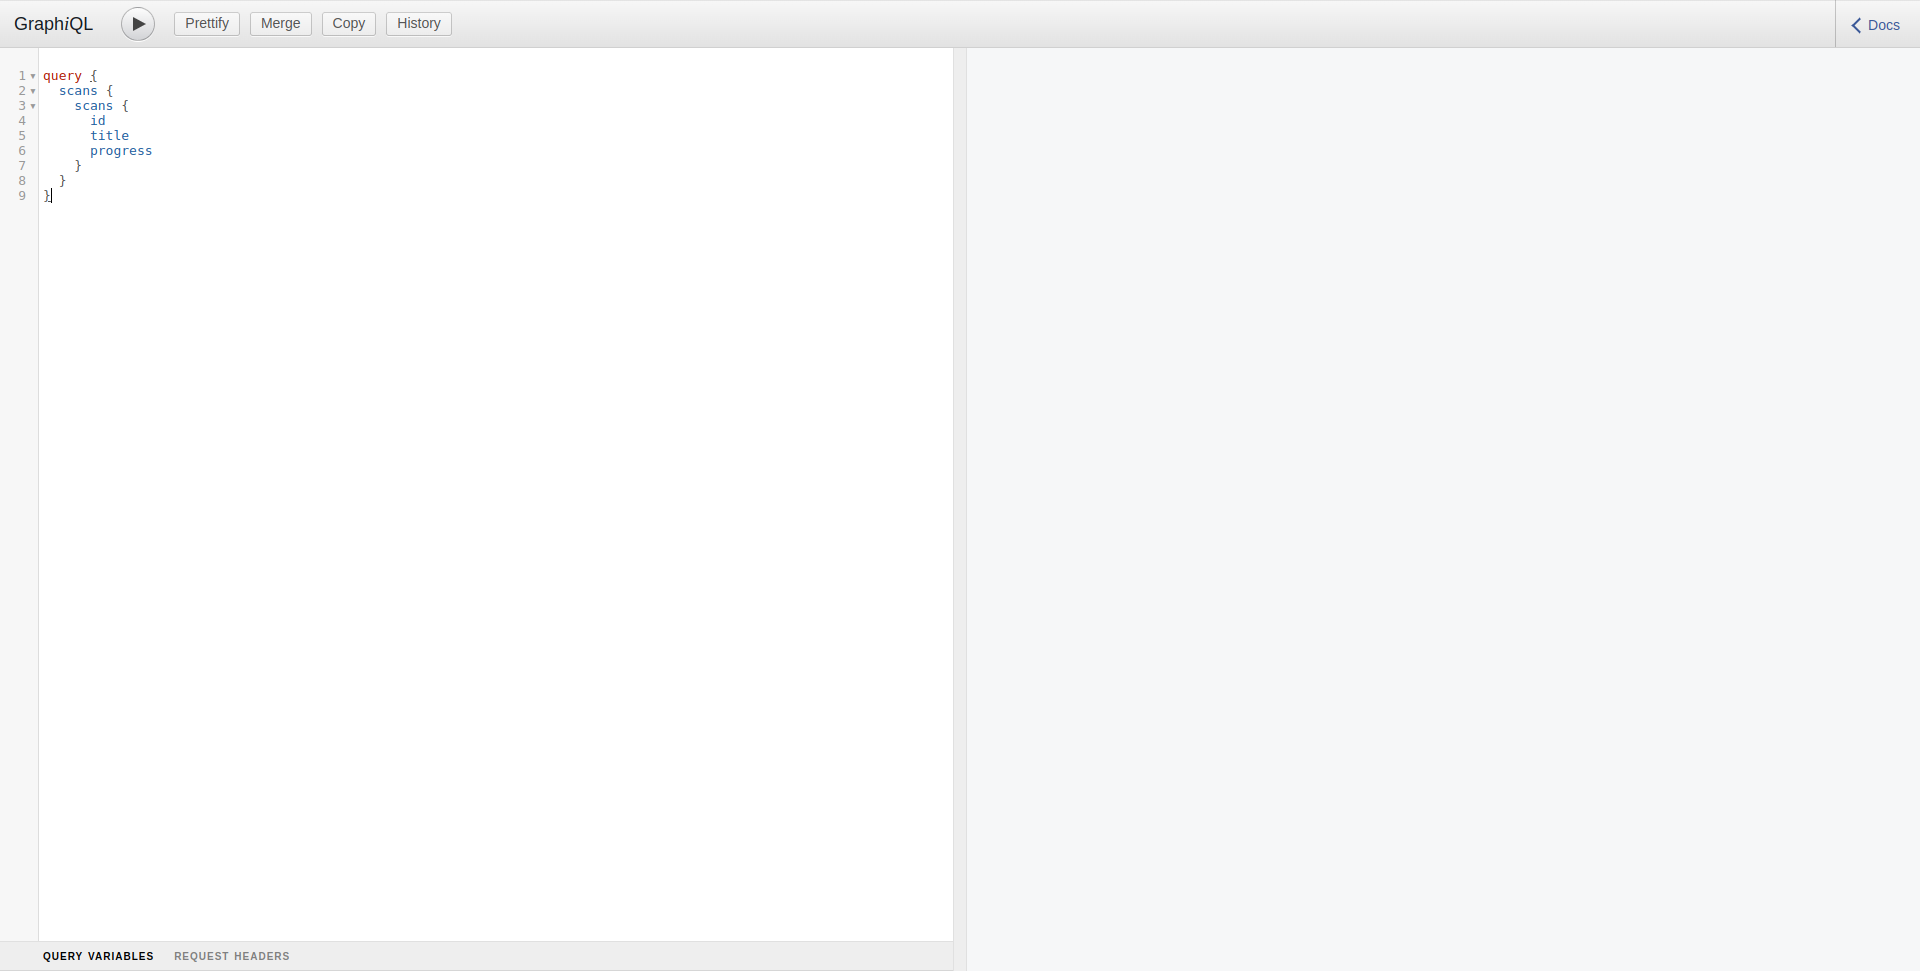
可通过以下 URL 访问 GraphiQL:https://api.ostorlab.co/apis/graphql
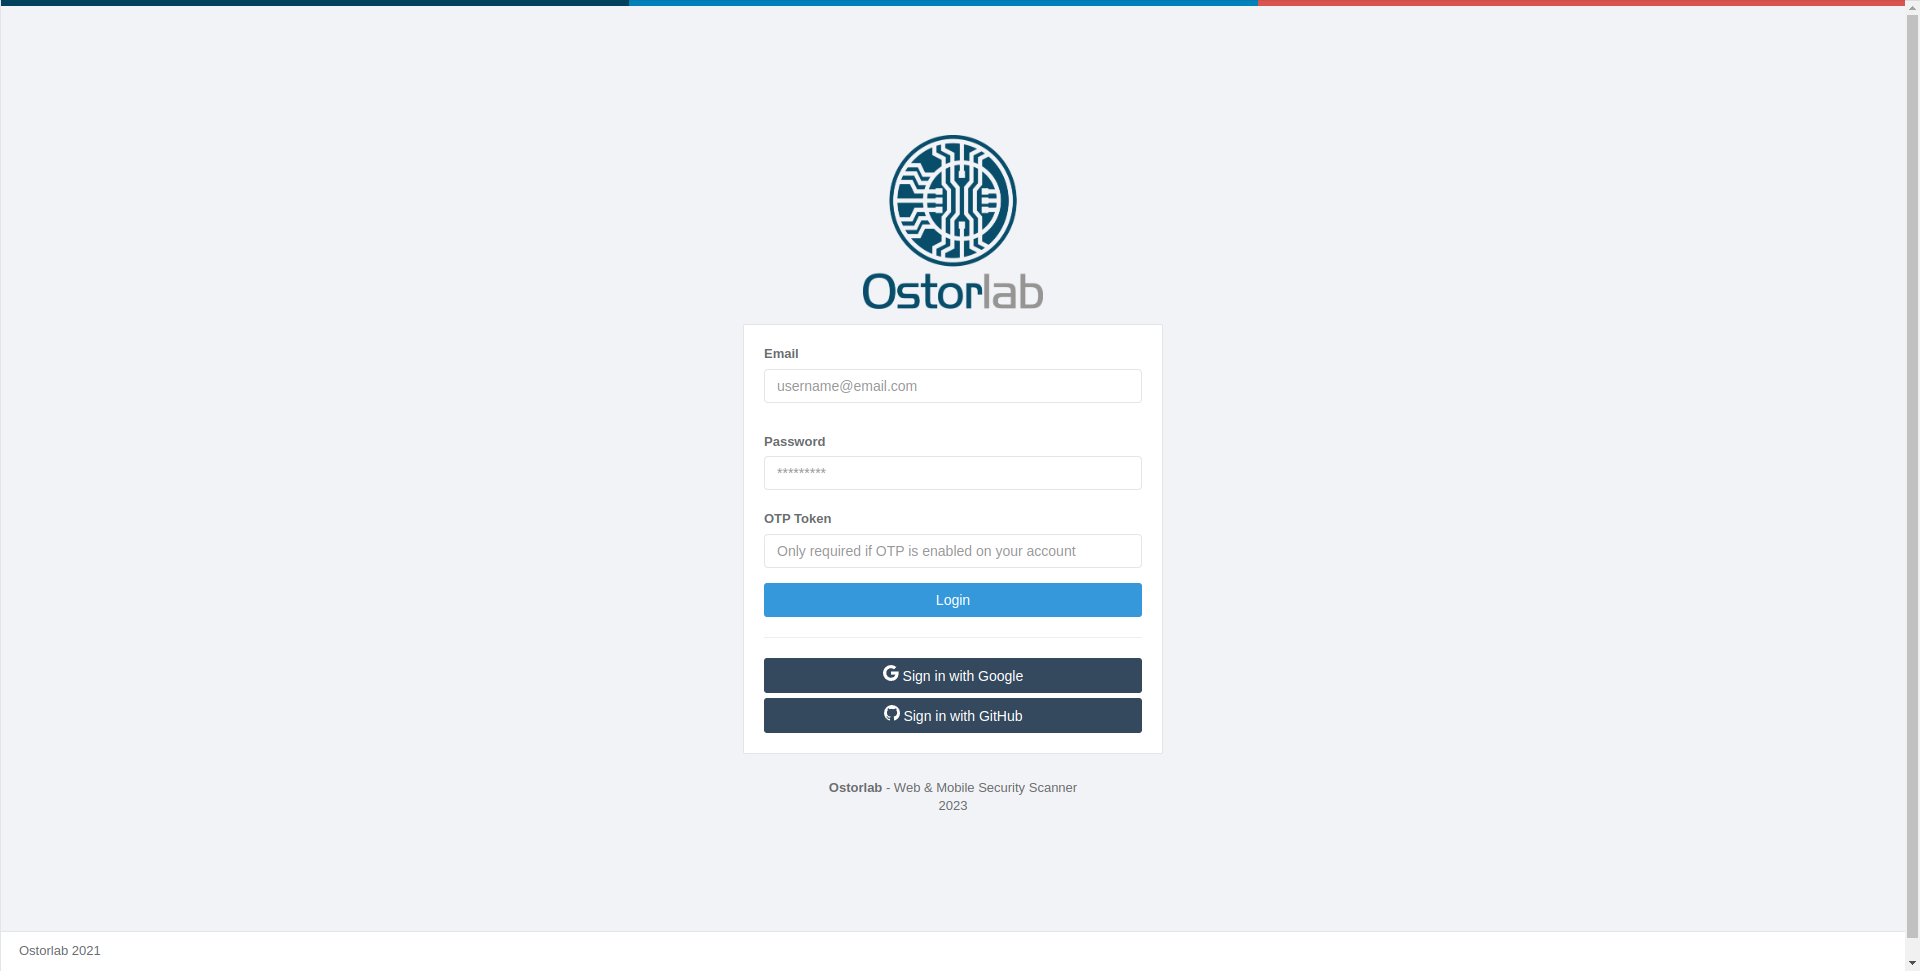
该 API 仅供已验证的用户访问。请确保您已在 https://api.ostorlab.co/portal/login 进行身份验证。
示例
为了让您了解如何使用该 API,以下是一些常见查询的示例:
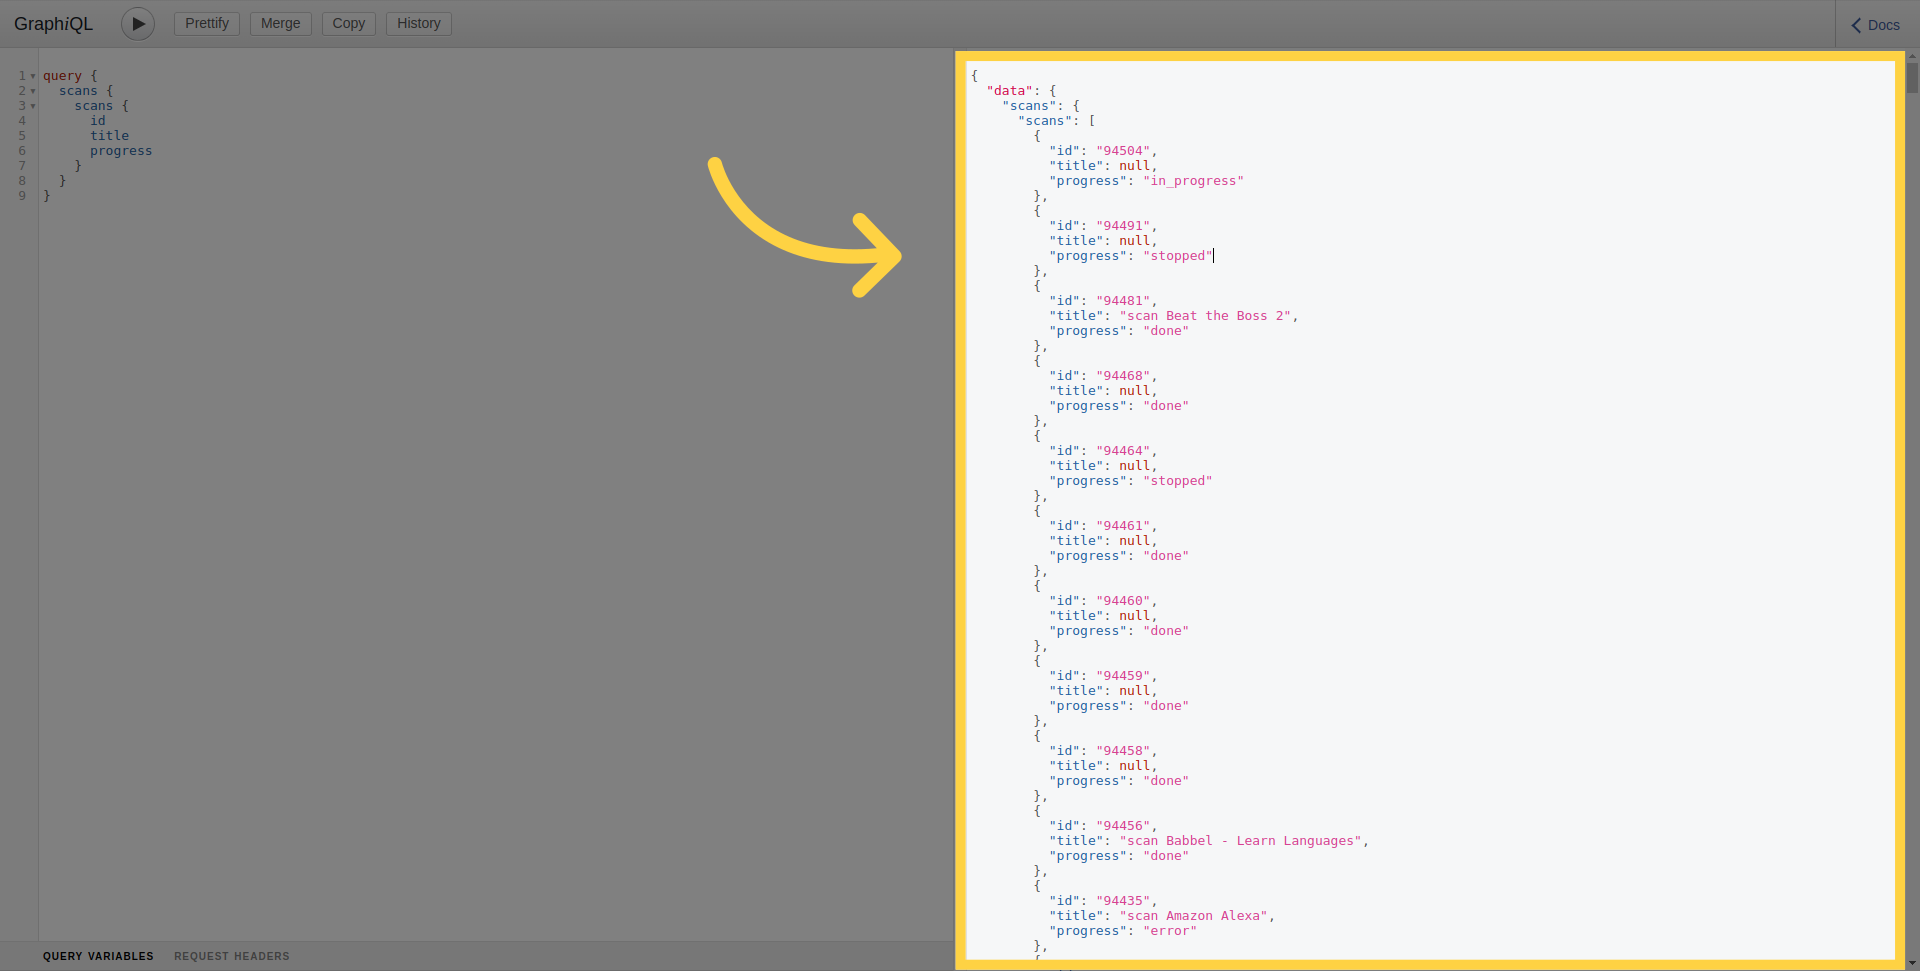
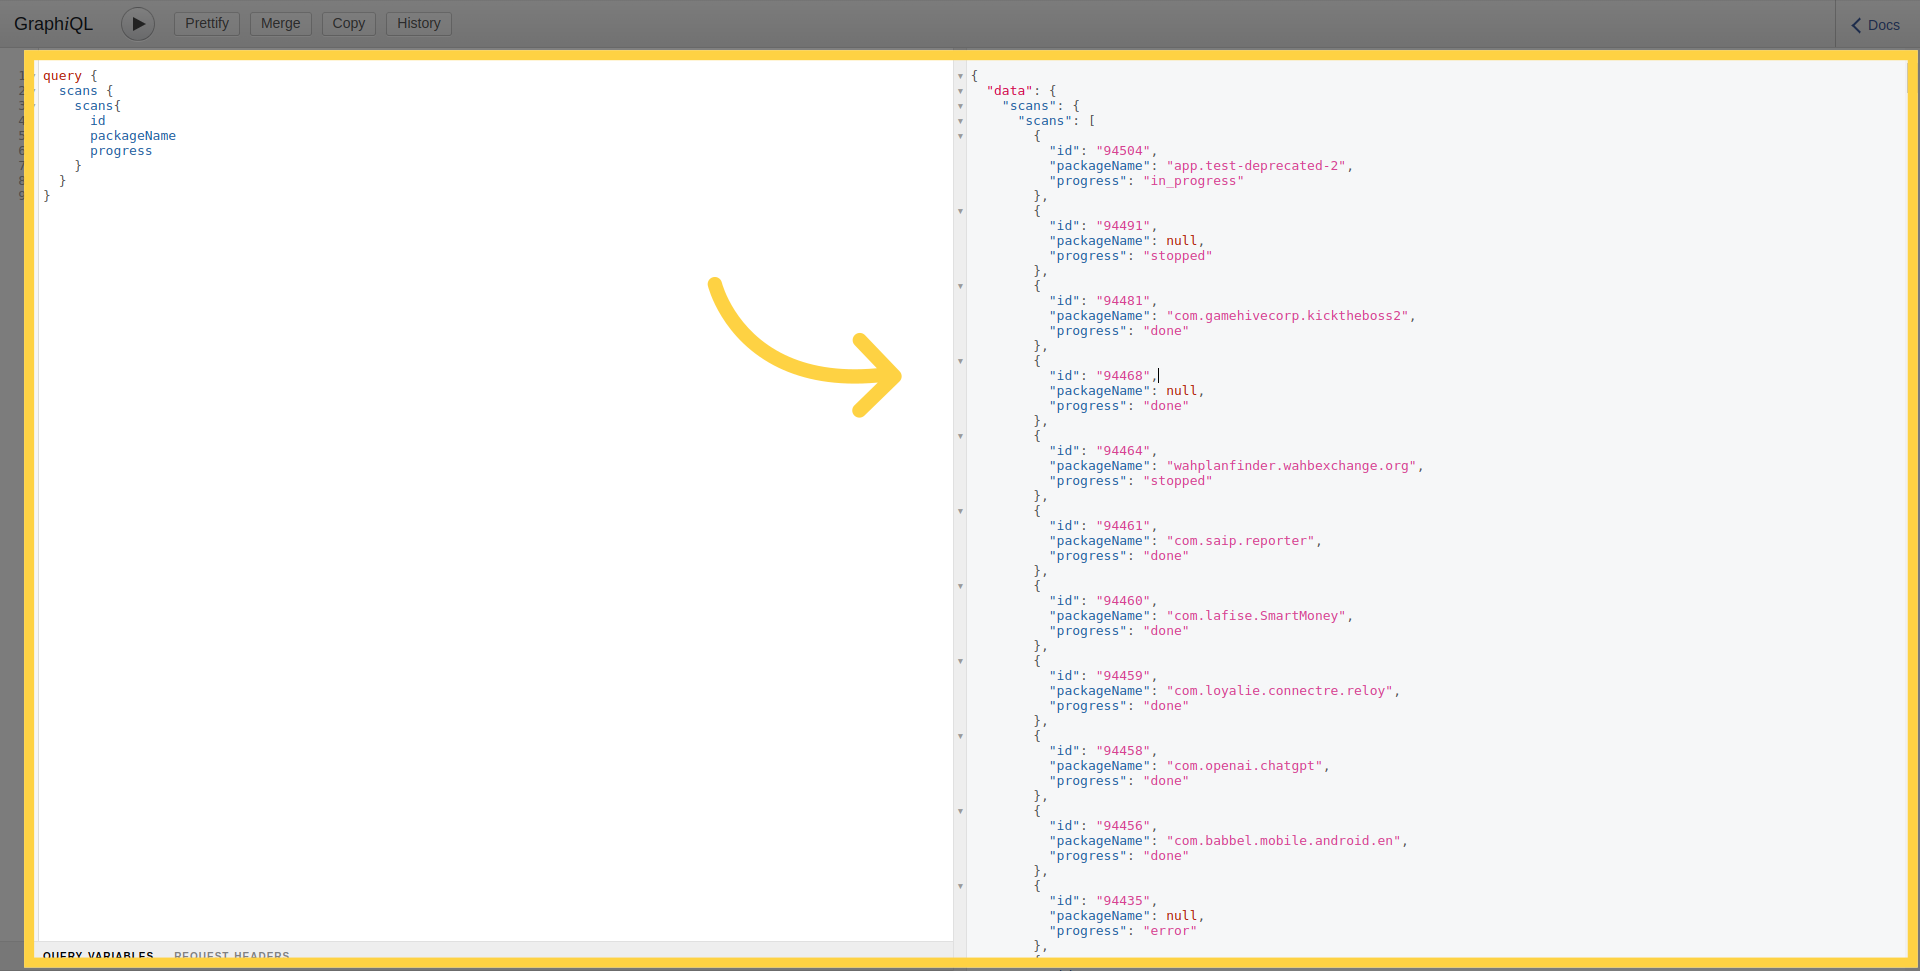
列出扫描
要列出当前用户所在组织拥有的所有扫描:
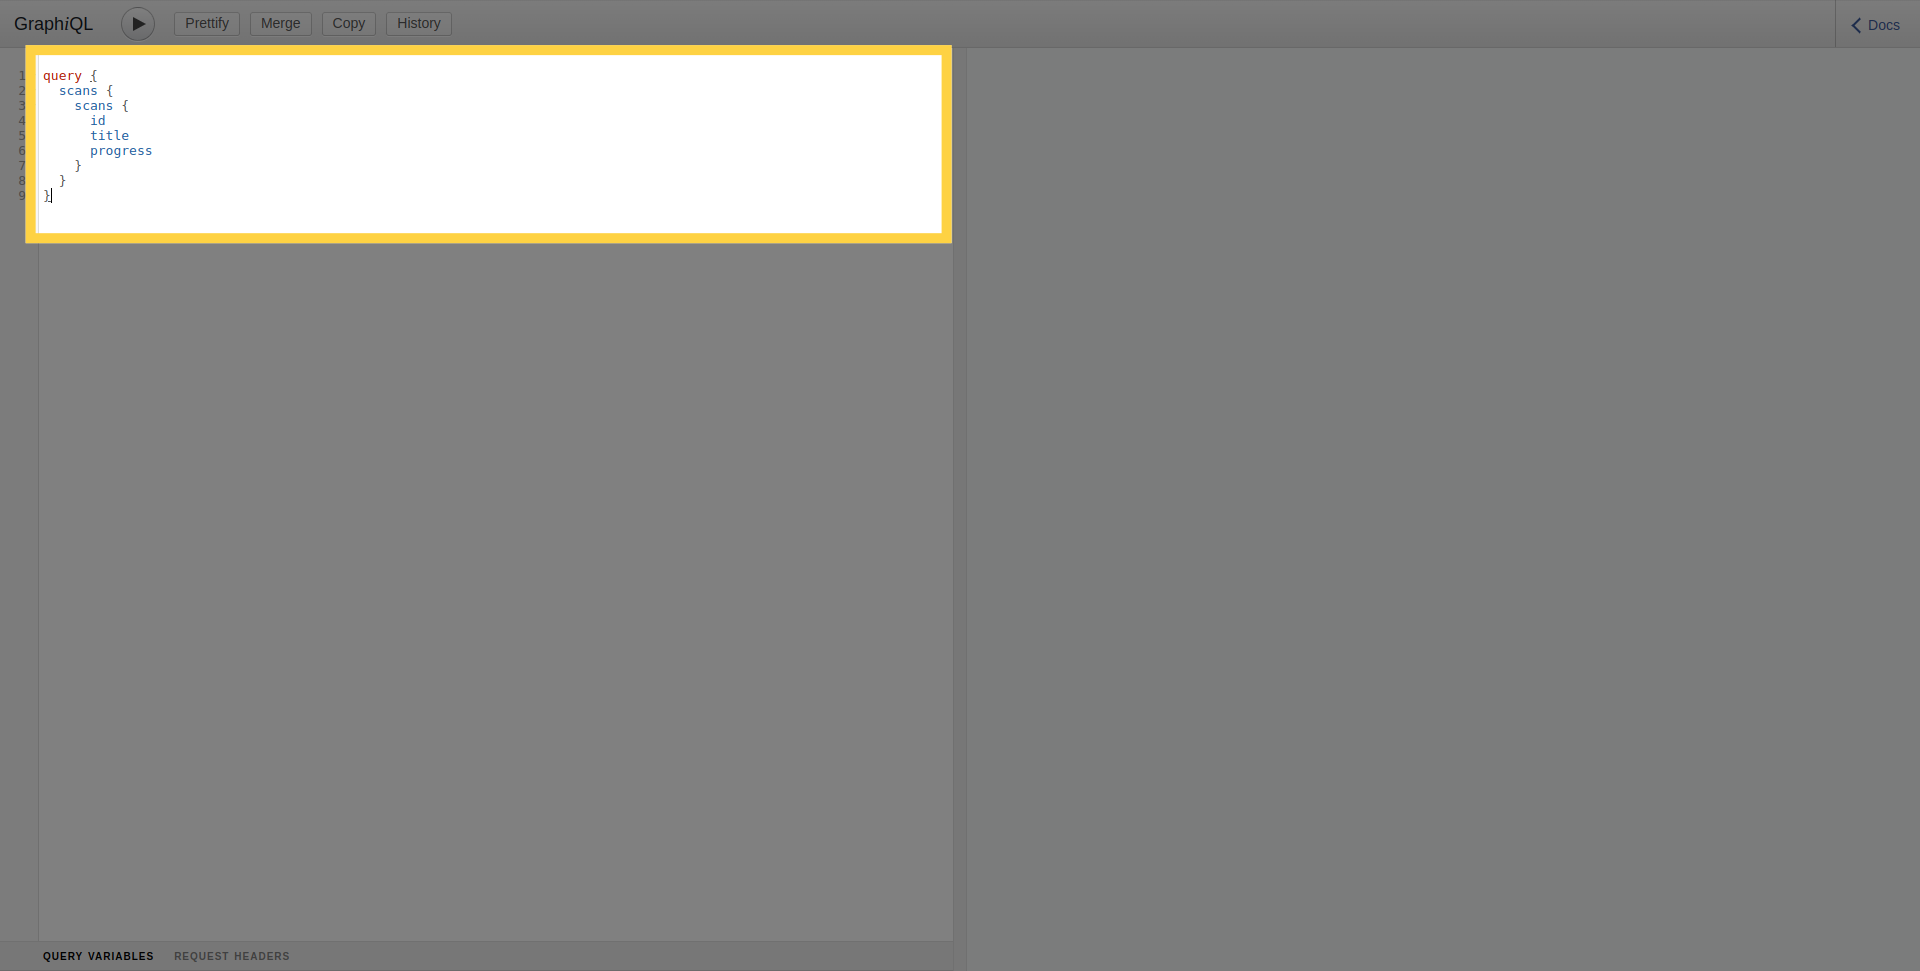 要执行查询,请点击运行按钮。
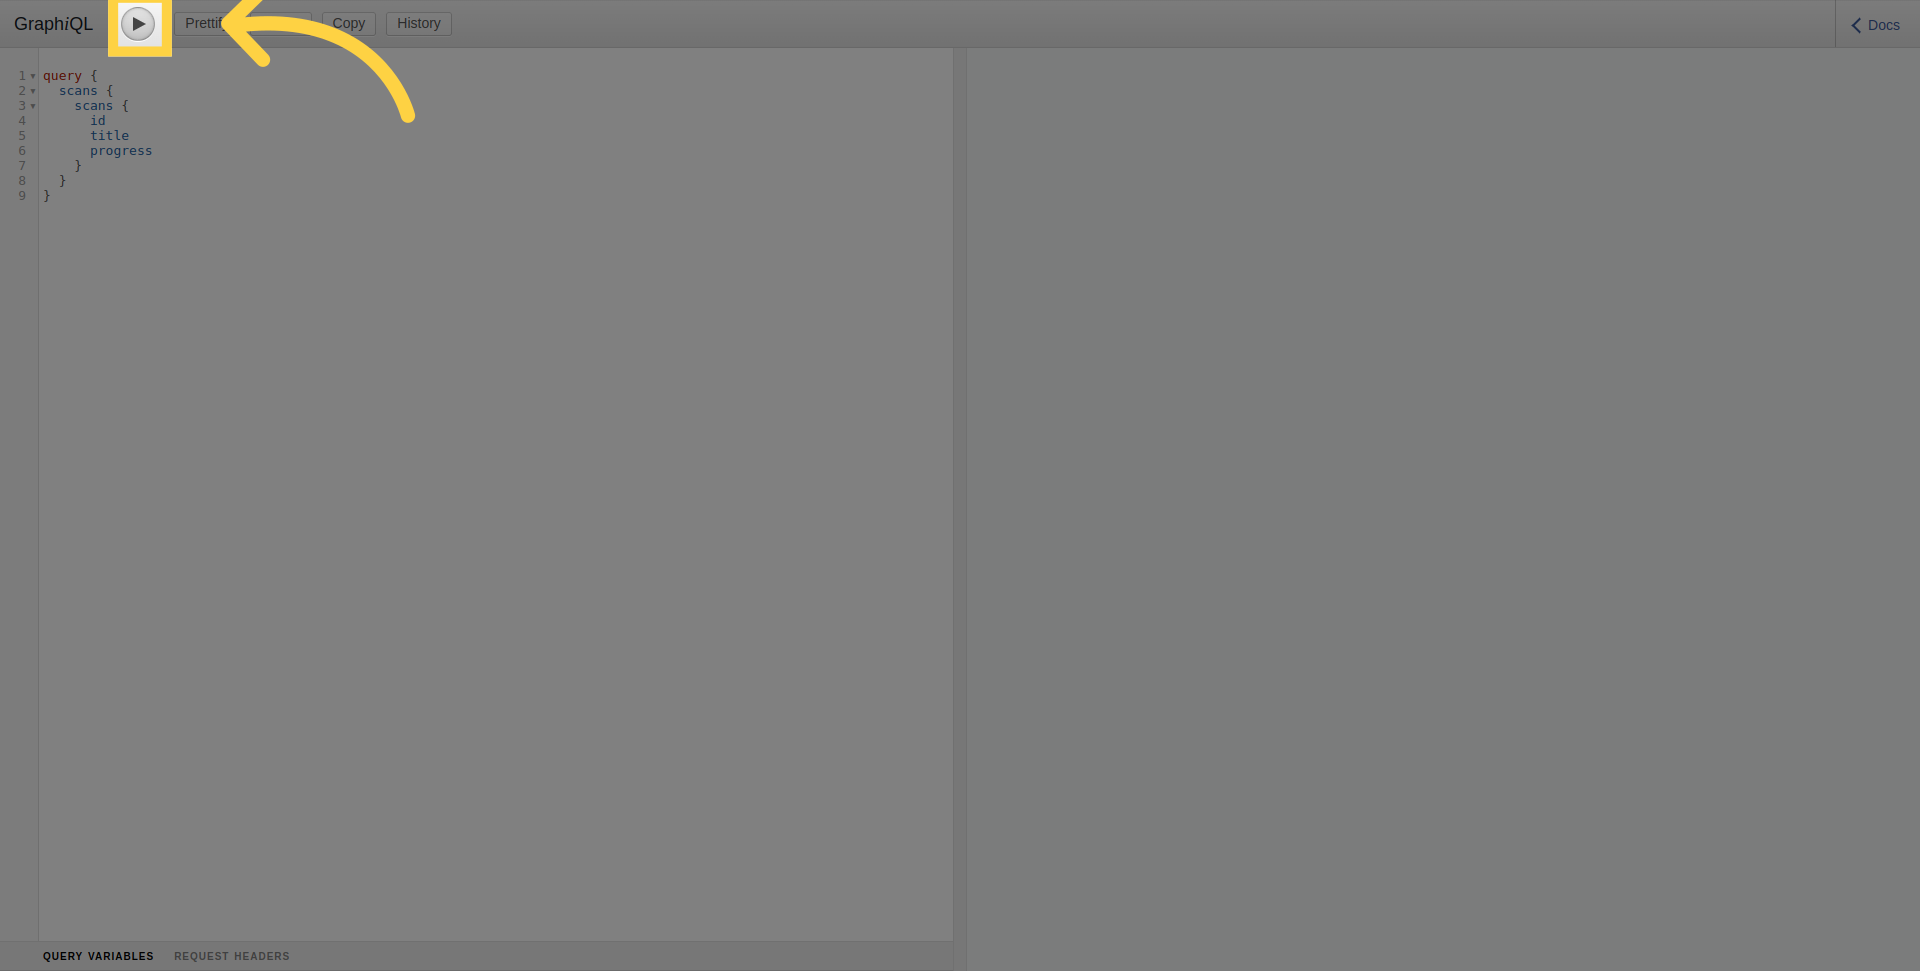
在右侧部分,您可以看到已执行查询的结果。
按过滤器列出扫描
要列出特定移动应用程序的扫描,请使用 target 参数指定应用程序包名称或 bundle ID。
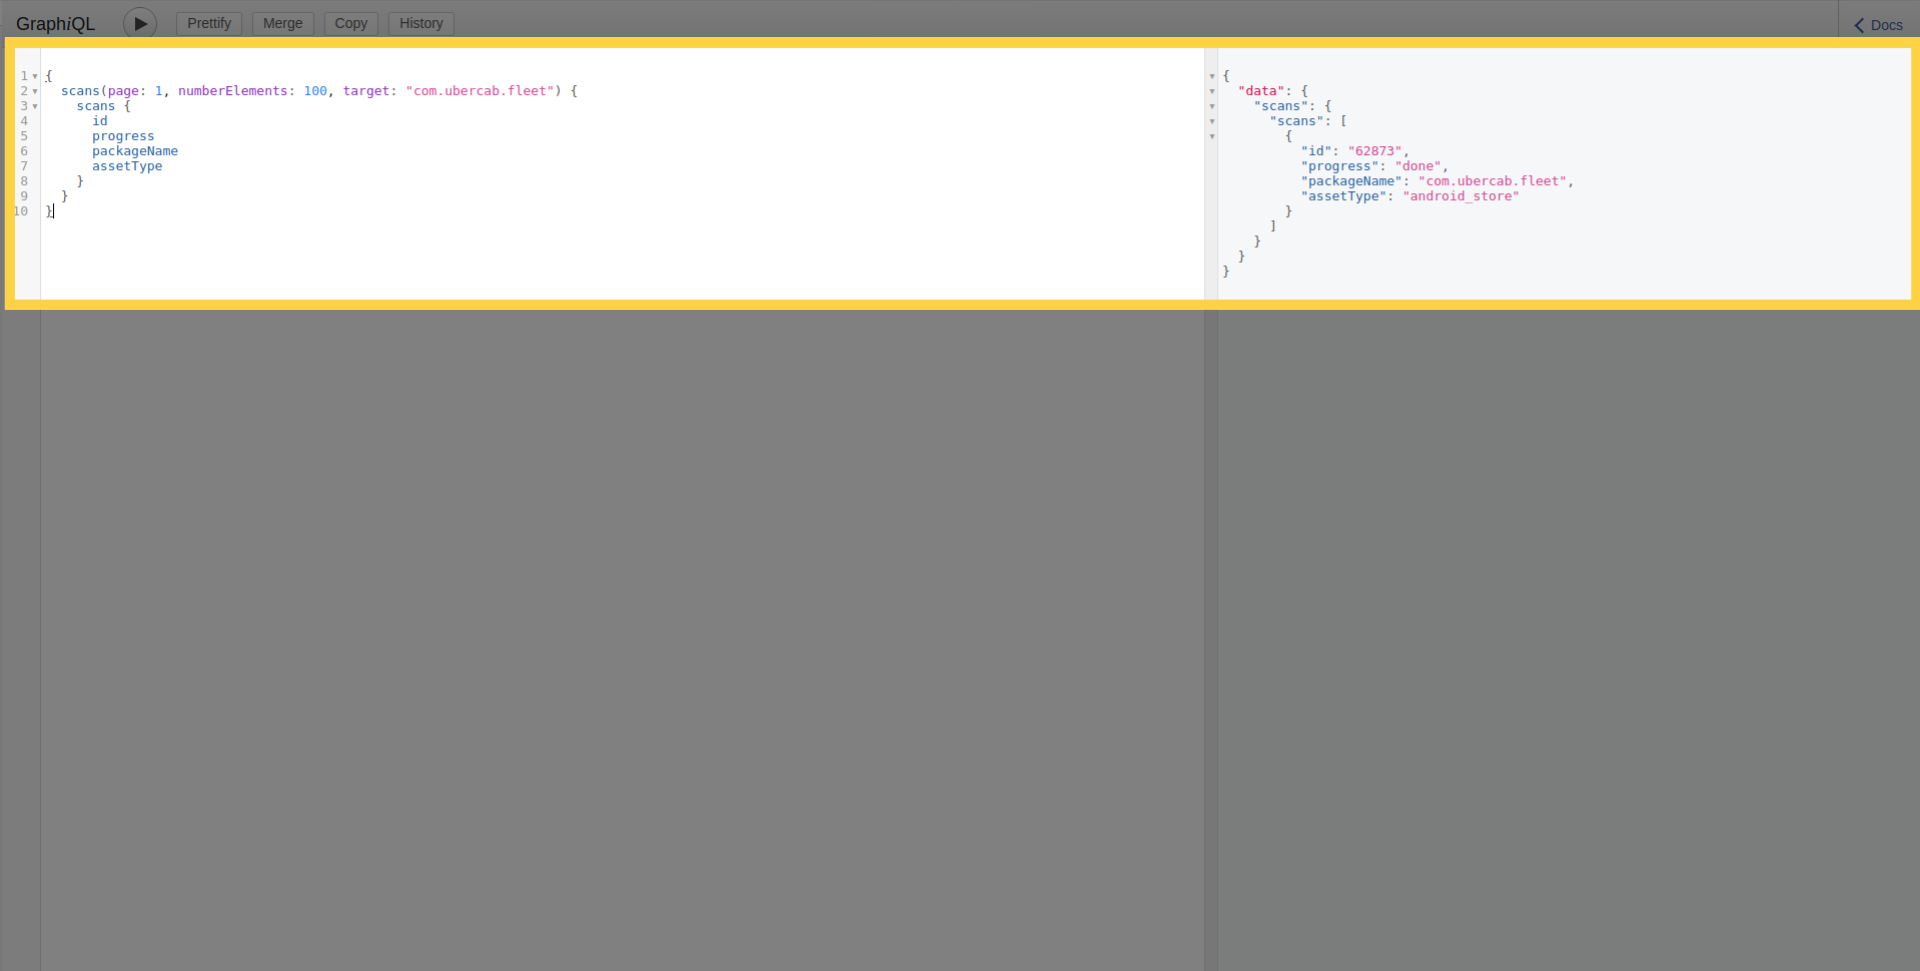
扫描 API 支持其他过滤器(如 targetAssetTypes、riskRatings、progress),并可以使用 orderBy 和 sort 参数进行排序和分类。
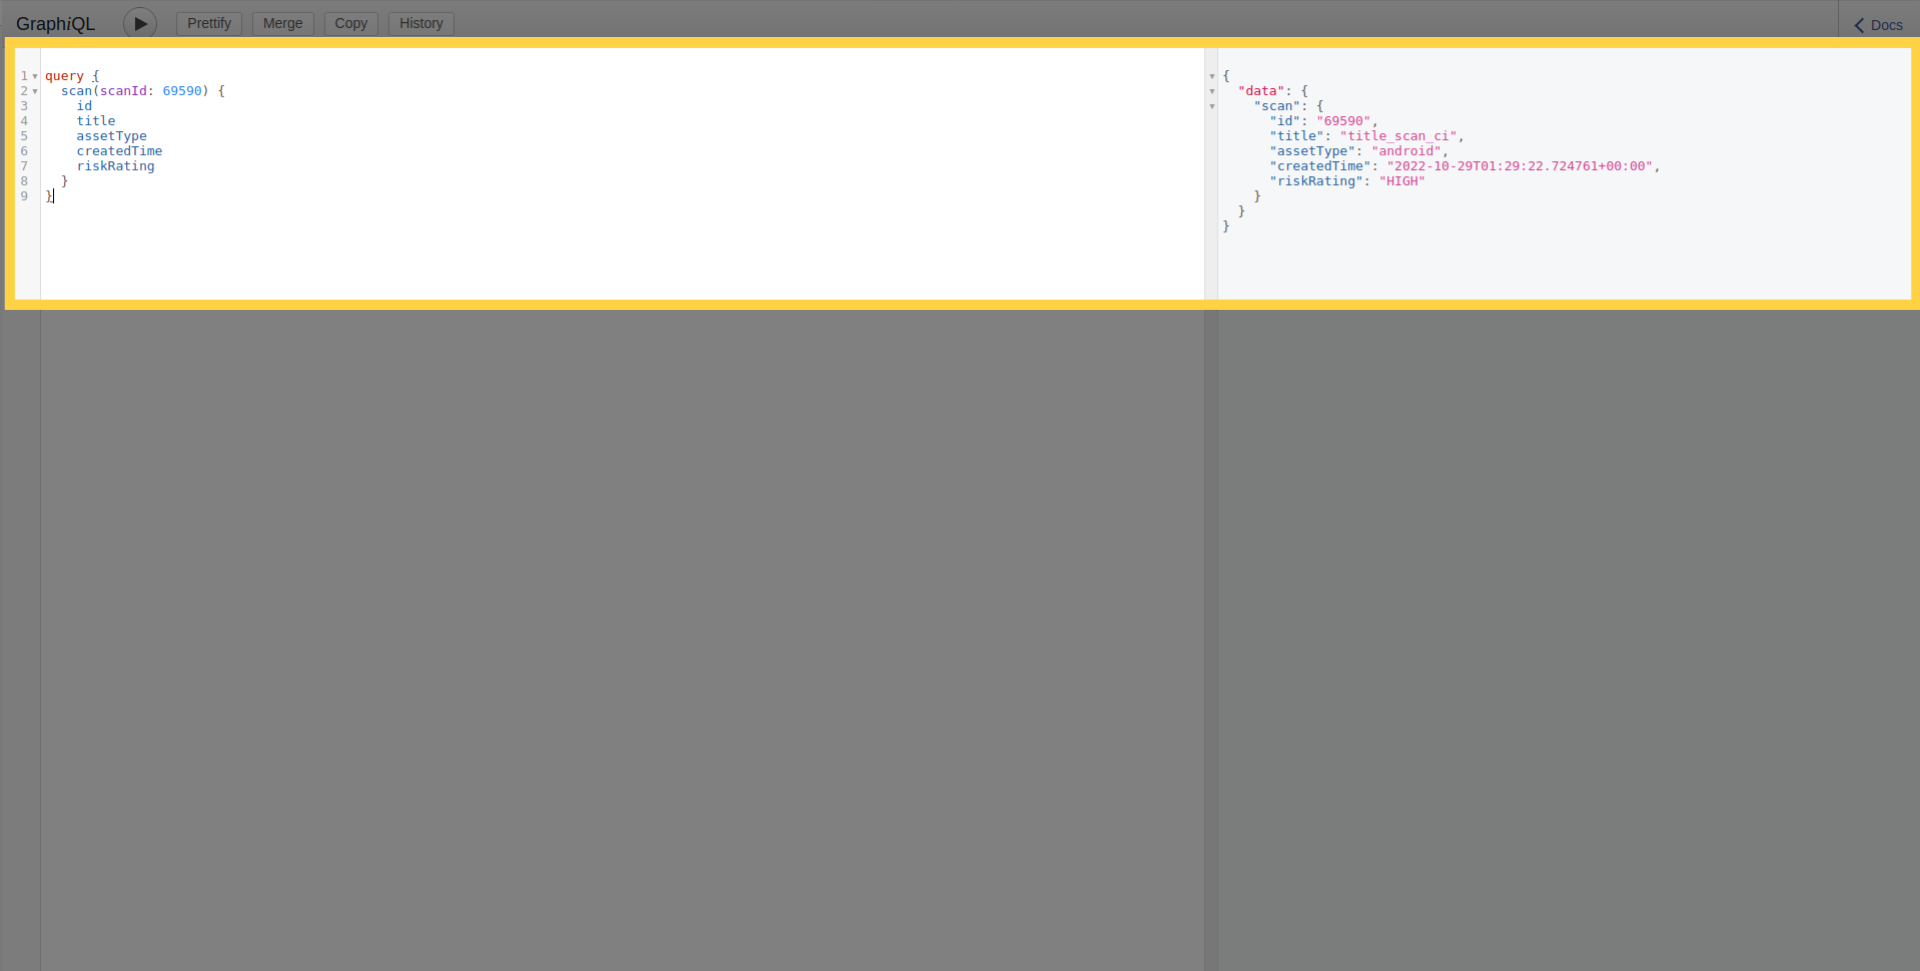
扫描详细信息
您还可以按如下方式使用其 ID 检索单次扫描的详细信息:
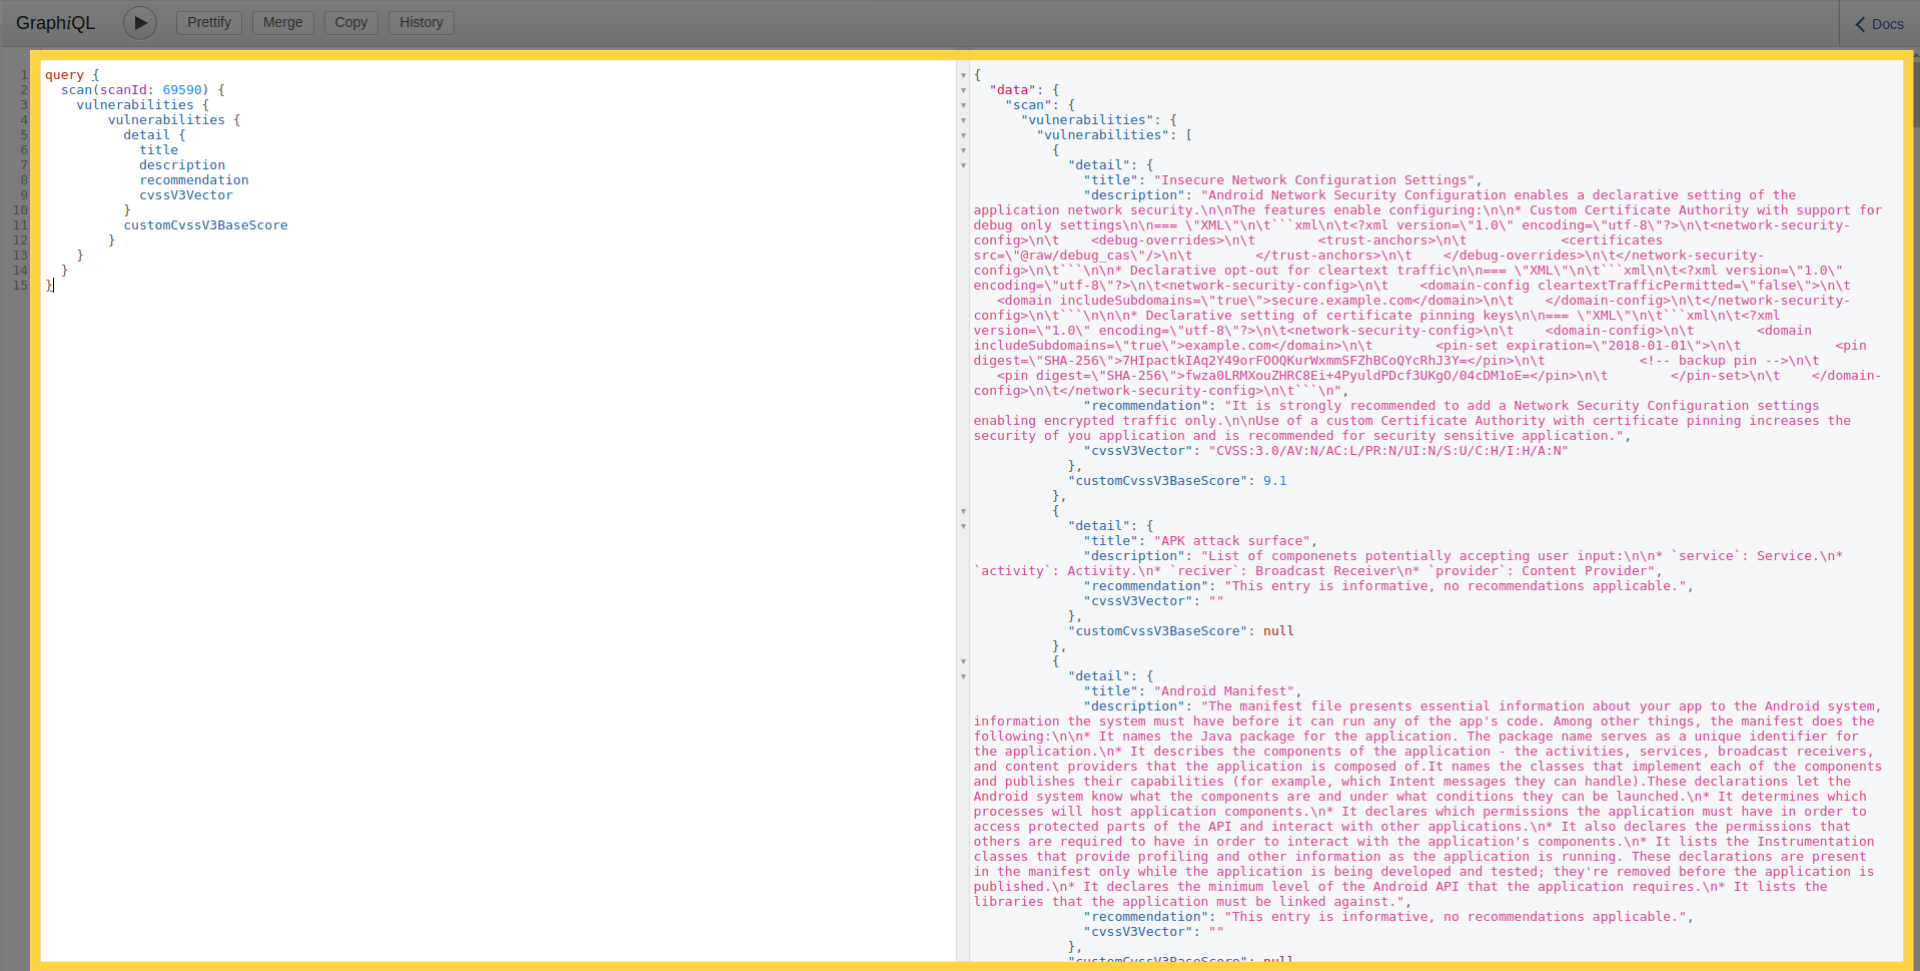
漏洞详细信息
此外,此查询还允许您检索扫描的漏洞列表及详细信息:
扫描进度
除此之外,若要确定扫描的当前进度阶段,您可以使用以下查询:
创建新扫描
要创建扫描,需将文件作为 multipart HTTP 请求进行上传。
mutation newMobileScan($title: String!, $assetType: String!, $application: Upload!, $scanProfile: String!) {
      createMobileScan(title: $title, assetType:$assetType, application: $application, scanProfile: $scanProfile) {
        scan {
            id
        }
      }
    }
使用身份验证创建新扫描
使用凭证创建扫描分两步完成。首先,将凭证添加到凭证存储中并返回凭证 ID,然后发送扫描创建请求,指定在该扫描中使用的凭证 ID。
例如,要创建一个简单的登录密码凭证。您可以使用以下内容:
mutation newTestCredential {
  createTestCredentials(testCredentials: {loginPassword: {login: "login1", password: "password1"}}) {
    testCredentials {
      __typename
      ... on LoginPasswordTestCredentials {
        id
      }
    }
  }
}
这将返回如下 ID:
{
  "data": {
    "createTestCredentials": {
      "testCredentials": {
        "__typename": "LoginPasswordTestCredentials",
        "id": "901"
      }
    }
  }
}
要传递凭证 ID,必须添加包含 ID 列表的 credentialIds 参数:
mutation newMobileScan($title: String!, $assetType: String!, $application: Upload!, $scanProfile: String!) {
  createMobileScan(title: $title, assetType: $assetType, application: $application, scanProfile: $scanProfile, credentialIds: [901]) {
    scan {
      id
    }
  }
}
发现的资产
您可以使用以下查询检索发现的资产列表(域名、移动应用程序、IP 等)。这允许探索由攻击面发现平台识别出的资产。该查询支持资产类型、所有权和相关节点深度等过滤器。
query NodesEdges($depth: Int, $limit: Int, $filterExcluded: Boolean, $assets: [NGAssetIdInputType], $ownerIds: [Int], $nodeKeys: [String], $nodeTypes: [String]) {
  nodesEdges(
    depth: $depth
    limit: $limit
    filterExcluded: $filterExcluded
    assets: $assets
    ownerIds: $ownerIds
    nodeKeys: $nodeKeys
    nodeTypes: $nodeTypes
  ) {
    nodes {
      type
      assetType
      assetId
      key
      ownershipType
      customColor
      attributes {
        name
        value
      }
    }
    edges {
      fromType
      fromKey
      toType
      toKey
      attributes {
        name
        value
      }
    }
  }
}
示例变量:
{
  "depth": 1,
  "limit": 10,
  "ownerIds": [],
  "nodeKeys": [],
  "nodeTypes": [
    "androidApp"
  ]
}
2. 脚本
如前所述,GraphiQL 并非访问 API 的唯一途径,您也可以通过脚本来使用它。其典型用途是围绕部署流水线的自动化,或自动化创建和监控大量扫描。对于身份验证过程,您有两个选项:基于 Token 的身份验证和 API Key 身份验证。
基于 Token 的身份验证
可以通过提交用户名和密码,从以下 URL https://api.ostorlab.co/apis/token 检索该 token。系统将创建一个与用户关联的 token。然后,在 Authorization 标头中将该 token 的值设置为 Token {value},以对后续发往 https://api.ostorlab.co/apis/graphql_token 的请求进行身份验证。
API Key 身份验证
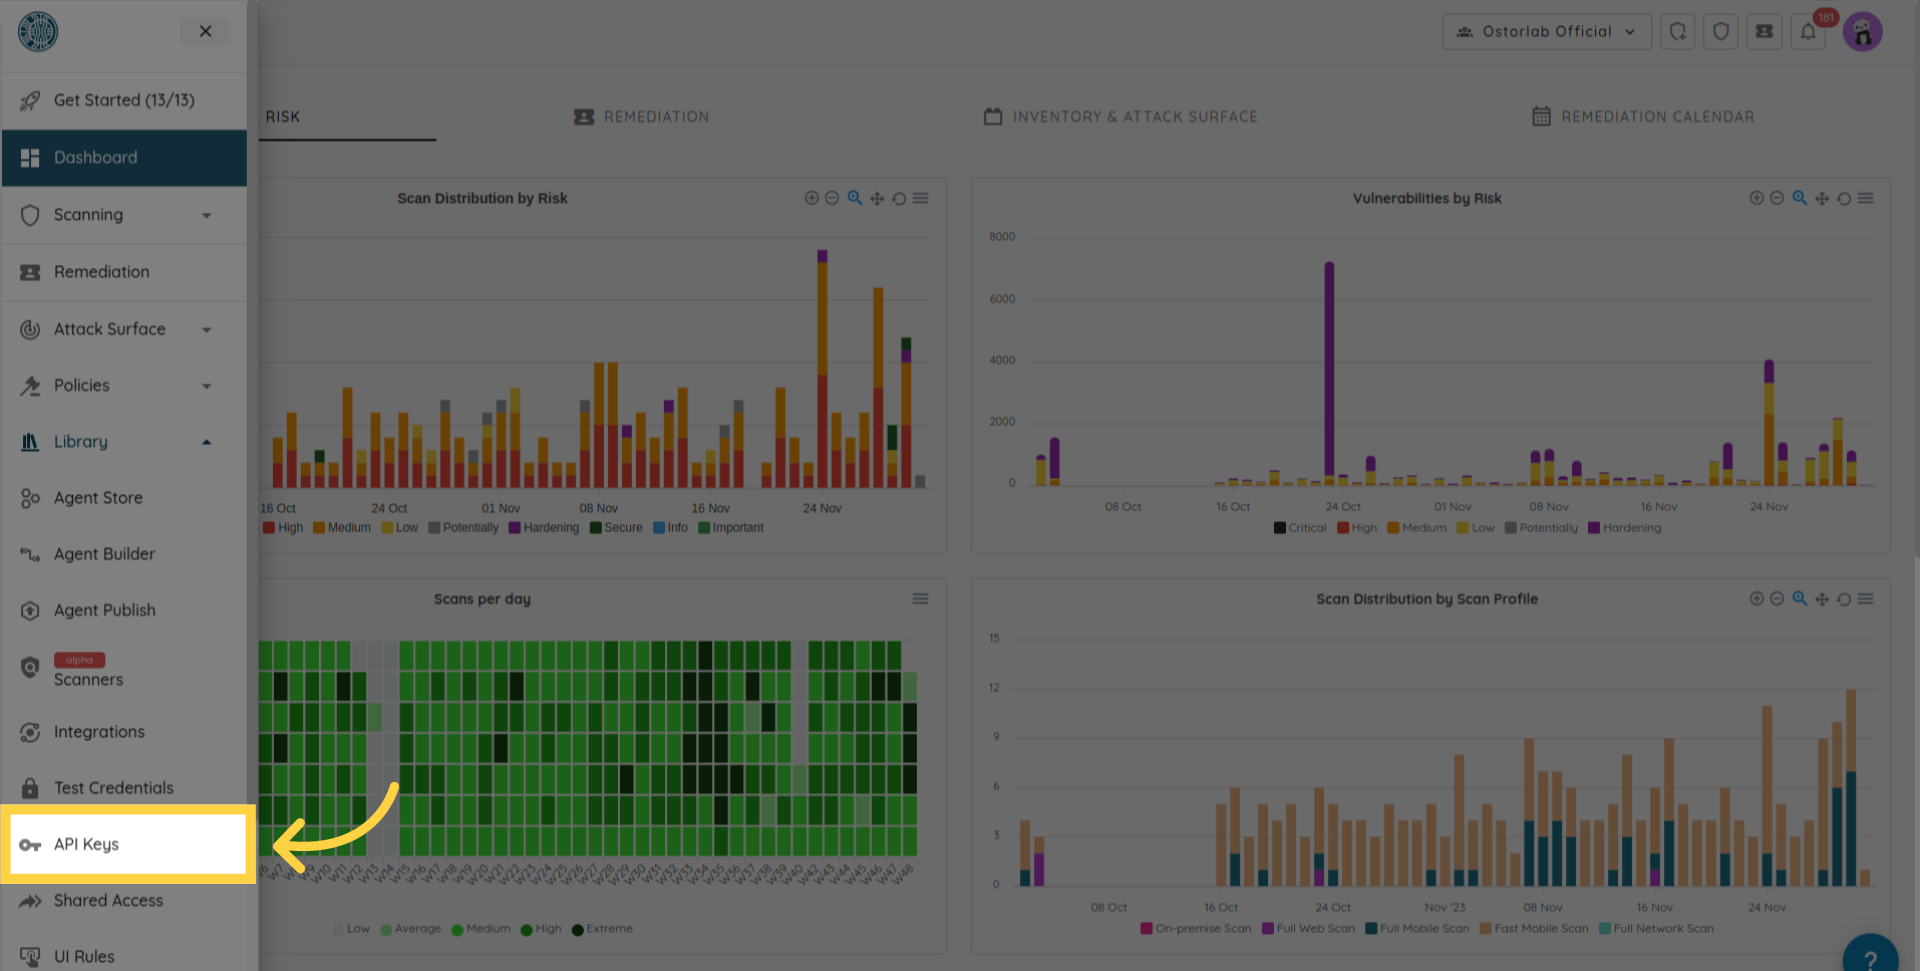
可从您的仪表板 https://report.ostorlab.co 检索 API Key。您需要点击 Integrations/API:

然后进入 API keys 菜单。
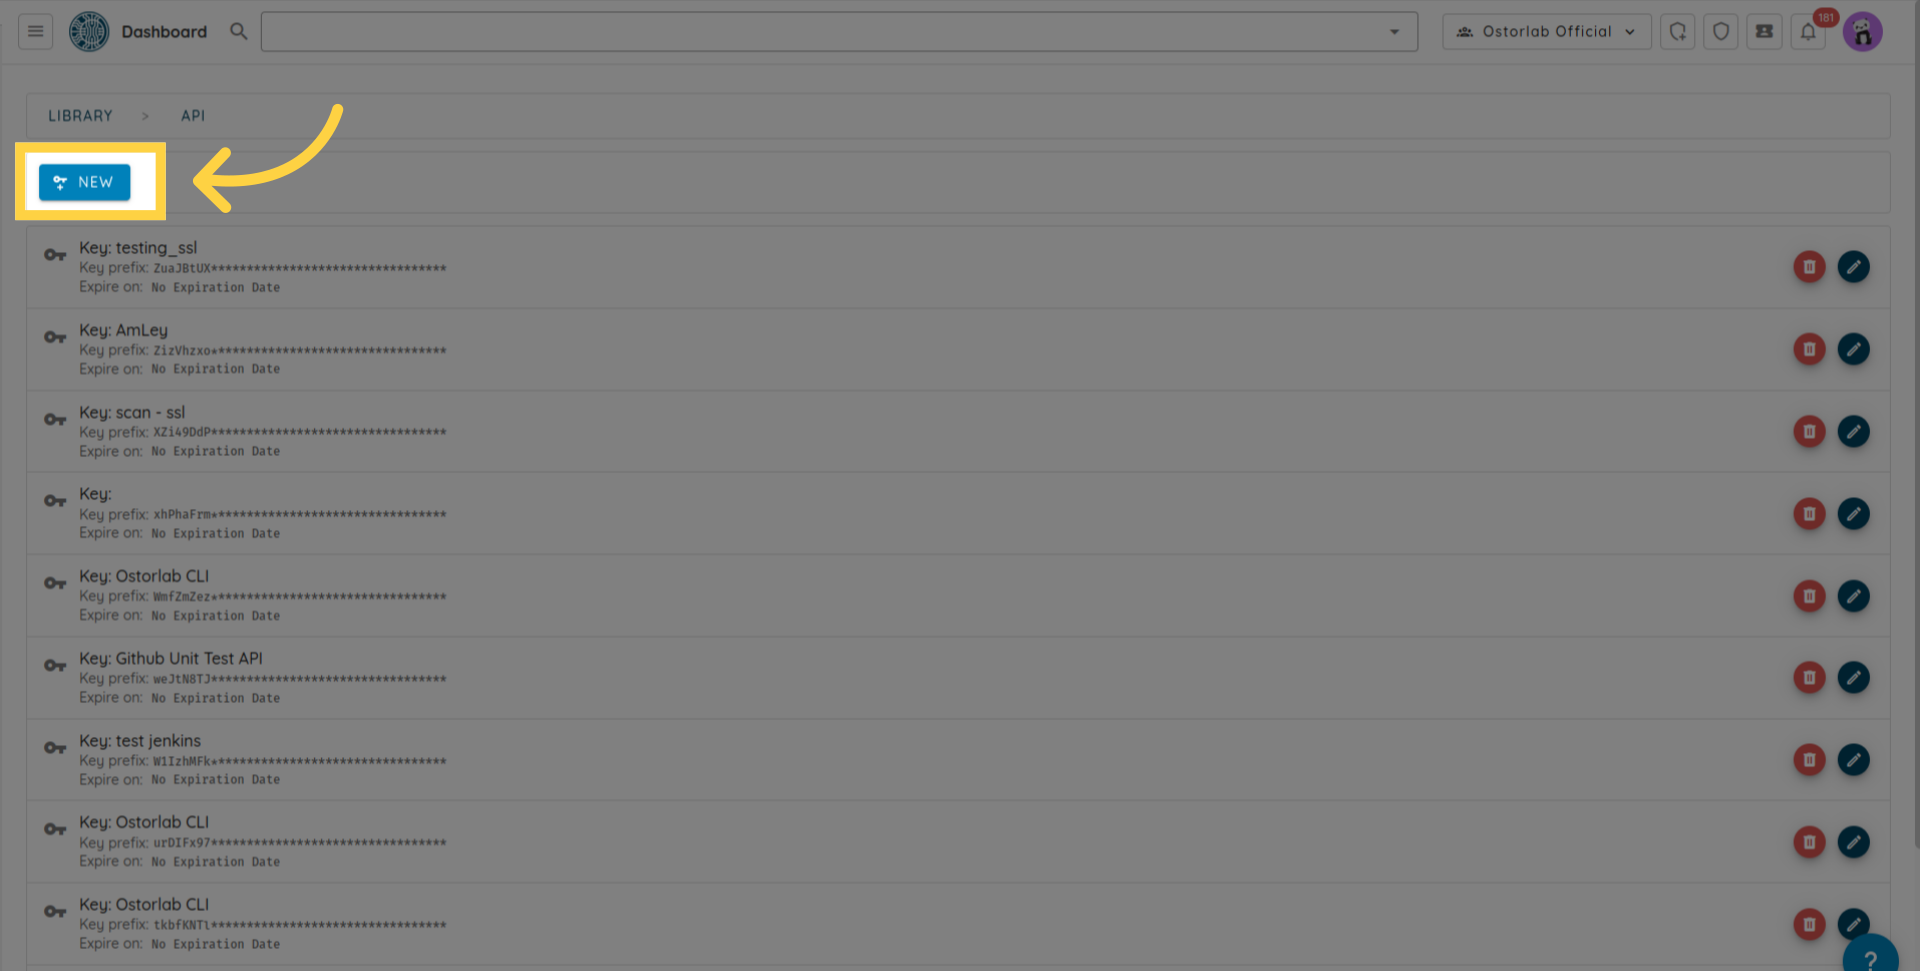
点击新按钮以生成一个新 key
然后复制 API Key(您可以为该 key 添加名称和过期日期),最后请不要忘记点击保存按钮来保存您的 key。
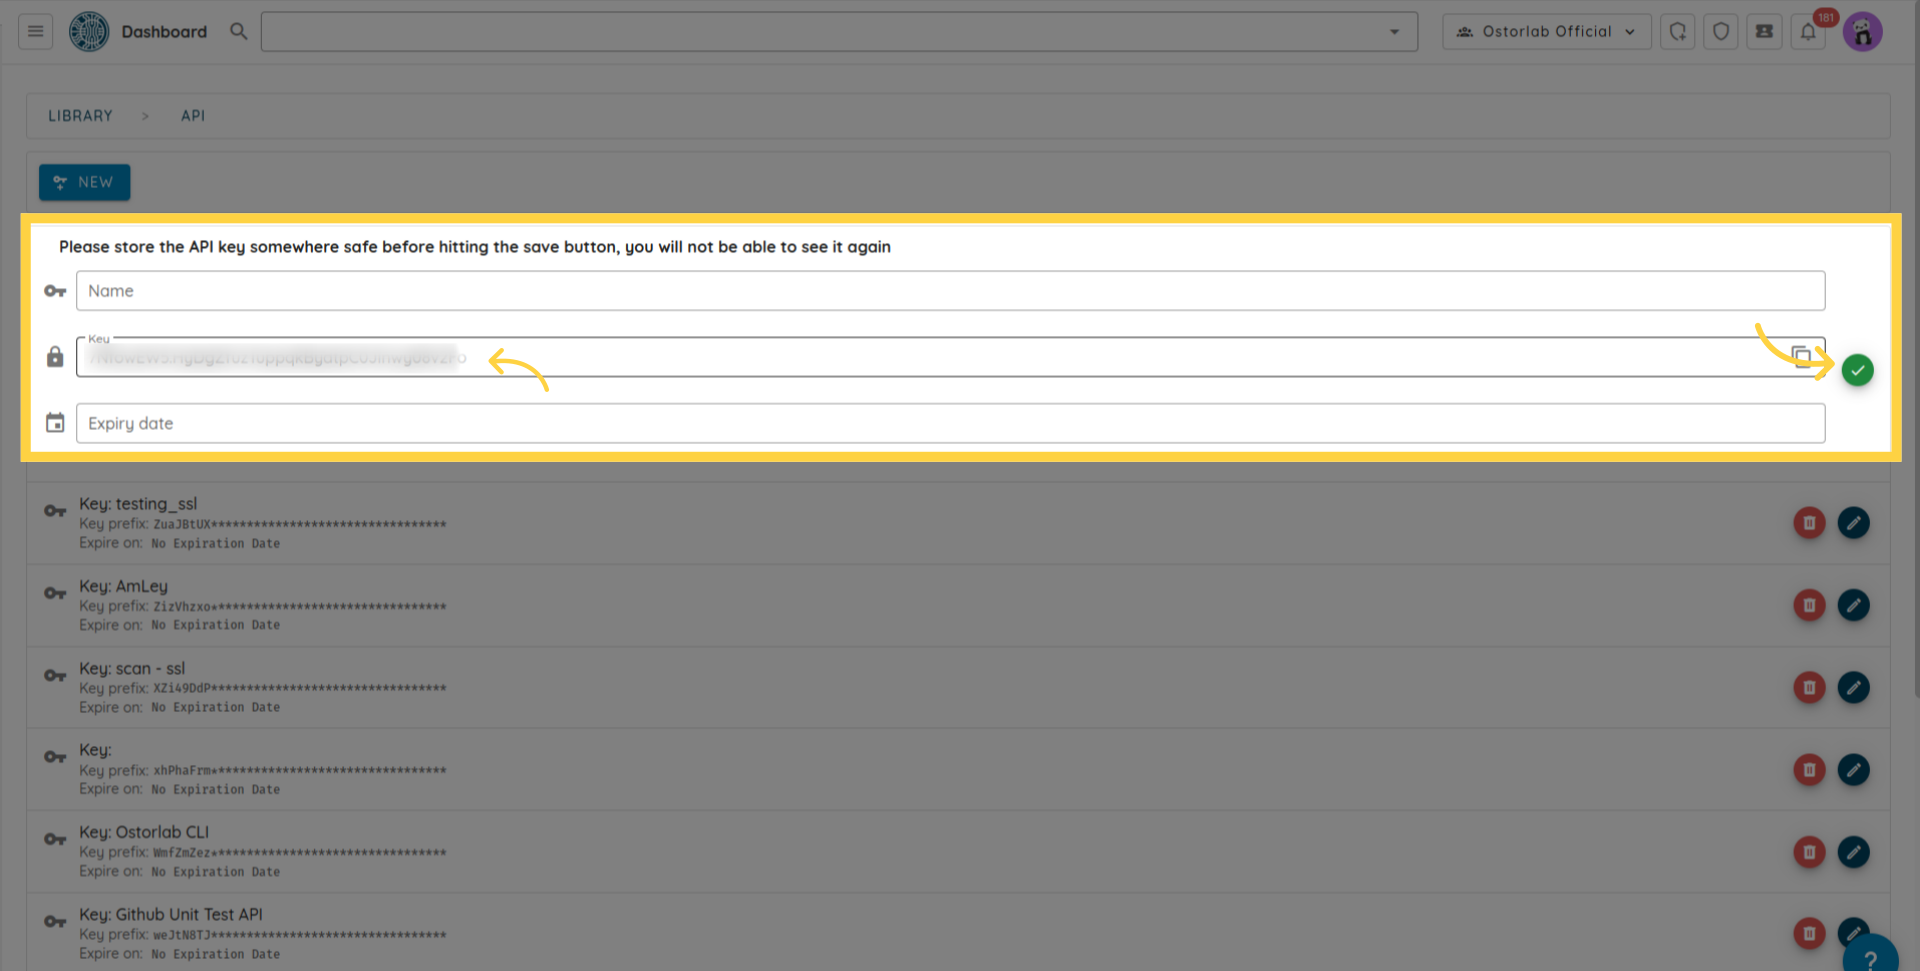
该 API Key 将用作标头键 X-Api-Key 的值,以对后续发往 https://api.ostorlab.co/apis/graphql_token 的请求进行身份验证。
创建扫描
import json
import requests

query = '''
mutation MobileScan($title: String!, $assetType: String!, $application: Upload!, $sboms: [Upload], $scanProfile: String!, $credentialIds: [Int]) {
  createMobileScan(title: $title, assetType: $assetType, application: $application, sboms: $sboms, scanProfile: $scanProfile, credentialIds: $credentialIds) {
    scan {
      id
    }
  }
}
'''

# 在 Authorization 标头中设置 API Key。
api_key = "XXXXXXXXXXX"
headers = {"X-Api-Key": f"{api_key}"}
# 变量
title = "scan_title"
asset_type = "android"
scan_profile = "Fast Scan"
data = {"operations": json.dumps({"query":query,"variables": {"title":title,"assetType":asset_type,"application": None,"scanProfile": scan_profile,},}), "map": json.dumps({"0": ["variables.application"]}),}
path_to_file = "my_full_path"
# 发送 post 查询请求。
with open(path_to_file, "rb") as f:
    request = requests.post(url='https://api.ostorlab.co/apis/graphql_token/',
                          data=data,
                          files={"0": f.read()},
                          headers=headers)
    print(request.json())
curl -v -X POST https://api.ostorlab.co/apis/graphql \
--header "X-Api-Key: $API_KEY" \
-F 'operations={"query": "mutation newMobileScan($title: String!, $assetType: String!, \
$application: Upload!, $scanProfile: String!) { createMobileScan(title: $title, assetType:$assetType, \
application: $application, scanProfile: $scanProfile) {scan {id }  }}", "variables": \
{"title": "test_title", "assetType": "android", "application": null, "scanProfile": "$SCAN_PROFILE"}}' \
-F 'map={"0": ["variables.application"]}' -F "0=@$PATH_APPLICATION"
提取扫描进度
import requests

query = '''
query {
  scans {
    scans {
      id
      title
      progress
    }
  }
}
'''

# 在 Authorization 标头中设置 API Key。
api_key = "XXXXXXXXXXX"
headers = {"X-Api-Key": f"{api_key}"}
# 发送 post 查询请求。
request = requests.post(url='https://api.ostorlab.co/apis/graphql_token/',
                      json={"query": query},
                      headers=headers)
print(request.json())
curl -v -X POST https://api.ostorlab.co/apis/graphql \
--header 'Content-Type: application/json' \
--header "X-Api-Key: $API_KEY" \
--data '{"query": "query {scans { scans { id title  progress }}}"}'
提取扫描工单 (tickets)
import requests

query = '''
query tickets($scanId: Int) {
    tickets(scanId: $scanId) {
    tickets{
      id
      withinSlo
      status
      priority
      }
    }
  }
'''

# 变量
scan_id = XXXXX
# 在 Authorization 标头中设置 API Key。
api_key = "XXXXXXXXXXX"
headers = {"X-Api-Key": f"{api_key}"}
# 发送 post 查询请求。
request = requests.post(url='https://api.ostorlab.co/apis/graphql_token/',
                      json={"query": query, "variables": {"scanId": scan_id}},
                      headers=headers)
print(request.json())
curl -v -X POST https://api.ostorlab.co/apis/graphql \
--header 'Content-Type: application/json' \
--header "X-Api-Key: $API_KEY" \
--data '{"query": "query tickets($scanId: Int) { tickets(scanId: $scanId) { tickets { id withinSlo status priority } } }", "variables": {"scanId": $SCAN_ID}}'
创建扫描 with SBOM
import json
import requests
import pathlib

query = '''
mutation MobileScan($title: String!, $assetType: String!, $application: Upload!, $sboms: [Upload], $scanProfile: String!) {
  createMobileScan(title: $title, assetType: $assetType, application: $application, sboms: $sboms, scanProfile: $scanProfile) {
    scan {
      id
    }
  }
}
'''

# 在 Authorization 标头中设置 API Key。
api_key = "XXXXXXXXXXX"
headers = {"X-Api-Key": f"{api_key}"}

# 变量
title = "scan_with_sbom"
asset_type = "android"
scan_profile = "Fast Scan"
path_to_apk = "your_apk.apk"
path_to_sboms = ["gradle.lockfile"]

# 数据
data = {
    "operations": json.dumps({
        "query": query,
        "variables": {
            "title": title,
            "assetType": asset_type,
            "application": None,
            "sboms": [None],  # 仅一项
            "scanProfile": scan_profile
        }
    }),
    "map": json.dumps({
        "0": ["variables.application"],
        "1": ["variables.sboms.0"]
    })
}

# 发送 post 查询请求
apk_content = pathlib.Path(path_to_apk).read_bytes()
sbom_content = pathlib.Path(path_to_sboms[0]).read_bytes()
response = requests.post(
    url='https://api.ostorlab.co/apis/graphql_token/',
    data=data,
    files={
        "0": apk_content,
        "1": sbom_content
    },
    headers=headers
)
print(response.json())
curl -v -X POST https://api.ostorlab.co/apis/graphql \
--header "X-Api-Key: $API_KEY" \
-F 'operations={"query": "mutation MobileScan($title: String!, $assetType: String!, $application: Upload!, $sboms: [Upload], $scanProfile: String!) { createMobileScan(title: $title, assetType: $assetType, application: $application, sboms: $sboms, scanProfile: $scanProfile) { scan { id } } }", "variables": {"title": "scan_with_sbom", "assetType": "android", "application": null, "sboms": [null], "scanProfile": "Fast Scan"}}' \
-F 'map={"0": ["variables.application"], "1": ["variables.sboms.0"]}' \
-F "0=@$PATH_APK" \
-F "1=@$PATH_SBOM"
创建扫描 with test credentials
创建测试凭证
创建简单的登录密码凭证示例:
import json
import requests

query = '''
    mutation CreateTestCredentials($credentials: TestCredentialsInput!) {
          createTestCredentials(testCredentials: $credentials) {
            testCredentials {
              ... on LoginPasswordTestCredentials {
                id
                credentialName
                login
                password
                type
                url
              }
            }
          }
        }
'''


# 在 Authorization 头中设置 API 密钥
api_key = "XXXXXXXXXX"
headers = {"X-Api-Key": f"{api_key}"}

# 变量
variables = {
    "credentials": {
        "credentialName": "login_creds",
        "loginPassword": {
            "login": "fake_login",
            "password": "fake_password",
            "url": "fake_url"
        },
    }
}

# 数据
data = {
    "query": query,
    "variables": variables
}

# 发送 post 查询请求
response = requests.post(
    url='https://api.ostorlab.co/apis/graphql_token/',
    json=data,
    headers=headers
)
print(response.json())
curl -X POST https://api.ostorlab.co/apis/graphql_token/ -H "X-Api-Key: $API_KEY" -H "Content-Type: application/json" -d '{
  "query": "mutation CreateTestCredentials($credentials: TestCredentialsInput!) { createTestCredentials(testCredentials: $credentials) { testCredentials { ... on LoginPasswordTestCredentials { id credentialName login password type url } } } }",
  "variables": {
    "credentials": {
      "credentialName": "login_creds",
      "loginPassword": {
        "login": "fake_login",
        "password": "fake_password",
        "url": "fake_url"
      }
    }
  }
}'
创建自定义测试凭证示例:
import json
import requests

query = '''
    mutation CreateTestCredentials($credentials: TestCredentialsInput!) {
      createTestCredentials(testCredentials: $credentials) {
        testCredentials {
          ... on CustomTestCredentials {
            id
            credentialName
            credentials {
              name
              value
            }
          }
        }
      }
    }
'''


# 在 Authorization 头中设置 API 密钥
api_key = "XXXXXXXXXXXXX"
headers = {"X-Api-Key": f"{api_key}"}

# 变量
variables = {
        "credentials": {
            "credentialName": "testCustomCredentials",
            "custom": {
                "credentials": [
                    {"name": "a", "value": "b"},
                    {"name": "a2", "value": "b2"},
                ],
            },
        }
    }

# 数据
data = {
    "query": query,
    "variables": variables
}

# 发送 post 查询请求
response = requests.post(
    url='https://api.ostorlab.co/apis/graphql_token/',
    json=data,
    headers=headers
)
print(response.json())
curl -X POST https://api.ostorlab.co/apis/graphql_token/ \
-H "X-Api-Key: $API_KEY" \
-H "Content-Type: application/json" \
-d '{
  "query": "mutation CreateTestCredentials($credentials: TestCredentialsInput!) { createTestCredentials(testCredentials: $credentials) { testCredentials { ... on CustomTestCredentials { id credentialName credentials { name value } } } } }",
  "variables": {
    "credentials": {
      "credentialName": "testCustomCredentials",
      "custom": {
        "credentials": [
          { "name": "a", "value": "b" },
          { "name": "a2", "value": "b2" }
        ]
      }
    }
  }
}'
查询测试凭证
import requests

query = '''
    query {
      testsCredentials(page: 1, numberElements: 10) {
        pageInfo {
          count
          numPages
        }
        testsCredentials {
          __typename
          ... on LoginPasswordTestCredentials {
            credentialName
            id
            login
            password
            role
            url
          }
          ... on CreditCardTestCredentials {
            id
            credentialName
            creditCardNumber
            expirationDate
            name
            cvv
          }
          ... on AddressTestCredentials {
            id
            credentialName
            addressLine
            city
            zipCode
            country
          }
          ... on EmailTestCredentials {
            id
            credentialName
            email
          }
          ... on PhoneNumberTestCredentials {
            id
            credentialName
            phoneNumber
          }
          ... on ScriptTestCredentials {
            id
            credentialName
            script
          }
          ... on TlsCertificateTestCredentials {
            id
            credentialName
            tlsCertificate
          }
          ... on CustomTestCredentials {
            id
            credentialName
            credentials {
              name
              value
            }
          }
          ... on TestHeaders {
            id
            credentialName
            testHeaders {
              name
              value
            }
          }
          ... on BasicTestCredentials {
            id
            credentialName
            login
            password
          }
        }
      }
    }
'''

# 在 Authorization 标头中设置 API Key。
api_key = "XXXXXXXXXXX"
headers = {"X-Api-Key": f"{api_key}"}

# 发送 post 查询请求
response = requests.post(
    url='https://api.ostorlab.co/apis/graphql_token/',
    json={"query": query},
    headers=headers
)
print(response.json())
curl -v -X POST https://api.ostorlab.co/apis/graphql \
--header 'Content-Type: application/json' \
--header "X-Api-Key: $API_KEY" \
--data '{"query": "query { testsCredentials(page: 1, numberElements: 10) { pageInfo { count numPages } testsCredentials { __typename ... on LoginPasswordTestCredentials { credentialName id login password role url } ... on CreditCardTestCredentials { id credentialName creditCardNumber expirationDate name cvv } ... on AddressTestCredentials { id credentialName addressLine city zipCode country } ... on EmailTestCredentials { id credentialName email } ... on PhoneNumberTestCredentials { id credentialName phoneNumber } ... on ScriptTestCredentials { id credentialName script } ... on TlsCertificateTestCredentials { id credentialName tlsCertificate } ... on CustomTestCredentials { id credentialName credentials { name value } } ... on TestHeaders { id credentialName testHeaders { name value } } ... on BasicTestCredentials { id credentialName login password } } } }"}'
Create a scan with test credentials
import json
import requests

query = '''
mutation MobileScan($title: String!, $assetType: String!, $application: Upload!, $scanProfile: String!, $credentialIds: [Int]) {
  createMobileScan(title: $title, assetType: $assetType, application: $application, scanProfile: $scanProfile, credentialIds: $credentialIds) {
    scan {
      id
    }
  }
}
'''

# 在 Authorization 标头中设置 API Key。
api_key = "XXXXXXXXXXX"
headers = {"X-Api-Key": f"{api_key}"}

# 变量
title = "scan_with_test_credentials"
asset_type = "android"
scan_profile = "Full Scan"
path_to_apk = "your_apk.apk"

# 在扫描中使用的凭证 ID,您可以从上一步创建测试凭证时获取该凭证 ID。
credential_ids = [123]

# 数据
data = {
    "operations": json.dumps({
        "query": query,
        "variables": {
            "title": title,
            "assetType": asset_type,
            "application": None,
            "scanProfile": scan_profile,
            "credentialIds": credential_ids
        }
    }),
    "map": json.dumps({
        "0": ["variables.application"]
    })
}

# 发送 post 查询请求
apk_content = pathlib.Path(path_to_apk).read_bytes()
response = requests.post(
    url='https://api.ostorlab.co/apis/graphql_token/',
    data=data,
    files={
        "0": apk_content
    },
    headers=headers
)
print(response.json())
curl -v -X POST https://api.ostorlab.co/apis/graphql \
--header "X-Api-Key: $API_KEY" \
-F 'operations={"query": "mutation MobileScan($title: String!, $assetType: String!, $application: Upload!, $scanProfile: String!, $credentialIds: [Int]) { createMobileScan(title: $title, assetType: $assetType, application: $application, scanProfile: $scanProfile, credentialIds: $credentialIds) { scan { id } } }", "variables": {"title": "scan_with_test_credentials", "assetType": "android", "application": null, "scanProfile": "Full Scan", "credentialIds": [123]}}' \
-F 'map={"0": ["variables.application"]}' \
-F "0=@$PATH_APK"
创建扫描 with on prem scanner
- 步骤 1:检索可用扫描器
在创建扫描之前,您首先需要确定扫描器 ID。您可以使用以下查询获取组织可用的扫描器列表:
import json
import requests

query_scanners = '''
query GetScanners {
  scanners {
    scanners {
      id
      uuid
      name
      description
    }
  }
}
'''

# 在 Authorization 标头中设置 API Key。
api_key = "XXXXXXXXXXX"
headers = {"X-Api-Key": f"{api_key}"}
path_to_file = "my_full_path"
data = {"operations": json.dumps({"query": query_scanners}) , "map": json.dumps({}),}
# 发送 post 查询请求。
with open(path_to_file, "rb") as f:
    request = requests.post(url='https://api.ostorlab.co/apis/graphql_token/',
                          data=data,
                          files={"0": f.read()},
                          headers=headers)
    print(request.json())
curl -v -X POST "https://api.ostorlab.co/apis/graphql_token/" \
  -H "X-Api-Key: $API_KEY" \
  -F 'operations={
    "query": "query GetScanners { scanners { scanners { id uuid name description } } }"
  }' \
  -F 'map={}' \
  -F "0=@$PATH_TO_FILE"
此请求将返回与您帐户关联的扫描器列表。请记下您在创建扫描时希望使用的扫描器 ID。
- 步骤 2:创建 Web 扫描
在确定正确的扫描器 ID 后,您可以通过提供扫描标题、目标 URL、扫描配置文件和扫描器 ID 来创建新的 Web 扫描。
import json
import requests

query = '''
mutation NewWebScan($title: String, $urls: [String]!, $scanProfile: String!,  $scannerId: Int,) {
  createWebScan(title: $title, urls: $urls, scanProfile: $scanProfile,  scannerId: $scannerId,) {
    scan {
      id
    }
  }
}
'''

# 在 Authorization 标头中设置 API Key。
api_key = "XXXXXXXXXXX"
headers = {"X-Api-Key": f"{api_key}"}
# 变量
title = "scan_title"
urls = ["example.com"] # List of urls to scan.
scan_profile = "Full Web Scan"
scanner_id = 000000 # Replace with your scanner id.
path_to_file = "my_full_path"

data = {"operations": json.dumps({"query":query, "variables": {"title": title, "urls": urls,
                           "scanProfile": scan_profile, "scannerId": scanner_id
                          }}) , "map": json.dumps({}),}
# 发送 post 查询请求。
with open(path_to_file, "rb") as f:
    request = requests.post(url='https://api.ostorlab.co/apis/graphql_token/',
                          data=data,
                          files={"0": f.read()},
                          headers=headers)
    print(request.json())
curl -v -X POST "https://api.ostorlab.co/apis/graphql_token/" \
  -H "X-Api-Key: $API_KEY" \
  -F 'operations={
    "query": "mutation NewWebScan($title: String, $urls: [String]!, $scanProfile: String!, $scannerId: Int) { createWebScan(title: $title, urls: $urls, scanProfile: $scanProfile, scannerId: $scannerId) { scan { id } } }",
    "variables": {
      "title": "scan_title",
      "urls": ["example.com"],
      "scanProfile": "Full Web Scan",
      "scannerId": 000000
    }
  }' \
  -F 'map={}' \
  -F "0=@$PATH_TO_FILE"
下载 PDF
要下载 PDF 报告,您需要遵循以下 3 个步骤:
1- 触发 PDF Job 创建。此步骤需要提供扫描 ID 并返回 Job Id。
2- 检查 Job 状态,并等待其状态变为 "SUCCESS"。
3- 使用 Job Id 下载 PDF。
import json
import requests
import time
import sys

API_KEY = "XXXXXXXXXXX" # 替换为有效的 API Key。
API_URL = 'https://api.ostorlab.co/apis/graphql_token/'
HEADERS = {"X-Api-Key": API_KEY}
PDF_OUTPUT_PATH = '/tmp/f123.pdf'
Time_SLEEP = 10

def generate_pdf_job(scan_id):
    """启动 PDF 生成并返回 Job ID"""
    query = '''
    mutation generatePdf($scanId: Int!, $riskRatings: [RiskRating]!, $statuses: [TicketStatusEnum]!, $pdfReportTemplate: PDFReportTemplate!, $standards: [ScanCategoryGroupEnum]) {
        generatePdf(scanId: $scanId, riskRatings: $riskRatings, statuses: $statuses, pdfReportTemplate: $pdfReportTemplate, standards: $standards) {
          job {
            id
            status
          }
        }
    }
    '''

    variables = {
        "scanId": scan_id,
        "riskRatings": ["CRITICAL", "HIGH", "MEDIUM", "LOW", "POTENTIALLY", "HARDENING"],
        "statuses": ["OPEN", "REOPEN"],
        "standards": [],
        "pdfReportTemplate": "full_report"
    }

    response = requests.post(API_URL, json={"query": query, "variables": variables}, headers=HEADERS)
    response_data = response.json()

    if 'errors' in response_data:
        print("PDF 生成期间出错:", response_data, file=sys.stderr)
        sys.exit(1)

    return response_data['data']['generatePdf']['job']['id']

def wait_for_job_completion(job_id):
    """等待 job 完成"""
    query = """
    query job($jobId: String!) {
        job(jobId: $jobId) {
            id
            status
        }
    }
    """

    while True:
        response = requests.post(API_URL, json={"query": query, "variables": {"jobId": job_id}}, headers=HEADERS)
        status = response.json()['data']['job']['status']

        if status == 'SUCCESS':
            break
        time.sleep(Time_SLEEP)

def download_pdf(job_id, output_path=PDF_OUTPUT_PATH):
    """下载生成的 PDF"""
    response = requests.get(f'https://api.ostorlab.co/apis/job/result/{job_id}/', headers=HEADERS)
    with open(output_path, 'wb') as f:
        f.write(response.content)

def main(scan_id, output_path=PDF_OUTPUT_PATH):
    """用于生成和下载 PDF 的主函数"""
    try:
        print("正在启动 PDF 生成...")
        job_id = generate_pdf_job(scan_id)
        print(f"已创建 Job,ID 为:{job_id}")

        print("正在等待 job 完成...")
        wait_for_job_completion(job_id)

        print("正在下载 PDF...")
        download_pdf(job_id, output_path)
        print(f"PDF 已成功下载至:{output_path}")
    except Exception as e:
        print(f"发生错误:{str(e)}", file=sys.stderr)
        sys.exit(1)

scan_id = XXXXXXXXXXX # 替换为扫描 ID。
main(scan_id)
curl -X POST https://api.ostorlab.co/apis/graphql_token/ -H "X-Api-Key: $API_KEY" -H "Content-Type: application/json" -d '{
  "query": "mutation generatePdf($scanId: Int!, $riskRatings: [RiskRating]!, $statuses: [TicketStatusEnum]!, $pdfReportTemplate: PDFReportTemplate!, $standards: [ScanCategoryGroupEnum]) { generatePdf(scanId: $scanId, riskRatings: $riskRatings, statuses: $statuses, pdfReportTemplate: $pdfReportTemplate, standards: $standards) { job { id status } } }",
  "variables": {
    "scanId": $SCAN_ID,
    "riskRatings": ["CRITICAL", "HIGH", "MEDIUM", "LOW", "POTENTIALLY", "HARDENING"],
    "statuses": ["OPEN", "REOPEN"],
    "standards": [],
    "pdfReportTemplate": "full_report"
  }
}'
提取 Job ID 状态并使用以下查询提取 job 状态(其中 XXXXXXX 是 job id):
``` shell
curl -v -X POST https://api.ostorlab.co/apis/graphql \
--header 'Content-Type: application/json' \
--header "X-Api-Key: $API_KEY" \
--data '{"query": "query { job(jobId: XXXXXXX) { id status } }"}'
```
一旦状态变为 SUCCESS,您就可以运行以下查询来下载 PDF:
``` shell
curl --header "X-Api-Key: $API_KEY" "https://api.ostorlab.co/apis/job/result/<job_id>/" -o <output_path>
```
总而言之,本指南详细介绍了 Ostorlab API。我们探索了使用该 API 的各种方法,包括 GraphiQL Web 应用程序和脚本。此外,我们还提供了一组常见查询以供参考。